Showing posts with label pattern papers. Show all posts

Friday, 3 December 2021

Holiday season

Hello to all!

Happy December!

I am inspired by a very talented Designer Jodi Collins and CASEing her card. And it was the layout of the card that really appealed to me!

Here is my interpretation of this. Instead, of stamped flowers, I used a Nutcracker with Christmas trees. And I have opted for the traditional colors for my Christmas Holiday card.


I really enjoyed coloring this cute guy, perfect for coloring with so much space.


The winter Christmas tree are from white sheet and I watercolored them using ZIG.


On a red strip, I stamped the sentiment and heat embossed it.


I have kept the design simple and added striped pattern paper to both sides of the centre panel.
I adhered to the focal panel with falling snow PP in a pastel brown color. Then placed my Nutcracker image with decorative trees.


I dazzled it with some rhinestones. Hope you enjoyed it.
Thanks for joining me today!
Happy crafting!

Supply List
Cardstocks: Whisper White CS, Textured white CS, Deep red textured CS
Pattern Paper: Let's bokeh in the snow from Lawn Fawn 6" by 6"
Stamp: Nutcracker Kisses from Winni & Walter
Dies: Winter Trees and Stitched scalloped Frames from Crafters Corner; Stitched squared from Itsy Bitsy
Embossing Powder: Opaque Bright white from WOW
ZIG watercolor brushes
Crystal rhinestones from Itsy Bitsy

Would love to participate in these fun challenges:
 

Sunday, 31 October 2021

Christmas Tea!

Hello everyone!

Happy Monday!

What could be cosier than a warm and festive cuppa?

I just love the design of this fancy teacup die with so many little details from Trinity Stamps!

I started by blending my background at the top and bottom using DI.

I die cut the two sets of cups in the traditional Christmas red and green colours. I love these striped PP in festive colours.


Then I dry embossed the shape of teacups on a piece of white CS and fussy cut it. Adhered these pieces to the embossed cups.

I added some crystal drops as snowfall over the top to make them nice and shiny.

I stamped some flurry of snowflakes around the cups and added the sentiment.

How fun this set be to make invitations and favours for a Christmas Tea!

Happy crafting!

Supply List

Trinity Stamps Product: Teacup die

Other products: 

Cardstocks: Whisper White CS, Bright red and green CS

Pattern Paper from Lawn Fawn

Stamps: Snowflakes from Inkadinkadoo Stamp set; sentiment is from W&W Snowy Holiday stamp set

Distress Inks: candied apple, 

Archival Ink: Jet Black

Nuvo Crystal Drops: white bizzard

Friday, 24 September 2021

Follow Your Dreams!

 Hello!

Happy Friday!

This is my new card featuring Follow your dreams stamp for the theme  "Back to School ". My DT Post for Cut It Up Challenges once again!


I started by stamping the signboard saying in Archival ink on a white stitched panel and watercolored it.


Then added a boy and school sticker to that panel and created a grass ground, Added more layers using some PP. And matted on a black card base.


Hope you like it!

Happy crafting!

Supply List
Cardstocks: black and whisper white CS
Pattern Paper: The Edumacation stack DCWV from Itsy Bitsy
Stamp: Follow Your Dreams signboard from D.R.S. Designs
Dies: Stitched rectangles from Itsy Bitsy; On the edge Shapeabilities from Spellbinder
Sticker: Foil School Days from Itsy Bitsy
Archival Ink: Fern Green
ZIG watercolor brushes

Would love to join these fun challenges:


Friday, 27 August 2021

Jungle Party!

 Hello everyone!

Happy Friday!

Today's card is my take on the sketch challenge as the theme at Cut It Up Challenges to use any favourite sketch! It's a Jungle Birthday party card with animal friends.


Here is the sketch!

I stamped the various cute animal faces on a watercoloured cardstock and coloured them with my ZIG brushes, fussy cut them all. 


Then on a white panel, I used a leafy stencil and applied DI.


Die-cut a stitched scallop border from a PP, grass border, some balloons and coloured them. Die-cut number 3 and Party text from the snippet of a black CS.


And finally arranged the whole celebration party animals with dimension.


Have fun with these cute animals. Hope you like it!
Happy crafting!

Supply List
Cardstocks: Whisper White CS, Dark green CS, black CS, watercolored sheet
Pattern Paper: Animal Crackers paper pad from DCWV
Stamps: Poppin' over stamp set from Create a Smile 
Stencil: Leaf from Tubby craft
Dies: Stitched scallop edges from Die-namics; Let's Party from Sizzix Sizzlits; Balloons from Joy Crafts; Grass border from IO dies, Number set small from Kaisercraft
Distress inks: Cracked Pistachio, candied apple, carved pumpkin, wilted violet 
Archival ink: jet Black
ZIG watercolour brushes
white gel pen

Would love to join these fun challenges:
http://cardztv.blogspot.com/2021/08/cardz-tv-anything-goes-challenge-148.html


Wednesday, 11 August 2021

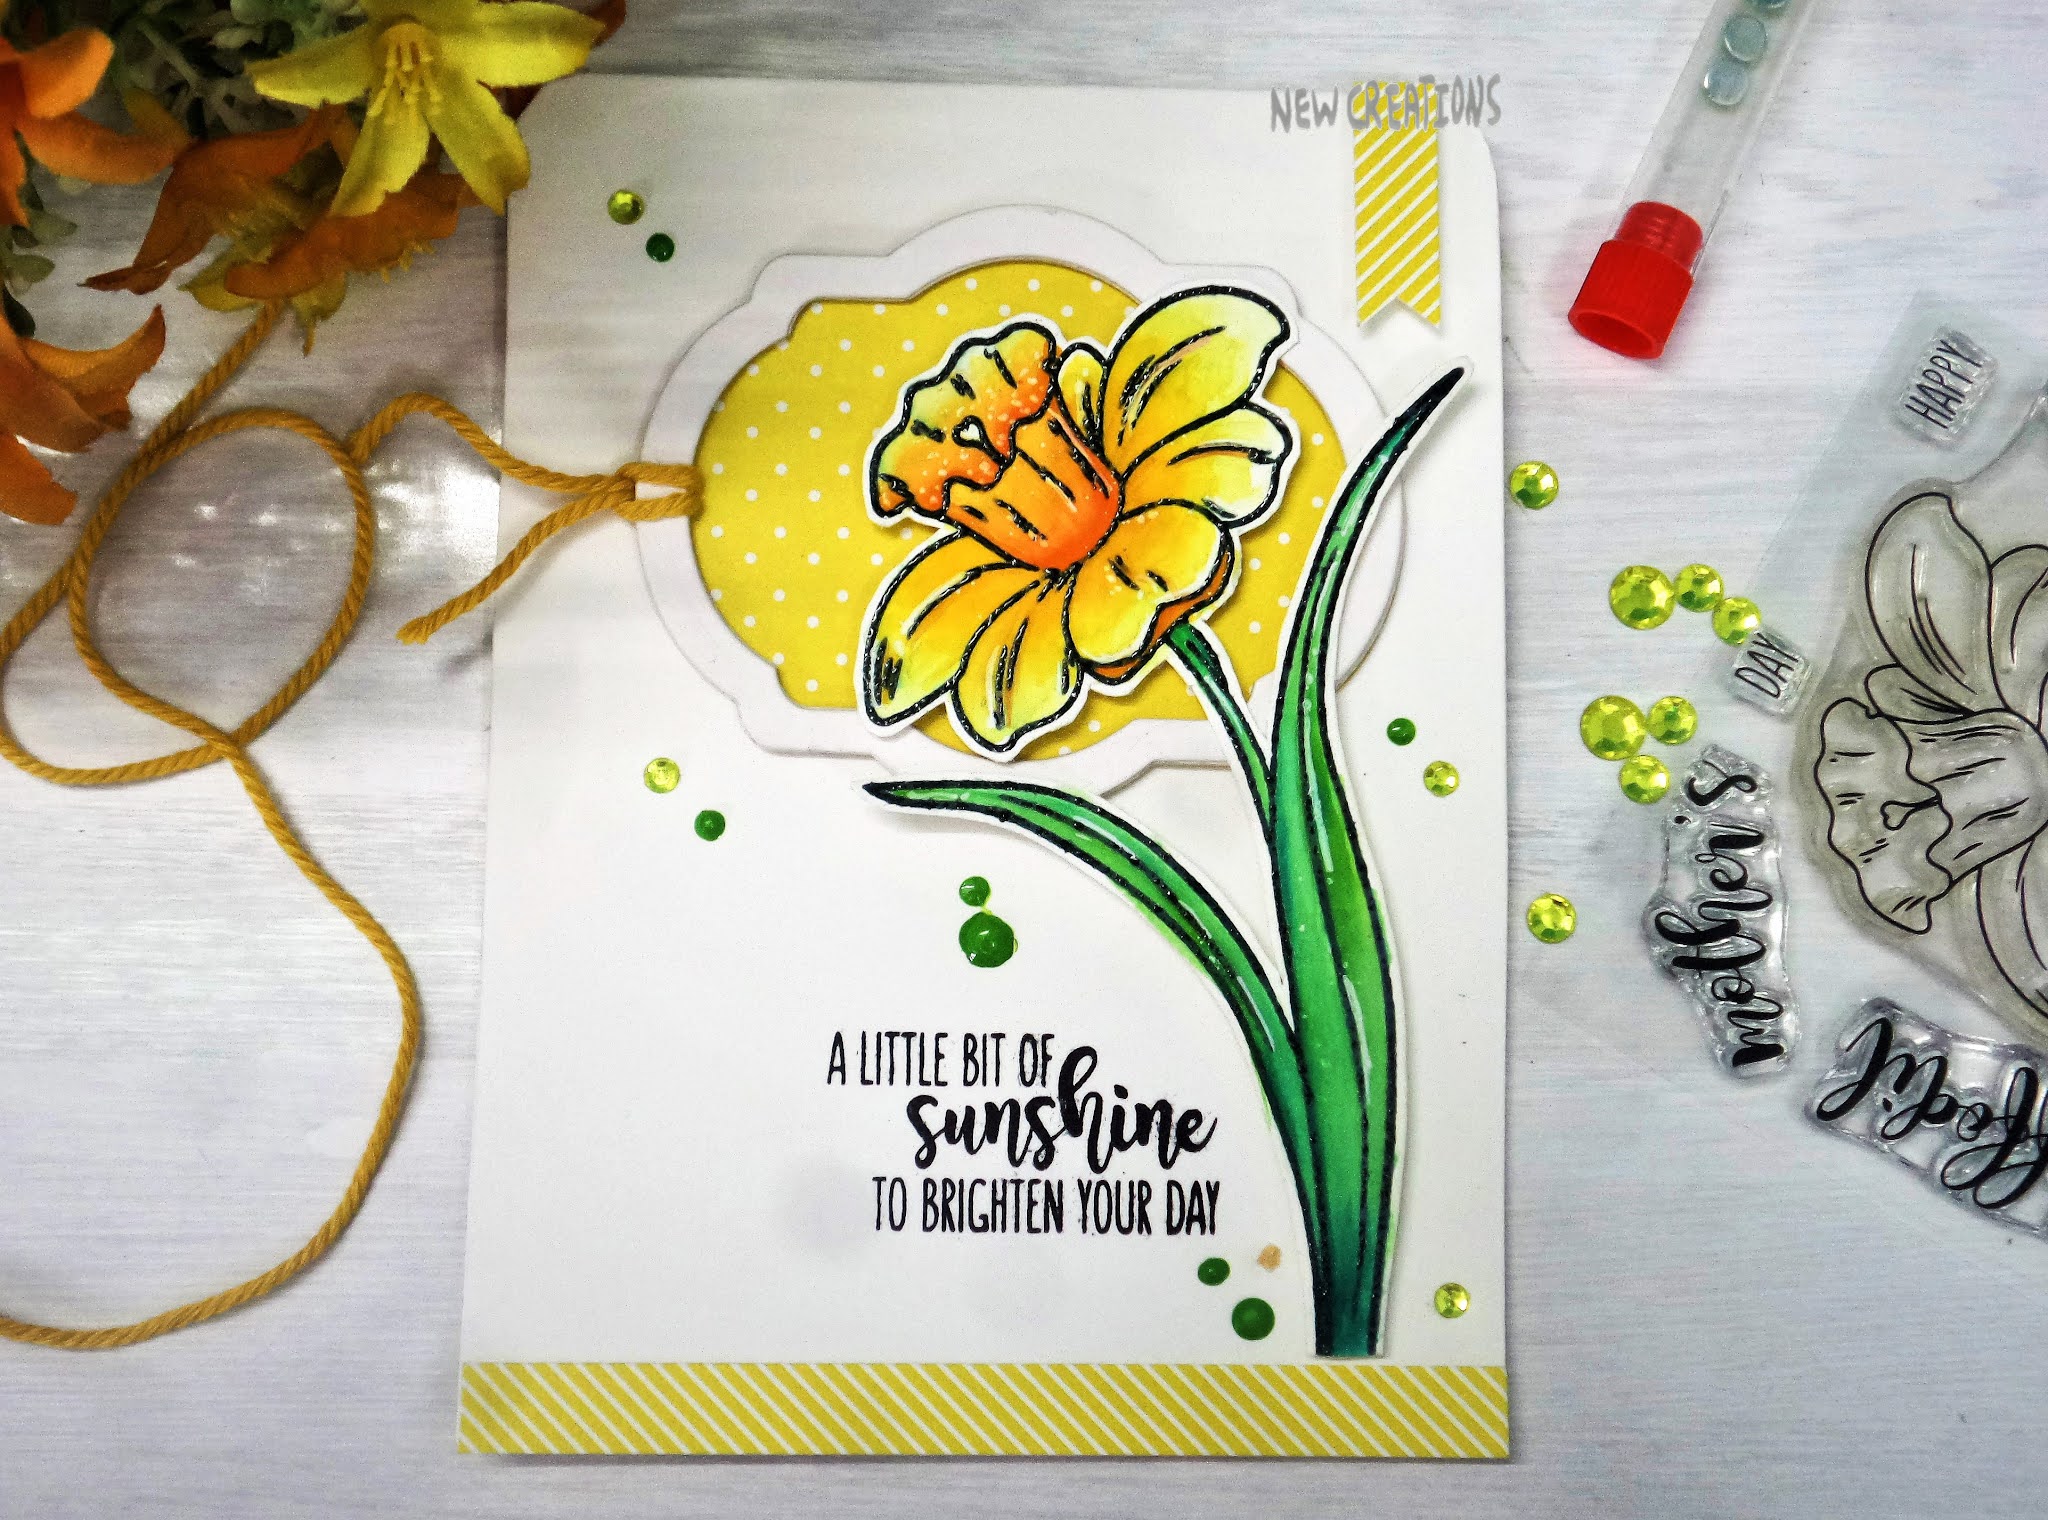
Watercolored Daffodil to Brighten your day!

Hello everyone! Happy Wednesday! 

Happy Hariyali Teej Festival in India to all the fabulous ladies out there.

In love with Uniko floral stamps, so I am in again! And inspired by today festive celebration to brighten up someone day!


Stamped the daffodil, watercoloured it with my ZIG brushes and accented it with my white gel pen. Fussy cut it. I love colouring this beautiful and spacious floral image.


A  close up look at my flower. After stamping the flower in black archival ink I applied Clear Glossy EP quickly before colouring and heat embossed it, love the shine.


Grab the Fancy Labels 2 and die cut 3 times from the snippets of white CS. Die-cut a fancy label out of a snippet of dotted PP. Stacked my frames.


The dotted label is added behind the stacked frame with dimension. And tied a yellow twine to it. Text is from the same stamp set.


The bottom stripe paper is from Papericious and has a small banner tag in the upper corner too.
Finished it off along with enamel dots and some blings.
Hope you like it!

Happy crafting!

Supply list

Cardstock: whisper white CS

PP: Pretty Basics from Papericious

Stamp: Spring Botanicals Daffodil from Uniko stamps 

Dies: Fancy Labels 2 from Inspired by Stamping

Embossing Powder: clear gloss from Wow

Enamel Accents: Electric Lime from Rangers

Blings: a set of 5 from Little Birdie

Twine: chrome yellow

Would love to join these fun challenges:

http://sirstampalotchallenge.blogspot.com/2021/08/august-any-celebration.html

https://unikostudio.blogspot.com/2021/07/uniko-challenge-66-flowers-optional.html


Wednesday, 12 August 2020

Sending Birthday Wishes

Hello, everyone!
Happy Thursday!

In love with these pretty array blooms, so delicate and fancy and I think the best way to showcasing them layering with striped and polka dots paper!


I used a stitched rectangle die for a striped PP. 
Then die cut these array blooms 2 times from black scrap sheet and 4 times out of a white scrap sheet.
Now it was delighted to color the internal die-cut pieces with my distress markers. Colored directly and blending them with a little water brush pen and adhered those pieces on one another and adjusted the pattern according to my requirement.
Then I die cut a double stitched circle from the centre out of my striped panel.
I added a dotted green PP on my white card base. Stamped the sentiment using my Misti. 


Now adhered that striped panel using foam tape.
 Arranged the floral array at the top of the circle corner with dimension.


Accented with few sequins, half pearls and shimmer in the centre of the flowers.

Thanks for stopping by!
Happy crafting!

Supply List
Cardstocks: Whisper white and black CS
Pattern Papers: Monochrome from Papericious and Dotted sheet from my stash
Dies: Adorable Array from Paper Smooches; double-stitched  rectangles and circles from Peekaboo designs
Stamp: Sentiment is from We adore you stamp set Paper Smooches
Dye ink: Black licorice from Lawn fawn
Distress Markers: Picked raspberry, mowed lawn
Nuvo Crystal Drops: white Bizzard
Misti
Foam tape, the small green half pearl and sequins from my stash

Would love to support these challenges:
http://timeoutchallenges.blogspot.com/2020/08/challenge-168.html- I am inspired by the pink flowers, stripes on the flip flop, luscious greenery


Thursday, 25 June 2020

There is wind beneath my wings...

Hello friends!
Happy Friday!

A card made for the colour challenge at Cut It Up Challenges using pink, coral, yellow, blue, green....... made me think of a summery scene!


Started with stamping the silhouette image in coral colour on a graph pp which is perfect for this cute image. I used my Misti especially helpful for exact placement of the image with good ink coverage on this PP.
The wild grass is created using ZIG watercolour brushes. The tiny flowers growing in the grass in pink using the same stamp, a part of it. The sentiment is from another stamp set with flutters by. They just really seemed to go perfectly with the sentiment.
Now die cut some clouds out of this main graph panel. I hand cut the kite base and then used dotted pp in blue tones and accented those pieces to the kite with bows.  I thought it would be fun to use in this cute little scene. Added a string to the kite.


Before adhering this main panel to my white card base I added pink dotted pp to the negative space of the clouds for more interest and textures using foam tape. Finished it off by adding few sequins.
Hoping you enjoyed this fun-filled card!
I hope your day is a good one!

Supply list
Cardstock: Snippets of Whisper White CS
Pattern Papers: Snippets of Kraft in colour ( graph print from Doodlebug designs; blue dotted papers from Pretty basics papericious brand; Pink dotted paper from Bo Bunny Bold & Bright
Stamps: Fun friends from Impression Obsession; Sentiment is from Life is sweet Mudra Brand
Die: Kite and clouds from Paper Smooches
Altenew inks: Paper bag, coralberry, warm sunshine, cotton candy, forest glades
ZIG real brushes, greens and orange

Would love to join these fun challenges:


Wednesday, 29 August 2018

Cute as a button Baby Layout!

Hi everyone!

I 'm back to share with you my baby layout for DCAM blog inspiration. A soft, delicate, little vintage page in light pink and blue shades, made with lots of collectables, chipboard elements,  fussy cut flowers, shaker element, stamping and dies.


I think you can imagine how excited I'm, presenting my first scrapbooking baby layout!
I fell in love with Bundle of Joy collection critter sheet! I love the cute baby images, baby related elements, glossy print, colors, the flowers:D


God's most beautiful thoughts bloom into children! Babies are always such a miracle that brought joy to our lives with such a little body........My sweet baby layout symbolizes the word Yesterday as the past memories of the times gone by...... every dream come true with all happiness, love, affection, made our life complete! For this layout, I choose a sweet baby pic with the vintage feel on it!

The cute baby images inspired me to try something different this time! I fussy cut every little piece of this critter sheet with all tiny details. I wanted to create a composition of flowers around the baby image and all cute little elements to showcase as well, so created this little scene!
I also added a strip of a corrugated off-white sheet and added strips of pattern papers too, inked all of the pink scrap paper edges with distress ink, with the scissors I slightly distressed the edges too and curled them for more texture and dimension. Love the effect and textures which are giving perfect volume to this beautiful LO!
I matted my baby photo onto a pink sheet and also used a chipboard frame, heat embossed it. I also used some die cut leaves, fussy cut watercolour floral critter sheet to add underneath my photo.
I did some stamping too around my striped paper with some double stitched lines.


For the duo leaves, I used an ink smooshed technique using distress ink and die cut them. Made a cute shaker too with scallop circle dies filled with confetti Sprinklers in Multicolor with a baby bib! Die cut stitched tags also from some patterned papers along with a sentiment banner from the same critter sheet and ties up with a pink twine.

Here are some close-ups:


Then I started to create my layers on the page with lots of flowers and leaves, clouds, rainbows and all the tiny elements I added on scalloped circles with dimension.

I heat embossed one of the clouds using embossing powder for more dimension and realistic look.


The black banner sentiments are from the same critter sheet and giving depth to the image. Added a text chipboard sentiment Dream and heat embossed in pink glitter for textures.
I like the final result and Hoping you also enjoyed too!


To finish it off I added some of the embellishments from my collection to decorate my layout, like a pom-pom frilled lace, crochet flowers, luxury button, prima flowers, a cute dragonfly and few hearts!
This has been a fun collection to work with!

Happy crafting!

Supply list:

Cardstock: Soft pink sheet; texture pink sheet
Cardboard: Kraft 800 gsm
Corrugated sheet: off-white from Itsy Bitsy
 Foam sheet: White
Acetate sheet: Itsy Bitsy
Pattern Papers: Easter time stripe/ Blue from pebbles inc; Precious Petals from Frances Mayer Inc; Love You Madly Bits & Pieces from Glitz Design
Critter sheets: Bundle of Joy Collection and watercolored Florals from DCAM
Dies: Stitched Scallop circles, Stitched Tag 2, Leaves duo from DCAM
Stamp: Stitches from Bo Bunny
Archival Ink: Jet Black
Distress ink: Picked raspberry, apple red
Clear Embossing Ink: Versamark
Embossing Glitter Powders: Sparkling Snow and Magenta Twinkle from Wow
Chippies: Dream sentiment from Studio Calico
Luxury button: CRAFT sensations
 Flowers: Strawberry Kisses set from Prima
Confetti Sprinklers: Multicolor from DCAM store
Baby steps printed cardboard stickers: Hearts, clouds, rainbow, tiny flower from my stash
Crochet flowers, dragonfly, pom-pom frilled lace in white and pink-silver twine: from my stash
Double sided foam tape,  fabric glue, craft glue
Big Shot