Showing posts with label Layering. Show all posts

Thursday, 12 January 2023

Collect beautiful moments- Double page art journal spread!

Hello everyone!

Happy Friday!

An art journal spread in pink with a shabby chic style, is not my cup of tea but I tried!! 

Hope you all like this!

Happy dance here:

https://butterflyspotchallenge.blogspot.com/2023/01/winners-176.html

I paired the abstract beauty girl with the pink theme.


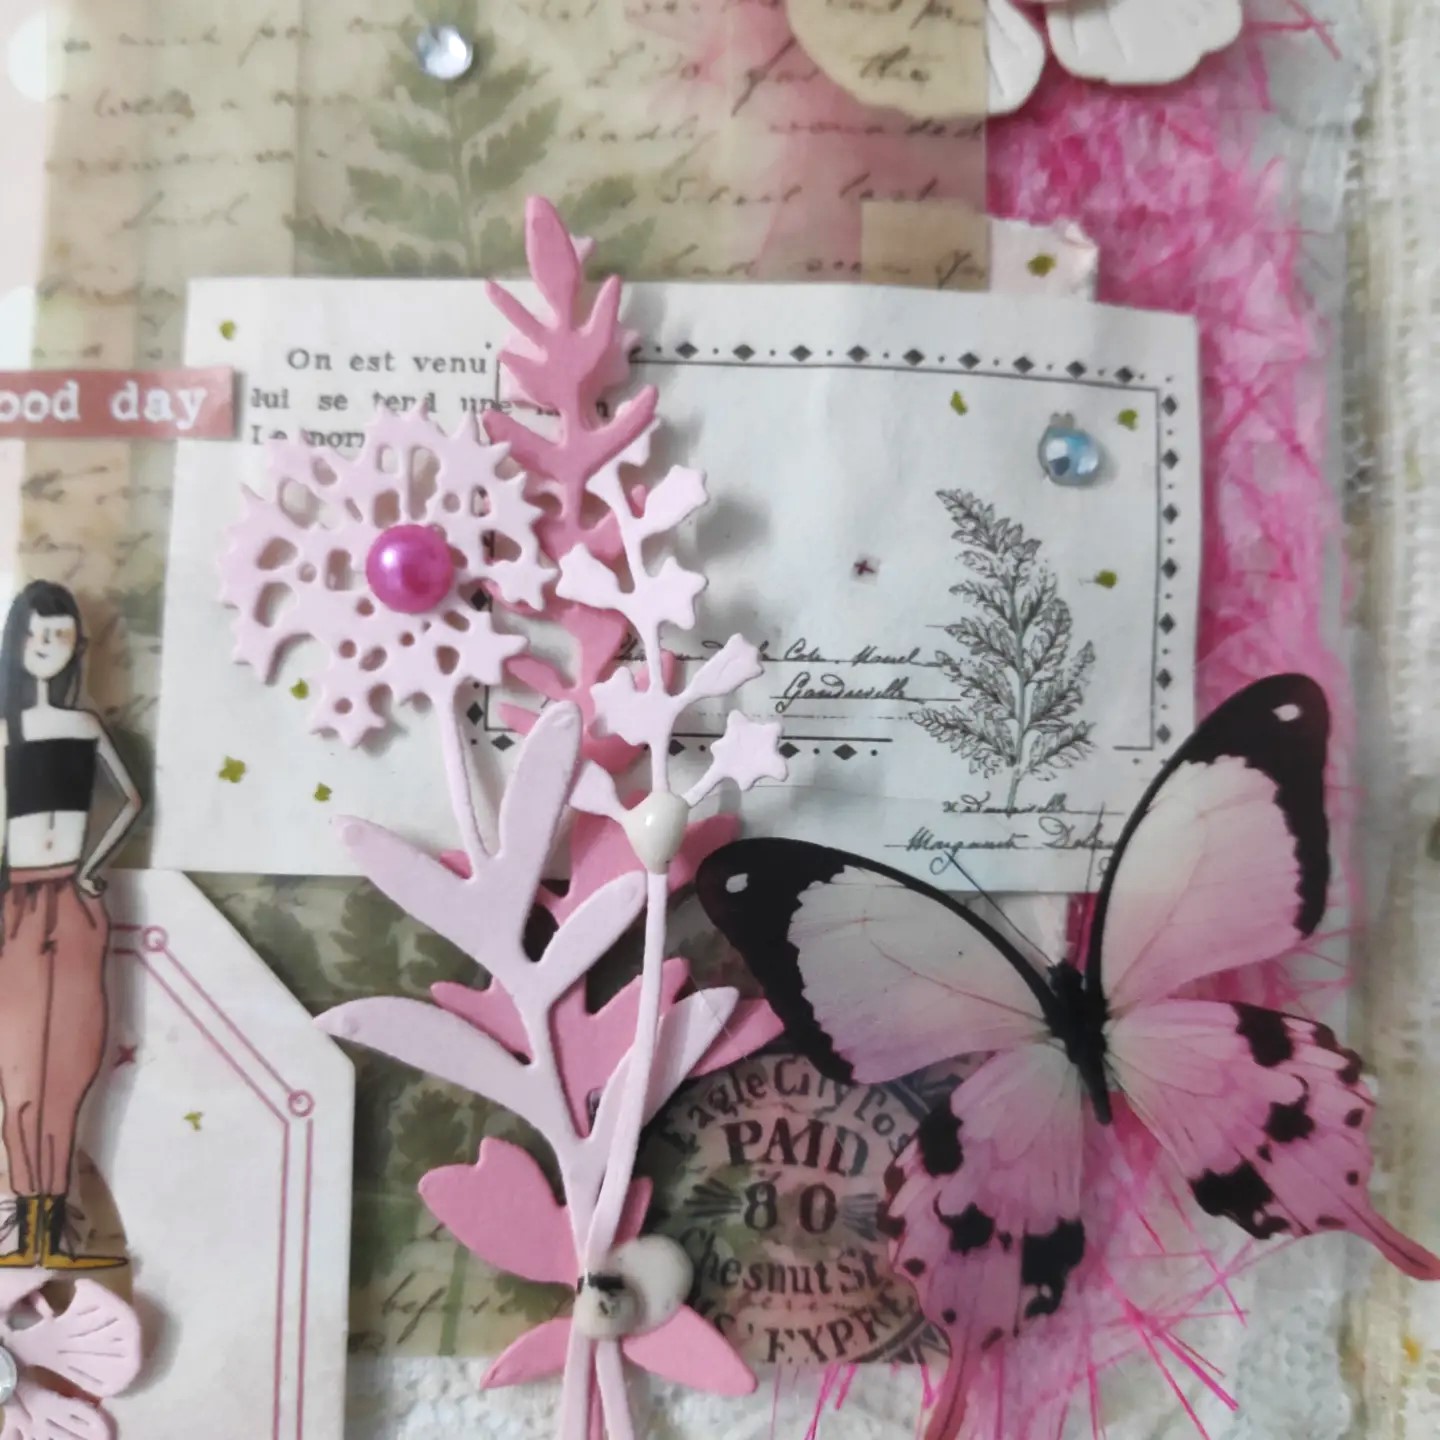


Hope you enjoyed this new addiction of work with a lot of layers, stamping, and a girly theme with a nature walk page!

Happy crafting!

Supply list
Journal diary: Craftangles
Cardstocks: Rose, baby pink, flax CS
Speciality paper: Leather paper in pink is used for the tag, fabric jute paper in rose pink
Designer papers: polka dot print, script print, flower print from my stash
Dies: ornate frame die set of 3, Floral set of 5, flower branches from craftadda and Tag die from Nellie's nest
Stamps: ledger and bird print set from Hndmd store
Archival Ink: black, brick colors 
clear PET girly tape, sentiment sticker, memo pad, labels from thelittlewings shop
Abstract girl washi sticker roll from Craftangles Brand
clear PET rose flower tape, butterfly stickers in pink, vellum note pack,  seal wax stamp, white and pink wax beads, and dried flowers in pink from craftadda Brand
White Floral laces and white net
Gold metallic pen and blings

Would love to join these fun challenges:
https://butterflyspotchallenge.blogspot.com/2023/01/176-spin-butterfly-wheel-with-f-for.html: I used butterfly stickers, colors: french rose, flax and forest green in vellum printed leaf


Monday, 22 February 2021

Reason to Smile!

 Hello to all!

Good Afternoon!

Today, I got some time for a little stamping before lunch and made this bright and beautiful card in yellow to make someone day happy! I made this card for my friend to celebrate her Birthday.

This stamp set from Hero Arts is my favorite now and I haven't used it before, I love this daisy bloom in yellow with a bold saying from Kaisercraft. 

I just gave outlined my stamp using ZIG brushes directly and die cut them. Then slightly colored them all.  Stamping outline stamps with fun colors is an excellently clean and simple way to design a card. I used two shades yellow and green to give this card such a fresh and fun look. Layered them all and paired my flower with a pretty dotted PP in yellow. And added a tiny butterfly near the sentiment.

 I attached my flowers and leaves with foam dots for some dimension.

Inside view:

Thanks for stopping by!

Happy crafting!

Supply List

Cardstock: Whisper White CS

Pattern Paper: Pretty basics from Papericious

Stamps: Daisy and bug stamp set with dies from Hero Arts, Smile sayings from Kaisercraft

Dies: stitched rectangle dies from Little Birdie: Floretta leaves from Little Birdie; Shapeabilities butterfly corner from Spellbinders used a butterfly here

ZIG real brush markers

Archival ink: Jet Black 

Would love to enter my card in the following fun challenges:

https://www.welovechocolatebaroque.uk/2021/02/february-flower-butterflies-or-birds.html

https://veselahiska.blogspot.com/2021/02/izziv-15-rumena-kot-sonce.html

http://ablognamedhero.com/2021/02/introducing-our-new-design-team-and-challenge-time/


Sunday, 21 February 2021

Beautiful day!

Hello!

Happy Sunday! Hoping you all enjoyed your weekend!

Another project created for Turner Syndrome awareness.

Today, my card featuring background stamps with few flutters by. I kept things simple and layered.

 My background is in soft grey with a pop of bright colours!

The grey tweed pattern background is so perfect, look like a pattern Paper. Then I stamped a floral pattern on a stitched circle in frosted pink. Stamped the sentiment in black. Die-cut a stitched circle in green. My flutters by in pink and soft green colours where I added some colourful wooden roses for more textures on top of them to enhance their beauty.

 I added some distress inks foilage too. In the end, added a baker twine in pink!

Hope you like my project!

Happy crafting!

Supply list

Cardstocks: Neenah Solar White CS, Deco Green CS, Pink CS, Light Green CS

Stamps: Tweed pattern from Hero Arts; Floral pattern from Tubby craft; Beautiful day stamp set (sentiment)) is from Altenew

Dies: Stitched Rectangles from Peekaboo Designs; Stitched Circles from Memory Box; Butterflies from Sizzix; Foilage and Leaves #6 from Dress my Craft Products

Distress inks: Mawed lawn and Mermaid lagoon

Dye Ink: Black Licorice from Lawn fawn

Twine: Double shade in pink from American Crafts

Would love to join these fun challenges:

https://myturnersyndromejourney.blogspot.com/2021/02/its-girl-thing-turner-syndrome.html

https://www.welovechocolatebaroque.uk/2021/02/flowers-butterflies-and-birds.html

Friday, 29 January 2021

Snapshot!

 Hello everyone!

For my card, I created a jungle scene and the theme is the point of view!

I used a super cute stamp called Wild things and colored it with my Zig markers. 

I then used a scalloped frame for the scene and adhered it to my Kraft card base.

I paired my image with a Leaf stencil to create my background since I wanted to capitalize on the jungle feel on it. I added a snapshot sentiment in black and popped this base with dimensions. I used a polaroid die for my picture frame and added a die-cut word Perfect which is already distressed. 

And die cut some wild greenery leaves and tucked them near the frame to look like jungle foliage.

I added a cute camera for this photoshoot which is paper pieced and enhance the beauty of this scene with some tiny flowers from my stash. Added some sheen to my giraffe image. Hard to catch.

Hoping you enjoyed my card today!

Wishing you a wonderful day!

Supply List

Cardstocks: Kraft CS, whisper white CS, Black CS

Pattern Paper: From Bo bunny

Stamps: Wild thing from Candibean; (Sentiment) Calendar from Kaisecraft 

Stencil: leaves from Expressions craft

Dies: Stitched scalloped rectangles from Die cuts and more; Polaroid from Kaisercraft; camera from Sizzix You &  Me die set; Wild greenery from Dienamics; Word perfect from Waffle Flower

Dye ink: black Licorice from Lawn fawn

ZIG watercolor brush pens

Distress inks: twisted citron, mawed lawn, cracked pistachio, lucky clover, candied apple

Would love to join these fun challenges:

http://sirstampalotchallenge.blogspot.com/2021/01/january-favourite-stamps.html

https://happylittlestampers.blogspot.com/2021/01/hls-january-anything-goes-with-dies.html


Wednesday, 12 August 2020

Sending Birthday Wishes

Hello, everyone!
Happy Thursday!

In love with these pretty array blooms, so delicate and fancy and I think the best way to showcasing them layering with striped and polka dots paper!


I used a stitched rectangle die for a striped PP. 
Then die cut these array blooms 2 times from black scrap sheet and 4 times out of a white scrap sheet.
Now it was delighted to color the internal die-cut pieces with my distress markers. Colored directly and blending them with a little water brush pen and adhered those pieces on one another and adjusted the pattern according to my requirement.
Then I die cut a double stitched circle from the centre out of my striped panel.
I added a dotted green PP on my white card base. Stamped the sentiment using my Misti. 


Now adhered that striped panel using foam tape.
 Arranged the floral array at the top of the circle corner with dimension.


Accented with few sequins, half pearls and shimmer in the centre of the flowers.

Thanks for stopping by!
Happy crafting!

Supply List
Cardstocks: Whisper white and black CS
Pattern Papers: Monochrome from Papericious and Dotted sheet from my stash
Dies: Adorable Array from Paper Smooches; double-stitched  rectangles and circles from Peekaboo designs
Stamp: Sentiment is from We adore you stamp set Paper Smooches
Dye ink: Black licorice from Lawn fawn
Distress Markers: Picked raspberry, mowed lawn
Nuvo Crystal Drops: white Bizzard
Misti
Foam tape, the small green half pearl and sequins from my stash

Would love to support these challenges:
http://timeoutchallenges.blogspot.com/2020/08/challenge-168.html- I am inspired by the pink flowers, stripes on the flip flop, luscious greenery


Friday, 7 August 2020

Designer Shaped Gate Fold card

Hello everyone!
Happy Friday!

Today, I am showing you how to make a shaped gatefold card using designer border die and this one is simplest!


For this, I used a textured rich red card base in A4 size. Scored at 3'' from each side and burnished the folds well with a bone folder for the crisp edges. Using my designer scalloped borders die, I die cut both the front panels. Now I placed my scattered polka dots stencil on both the gatefold flaps and heat embossed some dots in gold sparkle and some in red ink.


I stamped the flower and leaves images on white cardstock. First I heat embossed the outlined images using gold metallic sparkle EP and layered the floral images in hot summer ink colors using shades of red, yellow and green. Fussy cut them all.


Die-cut a scalloped circle out of red and a stitched circle out of white CS. Arranged my flowers.
Adhered it to the left side of the opening in the centre ensuring that only the left half closure piece attached well.


Close-up picture of the sentiment.
Hoping you all enjoyed the project.
Happy crafting!

Supply list
Cardstocks: Red CS, White CS
Stamps: Beautiful Blooms III and sentiment is from Spring botanical daffodil from Uniko 
Stencil: Scattered Polka dots from Uniko
Dies: Designer Borders from Die cuts and more, scalloped circle from Peek-a-boo stamps, stitched Layer circles from Memory Box
Dye Ink colours: Warm sunshine, Mango smoothie, Crimson, blush, evergreen, frayed leaf from Altenew
Embossing powder: Metallic gold sparkle from Wow
Embossing Inkpad
Misti

Would love to enter in these challenges:


Thursday, 25 June 2020

There is wind beneath my wings...

Hello friends!
Happy Friday!

A card made for the colour challenge at Cut It Up Challenges using pink, coral, yellow, blue, green....... made me think of a summery scene!


Started with stamping the silhouette image in coral colour on a graph pp which is perfect for this cute image. I used my Misti especially helpful for exact placement of the image with good ink coverage on this PP.
The wild grass is created using ZIG watercolour brushes. The tiny flowers growing in the grass in pink using the same stamp, a part of it. The sentiment is from another stamp set with flutters by. They just really seemed to go perfectly with the sentiment.
Now die cut some clouds out of this main graph panel. I hand cut the kite base and then used dotted pp in blue tones and accented those pieces to the kite with bows.  I thought it would be fun to use in this cute little scene. Added a string to the kite.


Before adhering this main panel to my white card base I added pink dotted pp to the negative space of the clouds for more interest and textures using foam tape. Finished it off by adding few sequins.
Hoping you enjoyed this fun-filled card!
I hope your day is a good one!

Supply list
Cardstock: Snippets of Whisper White CS
Pattern Papers: Snippets of Kraft in colour ( graph print from Doodlebug designs; blue dotted papers from Pretty basics papericious brand; Pink dotted paper from Bo Bunny Bold & Bright
Stamps: Fun friends from Impression Obsession; Sentiment is from Life is sweet Mudra Brand
Die: Kite and clouds from Paper Smooches
Altenew inks: Paper bag, coralberry, warm sunshine, cotton candy, forest glades
ZIG real brushes, greens and orange

Would love to join these fun challenges:


Saturday, 20 June 2020

Let's Party!

Hi everyone! 
Hoping all of you enjoying your day!

I created a fun birthday shaker card.


I am inspired by colourful pile and pinata with a white base.
I used the MFT stamp set for cute critter images an adorable tiger and a bird holding a balloon string and removed the monkey image after stamping it. Coloured it with my Chameleon pens and fussy cut it.


The confetti dots paper in gold with colourful splatters just helps add to the festivity.
On my white card base adhered that main panel with a shiny yellow strip. Added that image in the middle. Now die cut a trio of Birthday balloons, watercoloured them and outlined it with my golden pen for a festive touch. Drew the string line and added those party balloons.


 Now created my shaker panel with fun shaker elements with confetti.
Die-cut Let's Party phrase in golden sheet and added it on the OHP sheet.
Hoping you enjoyed it!


Supply List
Cardstock: whisper white
Mirror sheet: golden from Crafters Corner
Shimmer sheet: yellow from my stash
Foam sheet: white
Stamp: Jungle gym stamp set from MFT
Dies: Balloon Mania and double stitched rectangles from Peekaboo Designs, Let's Party from Sizzix
Chameleon pens: a set of 52
ZIG watercolour brushes
Misti
Shaker sequins: white frost and party sprinkles from DCAM store

 Would love to enter in these fun challenges:
https://pennyblackatallsorts.blogspot.com/2020/06/june-favourite-stamps.html- Love to play with critter stamps as these are always my favorite!
Craft monthly challenge