Saturday 31 December 2022

Happy New Year!

 Hello everyone!

Happy Sunday!

It's time to welcome New Year, hopefully, 2023 will be blessed for all of us!


Here is my card with cityscape die and fireworks with sparkle and shine!


Hope you all like it!

Happy crafting!

Supply list

Cardstock: Glossy black CS

Speciality silver paper: Holographic

Glitter sheets: Silver, gold and turquoise

Glitter foam sheet: Navyblue

Dies: Cityscape die from Memory Box, firework die from DMC Brand, New Year die from craftadda

Saturday 24 December 2022

Vintage Christmas tag!

 Hello to all!

Happy Sunday!

Merry Christmas to you and all your family members!!!

I made this beautiful Christmas tag in vintage style.

I started by adding layers on Tim Holtz Tag with stencilling and misting as shown in the pic:

Created some small tags to insert into the main tag!

I covered Angel's wings with glossy accents and sprinkled rock candy glitter, it's so sparkly in real!

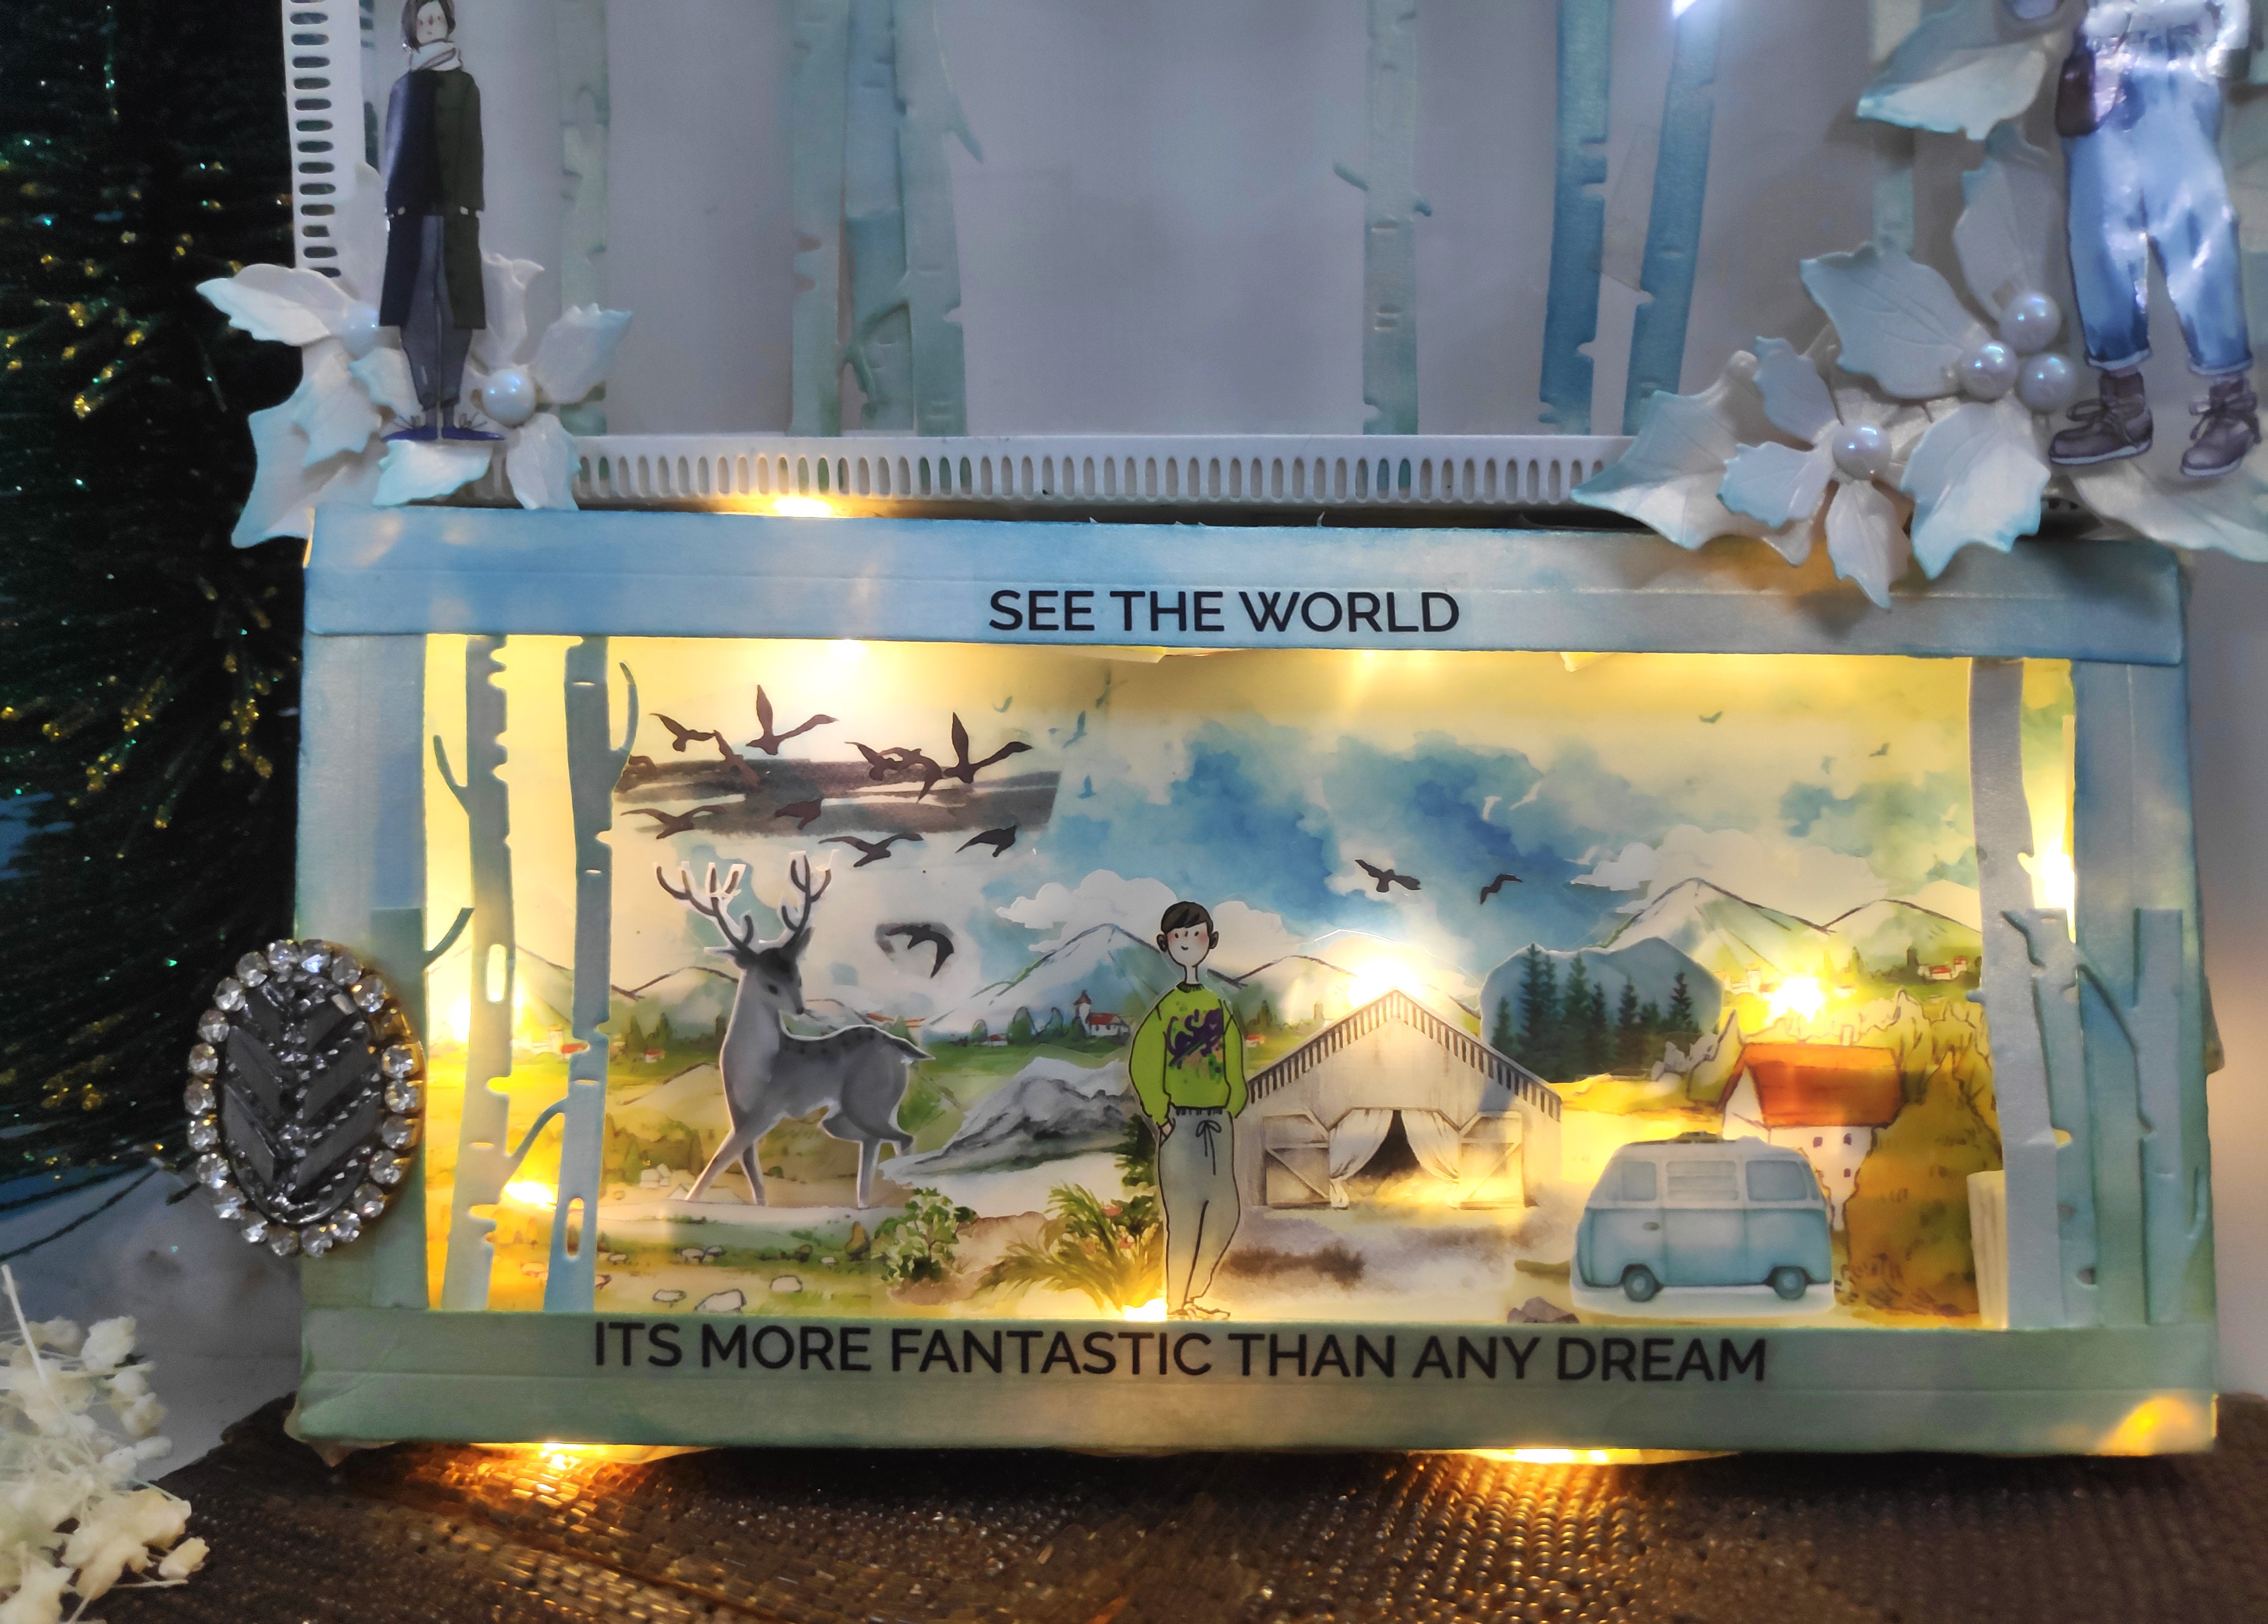
This is an ephemera cutout with a small 3D tag.

A sentiment Ephelera die cut. Added a metal charm and put glossy accents to the lights with glitter.

Then die cut a vintage frame 7 times with acetate and created a shaker with Christmas slices inside and covered it with this sentiment tag.


Added lots of motifs, like Santa with a gift, a Christmas tree, a cute girl with a deer and many more pieces.


In the end added some Christmas confetti, bells with a thread, and some handmade flowers with half-white pearls!

Here is the video reel link to enjoy:


Hope you all like it!

Stay safe and warm!
Happy crafting!

Supply list

Tim Holtz Tag set

Paper pad: Welcome Santa from DMC brand; Merry & Bright - Kaiser Kraft brand

Acetate sheet from DMC brand

Die: Vintage frame from Vintage clock die set DMC Brand

Stencil: Vintage damask from Craftangles

Stickers: Long Musical and tickets from the crafter corner store

Motif sheets: Christmas vibes and 

Distress Ink: Ground espresso

Spray: Moon Shadow Mist from Lindy's brand

Texture paste: Papericious brand

Shaker slices: Christmas bling from the DMC brand

3D Stickers: Eno Greetings brand

Christmas Confetti: Red and green DMC Brand

Rock Candy Glitter from the DMC brand

Handmade flowers from the Hndmd store

Glossy accents

Thread, white adhesive half pearls and bells from my stash

Would love to join these fun challenges:

https://abcchristmaschallenge.blogspot.com/2022/12/abc-christmas-challenge-y-and-z-are-for.html- y is for youngsters

https://papercraft-challenges.blogspot.com/2022/12/challenge-89-decking-halls.htmlhttps://girlzcreativecrafts.blogspot.com/2022/12/challenge-32-alles-mag.html

Tuesday 20 December 2022

Celebrate every moment!

 Hello to all!

Happy Tuesday!

I am in love to make 3D Christmas tags, so made another one for this festive season and to decorate my Christmas tree with a winter feel & blue frosty theme!

I tried to create a scene on both sides of the tag, as a girl watching from her window, a snowman playing in the winter with the snowball and on the other side a car borrowing a Christmas tree as a gift while going to the house through the Winter Wonderland!!


There are a lot of tiny details. I started by die-cutting the outlined Christmas tree with a star border tree out of a holographic sheet and added the acetate die-cut sheet behind them. And started decorating my tree from one side as shown in the below pic with a closure look:


Now decorated the other side!


a closer look:


I added snow paste for winter textures and cotton for the snow textures.
Here is a YouTube link to visit:https://www.youtube.com/shorts/eYBSXOxj2sw

Hope you all like it!

Happy crafting!
Supply list
Cardstocks: Plain Holographic CS, Garnet Matte CS and Turquoise Matte Foil CS from Die cuts and more brands, dual-textured white CS from CrafTangles, light cream textured CS
Acetate Sheet: Crafters Corner store
Glitter sheets: Silver and brown from DMC Brand
Dies: Christmas tree set, cute houses, snowflakes from Christmas set die DMC Brand; window set, mini doilies set of 4, a car with Christmas tree set from craftadda
Snow Paste: Cadance brand
Clear Pet Stickers: Girly from thelittle_wings shop
Special textured fabric net sheet: from thelittle_wings shop
Motif sheets: Christmas & Jinnie from DCAM brand
Rub-on: Brown flower flourish from Itsy Bitsy store (retired)
Washi tapes: Penguins, months, foiled sentiment from Nirmal Stationer store
Slices: Snowflakes and stars- glow in the dark from DMC Brand
Pompom, cotton, white thread, and silver gems are from my stash

Would love to join these fun challenges:


Sunday 18 December 2022

Winter town landscape!

Hello friends!

Happy Monday!

Hoping you all enjoyed your weekend!

This time I made a beautiful winter town landscape with textures and adorable reindeer!


I started by dry embossing a white CS using 3d waffled diamonds and placed that layer on a navy blue base.


Die cut some 3 layers Christmas trees out of bottle green and lime green CS. Applied distress inks on them and added snow texture to them. 


Die cut some houses, watercolored them and added snow textures to them.


Then build a reindeer, watercolored it and arranged all the pieces.


Collect all the pieces, die cut a framed door die and made a scene. In the end added a sentiment, love the outcome!

Happy crafting!

Supply List
Cardstocks: Dual textured white CS from CrafTangles, Bottle green CS from DMC brand, Lime green CS from DCAM brand, Navy blue CS,
Embossing Folder: Waffled diamonds 3D from Altenew
Dies: cute houses, 3-layer Christmas tree, build a reindeer from DMC brand; Vintage Doors from craftadda
Distress inks: shades of greens
ZIG watercolor brushes
Motif sheets: Sentiment from Christmas vibes from DMC Brand
Icy Snow Paste: Cadance Brand

Would love to join these fun challenges:


Saturday 10 December 2022

3D Double sided Vintage Christmas Tag

 Hello friends!

Happy Saturday!

Presenting my beautiful shaker tag which is double-sided and perfect for Christmas Decoration! 

Woohoo!!! In the Top 3-

https://girlzcreativecrafts.blogspot.com/2022/12/winnaar-en-top-3-challenge-31.html


I started by die cutting two ornate oval frames in Pastel cream and Kraft color CS/ Die cutting two oval-shaped transparent sheets. Using a starfield stencil I applied Gold texture paste on them. 


Added those transparent sheets to the ornate frames using foam tape and filled them with shaker elements.
Now die cut lots of different Christmas elements with some cute images from a motif sheet with a sentiment.
Also added some snow paste to my trees for a winter scene effect.
Adhered all these die-cut pieces to my Christmas tag as shown in the pics:


In the end, embellished it with some half-adhesive pearls.

You can open this direct given link to see the video!

https://www.instagram.com/p/Cl8ppFCPY08/

Hope you give it some love!

Happy crafting!

Supply List

 Cardstocks: Pastel cream and Kraft CS

Speciality paper: textured black

Mirror CS: Copper gold from DCAM, textured silver and textured gold

Motif sheet: Christmas Vibes from DMC

Acetate sheet

Stencil: Starfield from Newton's nook

Dies: Ornate oval frames, floral sprigs, Christmas mantle and snowflakes from craftadda, Reindeer with Christmas tree and Foliage & Leaves#7 from DMC

Icy snow paste Cadance Brand from DMC

Texture Paste: Gold from CrafTangles

Snowy glitter sprinkles from DMC

Shakers: Snow fashion from DCAM

Crystal white and gold half-adhesive pearl beads

Golden thread from DMC

Would love to join these fun challenges:

https://christmaskickstartchallenge.blogspot.com/2022/12/christmas-kickstart-challenge-69-if-its.html


Monday 5 December 2022

Winter Wonder Landscape Shadow Dream Box!

Hello friends!

Happy Tuesday! 

Hope you all enjoyed your weekend!

I love creating scenes and made my first own shadow box. I just love the depth of this winter theme landscape scene, I enjoyed it so much!

Yipee- I won the challenge here!!!

https://letscreatechallenges.blogspot.com/2023/01/challenge-191-ag-black-and-white.html

And I couldn't resist adding LED light to make it even more magical!


Hereafter opening the lid.


I just started by making the box using slimline dies and added a panel of an acetate sheet in the top centre of the box and lots of washi tapes and stickers.


Added the washi tape layers using foam tape for a 3D look with textures.


After creating all the layers I added LED lights to my box.


Added a few distressed ink birch trees at the top lid of the box.


Now added some people travelling through this landscape, watching deer, camping, clicking pics, and enjoying winter!


Some poinsettia flowers were added to the lid corners with a girl sticker.


In the end, I added a little decor charm to open my box easily with a cute sentiment perfect for this theme!
Hope you all like it!

Supply List

Cardstocks: Coconut cream CS; Cream Pearl metallic CS

Dies: Trees with deers  and Poinsettia flowers set from DMC; Slimline large shadow box die and slimline celebrate this die from DCAM brand

Distress oxides: salvaged patina, rustic wilderness, mermaid lagoon

Clear Pet Stickers: couples tape, planner figures, Blue Scenery from the little wings shop

Clear Pet Stickers Roll: Landscapes from craftadda

Paper for journalling with elements: colourful elements (50 sheets)

Washi Tape: Vintage Script from craftadda

Transparent Sentiment Sticker sheet: Travel sentiments 2 from CrafTangles

Half shine adhesive pearls: white

An oval-shaped decor charm and LED light  from my stash

Would love to join these fun challenges:

https://christmas-craft-creations.blogspot.com/2022/11/november-challenge-washi-tape-dt-call.html

https://abcchristmaschallenge.blogspot.com/2022/11/abc-christmas-challenge-w-andor-x.html- adding LED lights made it more magical with 3 D look and x-tra special!