Saturday 30 June 2018

Cut it up DT post- Tag, You're it!

Hello friends!
Happy Weekend!

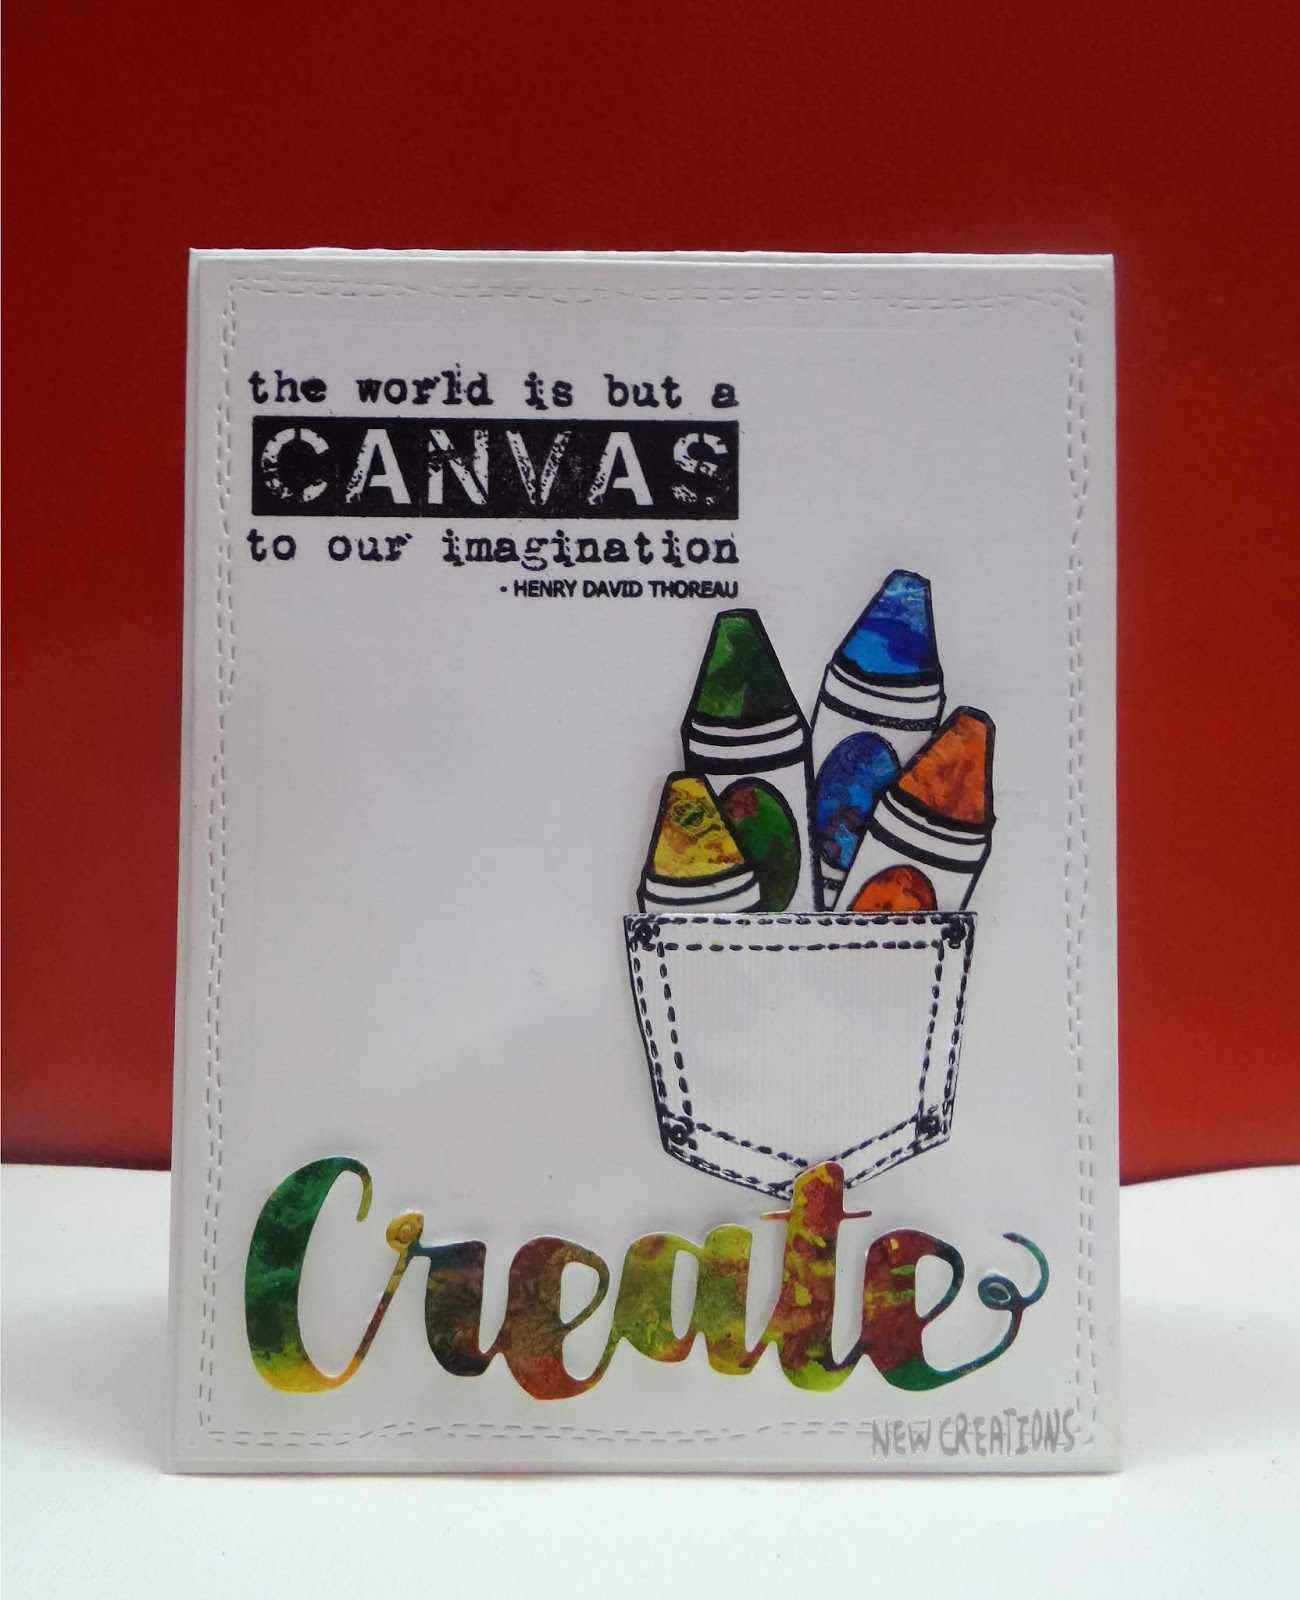
I made a set of cute tags which is my DT post for Cut it Up challenge #151 where the theme is Tag you're it! The sponsor is   CAS-ual Fridays Stamps, sent us some Fri-dies to work with them!
Its a gift from a teacher for a kid as an end of the year gift!


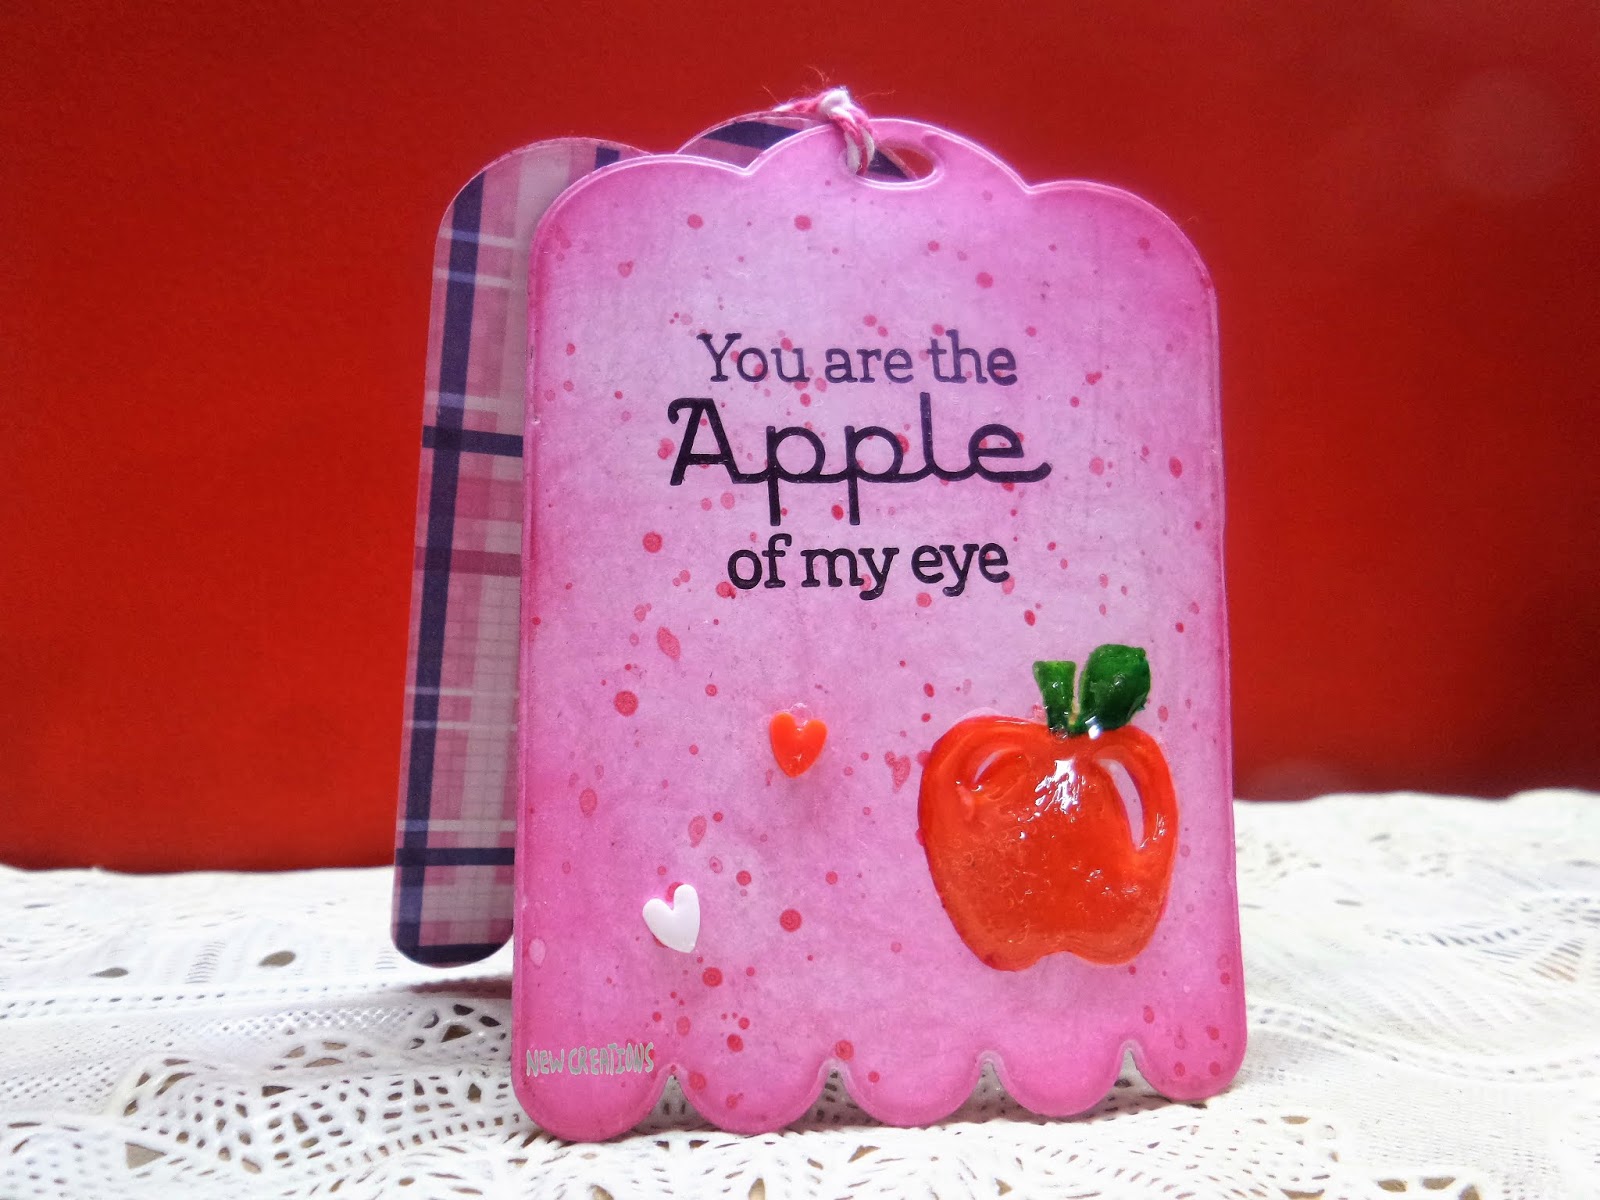
I started with the Tag buddies. One is die cut from a DP and the other is from a white CS.
I distressed the edges and ink blending using some Ombre ink. Stamped an apple and added 3D Dimensional Magic layer on it 3 times. Added the sentiment.
At the end added some splatters and cute tiny hearts.


On another tag, some stencilling was done to write the message tied them with a dual shade baker twine!

Supply list
Cardstock: White CS 300 gsm
Designer paper: DCWV The Countdown stack 12"x12" paper stack
Stamp: Apple of my eye stamp set from WeRMK
Die: Scallop Tags from Cas-ual Fridays Frie dies set
Stencil: Hearts from Craftyscrappers
Dye Ink: Hero arts Ombre ink pink to red
Archival ink: Jet Black
Mod Podge: 3D Dimensional Magic
 Enamel hearts from Craft corner
Baker twine 

Would love to enter in the following challenges:
http://timeoutchallenges.blogspot.com/2018/06/challenge-112.html


Monday 25 June 2018

Pocket filled with crayon colors

Hello to all!
Happy Monday!

The best period of life is childhood particularly the school days and I will never forget them! Especially, the memories related to art and craft. Be it sticking my hands with glue and then peeling it off or filling my school shirt pocket with colours and mess up my dress.


The STAMPloration STAMPgirl Kathy ....... brought back these memories and inspired me to create this piece!
I am CASEing her pretty card below and you can see more of her favorites at the above link given: Love the textures she created on her bold phrase die with artistic text sentiment and paired it with a beautiful cup filled with brushes and color only at the tip of brushes. Isn't it so artistic and inspiring! Really a CAS beauty with simplicity!!!


And I am happy I can correlate this topic at Rainbow Craftykari challenge too where the theme is Back to school!

I hold a scrap of colorful sheet which is a leftover piece I created for a card. I used some acrylic colors and Zig markers on it. Stamped some crayon images and die cut the bold phrase Create out of it as shown in the pic.


I die cut a white panel using Crazy Double Running Stitch Rectangles. Stamped a pocket and die cut it.  Stamped some crayon images once again. Fussy cut those colored crayons and added at the tips and centre of the crayons. Filled the pocket with crayon colors and added the text sentiment.
Now adhered that pocket and create phrase using foam adhesive tape, Voila done!


Hoping I did justice CASEing her pretty CAS artistic beauty!

Supply List:
Cardstock: Coconut white CS and Texture white CS for pocket
Stamps: ART IS and Pocket blooms from STAMPlorations and Crayon image- Color my world from Lawn Fawn
Dies: Crazy Double Running Stitch Rectangles and pocket die from CUTplorations (STAMPlorations), Create from SSS
Acrylic Paints: Red, blue, green, yellow from Fevicryl acrylic colors
Zig watercolor brushes: green, orange, yellow, red, blue
Archival ink: Jet black
Foam adhesive tape

Would love to enter in the following challenges:
https://stamplorations.blogspot.com/2018/06/stamplorations-is-five.html
https://stamplorations.blogspot.com/p/stamplorations-anything-goes-challenge.html
https://rainbowcraftykari.blogspot.com/2018/06/rcs-challenge-11-back-to-school-blog-hop.html
http://simplylessismoore.blogspot.com/2018/06/challenge-374-bits-box-item.html
http://countryviewchallenges.blogspot.com/2018/06/june-2018-written-word-add-text-in-some.html


Sunday 24 June 2018

Hello summer

Hello friends!

It's too hot here in India and the heat is on this summer!
Today, I made a cool one layer card in summery colors for my brother as he is on summer vacation trip with his family!!!


 I used masking and sponging technique here.  Try to keep soothing background where the sky met to the sea. And add detailings using Zig color brushes and created this cool scene. Stamped the yacht 2 times and fussy cut one, added with foam adhesive dot for more dimension

Love the tropical color scheme and silhouette images on it, don't you think?


Supply List:

Cardstock: Bielo white CS
Stamps: Coastal stamp set from Inkadinkado and sentiment from Tropical Birthday Stamp set from Itsy Bitsy
Die: Tattered Lace Rectangles
Distress Inks: Tumbled Glass, Broken China, Victorian velvet, bundled sage
Archival ink: Jet Black
Zig markers: Blue, light green
Adhesive Foam Tape

Would love to enter my card in the following challenges:
http://paruscardmakingchallenges.blogspot.com/2018/06/june-2018-challenge.html
http://www.sosuzystampsblog.com/2018/06/june-july-challenge.html
http://sirstampalotchallenge.blogspot.com/2018/06/june-anything-goes.html
http://thatscraftychallenges.blogspot.com/2018/06/a-summers-day-challenge.html

http://www.thedailymarker.com/2018/06/day-1-the-daily-marker-30-day-coloring-challenge/
https://cuttlebugmania.blogspot.com/2018/06/the-summer-is-magic.html
http://diesruschallenge.blogspot.com/2018/06/challenge-99-summertime-fun.html
http://sugarpeadesigns.com/blog/mix-it-up-challenge-44-fresh-inspiration/- on color scheme
http://www.ellibellescorner.com/2018/06/ellibelles-crafty-wednesday-june.html
http://papirlosjen.blogspot.com/2018/06/06-juni-ferietid.html


Saturday 23 June 2018

You made me so hoppy!

Hello to all!
Happy Saturday!

I created a cute happy fun scene card in a CAS style! Love these adorable froggies as the sentiment itself said! 


I made a background by blending some Distress inks on a white panel and added some water splatters, removed the extra ink with paper towel.


Stamped the crown frog image and watercolored it, fussy cut it. Using mirror image stamping technique and masking the same image, stamped another one and drew the line where I masked the crown part and colored it too, added some spots on frog body using a pointed black pen to create more interest. Stamped some pond plants elements directly and fussy cut the leaves. Created the whole scene, added the frog images with adhesive foam dots and combined with an adorable sentiment. 

It's so much fun to mix and match the stamp set! I don't believe that I've ever created a frog card before!
 Hope you enjoyed it!

Supply list
Cardstock: white CS 300gsm
Stamp: Hello baby stamp set from Lawn Fawn; sentiment is from Love &smiles stamp set from YNS
Die: Rectangles from Tattered Lace
Distress inks: Broken China, mermaid lagoon, cracked Pistachio, lucky clover
Zig watercolour brushes: Green, light green, yellow, orange
Fine black liner pen: Stabilo fine 0.4
Archival ink: Jet black
Tonic Trimmer and adhesive foam dots

Would love to enter this in the following challenges:


Sunday 17 June 2018

Dad my hero

Hello everyone!
Happy Sunday!

Happy Father's Day!
Making a manly card is always difficult for me. It is very difficult to give life to them with fun and I love that stamp set I am using for it and achieved the good results, so perfect for Father's Day or Masculine projects!


For my card, I started with bending the edges using ombre ink and then stencilling my base panel to make my background as shown in the below pic.


The Dad image is so cool, I really love this silhouette man in pretty good size. I stamped my image using Misti for crisp black image and fussy cut it.
The set has so many cute text phrase sentiments with a frame and some argyle patterns too. I started with a pattern stamping in different soothing colors to create a partial background and then randomly added some sentiments over the pattern. 
Added the DAD sentiment in jet black ink and filled the color in it. Now added the frame at an angle to give it some dimension and more interest.
Adhered the man image on that focal panel and then to my stenciled card base. Finished off the card with some enamel shapes.

The angle panel added a modern touch to this timeless card!
This is definitely a perfect fun set for making DAD cards!

Hope you enjoyed!

Supply List:
Cardstock: Glossy White 300gsm- Bielo 
Stamp: The write stuff; Leave it to Dad from winnie & walter
Stencil: icraft
Ombre ink: Hero Arts Pink to Red
Memento inks: summer sky, dandelion, ladybug
Zig real watercolor brush: Carmine red
Archival ink: Jet Black
Koi coloring brush: Black for outline
Enamel dots: Rose quartz from Peekaboo designs and triangle shape fromWRMK


Saturday 16 June 2018

Trendy Spring Blooms!

Hello everyone!
Happy Saturday!

Hoping you all are enjoying your weekend!

PE: In Top Pick here at http://thetwistedchallenges.blogspot.com/2018/07/hello-everyone-its-time-to-announce.html


I started by embossing the white panel with a checkered embossing folder. Die cut some squares out of 3 different colored gingham DP. Cut some scalloped frames out of black gingham DP.  I then used the trendy spring blooms die to cut 3 times out of my that scalloped frames at the centre. Placed the thin flower layer with some matching colored pearls.
Assembled my card on a white base panel with a gingham strip behind my frames. Paired it up with a Birthday sentiment. I love the summery look of this card!

A close-up detail view:


I am CASEing STAMPgirl Julie Beech fabulous creations, she CASEd her own past version. I am inspired by black and white Lo, Incorporated the way of die cut flowers, birthday sentiment, polka dots DP ( I used checked gingham), instead of placing circles in the centre of these blooms I used pearls and white airy space.


Hope you enjoyed with m version and inspired!

Supply list:
Cardstock: White CS 300 gsm
Pattern Papers: Monochrome and Back to Basics from Papericious
Dies: Trendy Spring Blooms from CUTplorations ( STAMPlorations); Square Stitching from Nellie's Multi frame's
Embossing Folder: Basic Shapes from Cuttlebug
Stamp: Sentiment from Flower Frenzy HOTP set
Pearls: from my stash
Big shot

Would love to join the following challenges:
https://stamplorations.blogspot.com/2018/06/stamplorations-is-five.html
https://stamplorations.blogspot.com/p/stamplorations-anything-goes-challenge.html
http://thetwistedchallenges.blogspot.com/2018/06/ttc1-checkered-florals_1.html
http://www.happylittlestampers.com/2018/06/hls-june-anything-goes-with-dies.html
http://allsortschallenge.blogspot.com/2018/06/week-472-use-at-least-2-dies.html
http://casology.blogspot.com/2018/06/week-304-pearl.html#
http://papericiousindia.blogspot.com/2018/06/papericious-june-challenge-recipe.html
https://pixiescraftyworkshop.blogspot.com/2018/06/pixies-snippets-playground-challenge-328.html-lots of snippets used in different Designer papers
https://kreativtanten-challenge.blogspot.com/2018/06/18-blumen.html


Friday 15 June 2018

Exploring Nature World Art Journal Page with an announcement!


Hello friends!

Time for an art journal page and an announcement!

This is my first ever DT post for Cut It Up challenge blog! I am so excited and thrilled! The owner  Evelyn Holmberg  is such a sweet person and when she asked me to join how can I say no :)D and feel honoured!

This is my first ever Art Journaling try in mixed media! Hope you all like it and inspire to create yours! A lot of colorful layers of paint, stamping, stencilling, texturing and die-cutting!

One thing I found myself really enjoyed when it comes to creating an art journal page using Inspirational quotes. They are a great way to opening our minds to self-reflect in everyday life!
My page is inspired by all the nature elements, sunshine, summery, bright, full of blooms and let the butterflies exploring the Nature World what lives within it.


Firstly, I started  I to create my background using yellow and copper color ink. I love to mix and match all kinds of mediums.


 I applied a thin coat of gesso all over the page and then created my textured BG mixing these colors. You can see how bright, shiny are they and love the copper color shimmer. On the left side of the page stamped some butterflies in archival ink.

  
 I mixed the copper color in the texture paste and applied through Tear dots stencil and created a sunbeam at the top right.


And on the right side of the page, this time I created the BG first using bubble wrapper sheet for experiment and then applied the stencil using texture paste, I got the same result as like the first one!


Then stamped the butterflies. I added some gelato colors using lime green, orange and red, Colored my butterflies.


Then stamped the sentiment from the same set and color those lips. In the end, finished it off with a die cut sentiment-explore, some flowers, sticker butterflies and chit chat sentiment stickers!

Hope you all enjoyed my first ever Art Journal page!

Supply List

Cardstock: handmade white sheet
Chalk Paints: Yellow and Bronze from Expressions Craft Stamps
Stamp: Happy Fly from Expressions Craft Stamps
Die: Explore text -Travel world pack decorative die from Kaisercraft
Stencil: Tear Dots from Expressions Craft Stamps
Texture Paste: Ranger
Gelatos: Orange, red, yellow, green and pink
Chitchat Stickers from Tim Holtz
Black fine liner pen and Uni-ball white gel pen
Flowers and butterfly stickers from my stash

Thanks for stopping by!
Have a great day!

Would love to join the following challenges:
http://butterflyspotchallenge.blogspot.com/2018/06/101-spin-butterfly-wheel-with-letter-m.html- Blue and green color butterflies, metallic sheen is there
https://expressionsstamps.blogspot.com/2018/06/expressions-craft-challenge1.html
https://craftstamper.blogspot.com/2018/06/take-it-make-it-challenge-june.html
https://www.simonsaysstampblog.com/mondaychallenge/
http://www.sosuzystampsblog.com/2018/06/june-july-challenge.html
http://www.vintagejourney.com/2018/06/june-challenge-stencil-it.html
http://creativeartistemixedmedia.blogspot.com/2018/06/welcome-to-creative-artiste-challenge-39.html
http://www.happylittlestampers.com/2018/06/hls-june-mixed-media-challenge.html
http://thatscraftychallenges.blogspot.com/2018/06/a-summers-day-challenge.html
https://mixedmediaandart.blogspot.com/2018/06/june-challenge-emotional-outburst.html- I am inspired by the tones of yellow color, moth, texture, blooms


Thursday 14 June 2018

If Friends were Flowers.......!

Hello everyone!
Happy Thursday!

Aha......... some florals in summery colors do perk me up a little:) with a twist of tiny checkered grid florals!


Started with a white Textured checkered panel CS.
All the stamps image that I used to create a lace border and checkered grid florals are from Itsy Bitsy Ornate Lace clear stamp set. I stamped the lace border in Hero Arts soft pink shadow ink pad and the florals in Hero Arts Pink to Red Ombre Inkpad. Added details to flower centres using RB- 6000AT Zig watercolor brush and fussy cut it. 


The sentiment is from Inspired by Stamping Cherry Blossoms stamp set in ombre ink again. Added a Decorative checkered stamped tape image at the top corner from Kaisercraft Decorative Tape Pieces stamp set
Using a little strip and holograms dots for a little subtle shine! Adhered it on my textured Cardstock panel.
I just love it when an idea turns out better than I pictured it in my head!!!

Would love to enter my card in the following challenges:


Tuesday 12 June 2018

One Layer card!

Hello friends!
Happy Monday!

 STAMPlorations is celebrating their 5th Birthday, the entire month of June with the blog hop and lots of prizes. 
I am CASeing a card by one of my favorite artists and queen of one layer cardmaker, the awesome Shery Russ as she showcased 3 of her favorite one layer cards! You can check her card below.


And here is my version with a little twist in it. I choose her black and white card with loose watercoloring technique, layering and bold sentiment.
This is my first ever attempt to create one layer card without using any die cut or embellishment, hardly believe!!! But I am glad that I achieved the good results, all credit goes to her for the inspiration! :)D


I created this card for a friend who is very fashionable and trendy, hoping she will love it, friends are always so special!!! 
I started with stamping and masking flowers using jet black archival ink. Then using Iced spruce DI. I watercolored the blooms and background. At the bottom, while the background is still little wet, I placed my stencil and remove the extra ink to create the pattern for the ground using a paper towel. Then stamped that city+ girl image with second generation stamping. Then added some script texture to her outfit and stamp the sentiment.


I had no idea what I was doing in the beginning, just started playing with my paintbrush, ink, stencilling and in the end got such a cool result!

Hope you enjoyed this one layer card!
My wishlist link:

Supply List

Cardstock: Watercolored texture CS
Stamp: Pocket Blooms and city girl from STAMPlorations and script from Kaisercraft
Stencil: Broken glass from ARTplorations (STAMPlorations)
Distress Ink: Iced spruce
Archival ink: Jet Black

Would love to enter my card in the following challenges:
http://simplylessismoore.blogspot.com/2018/06/challenge-373-friendship.html
https://stamplorations.blogspot.com/2018/06/stamplorations-is-five.html
https://stamplorations.blogspot.com/p/stamplorations-anything-goes-challenge.html#
https://stamplorations.blogspot.com/2018/05/wishlist-linky-party.html
http://pennyblackatallsorts.blogspot.com/2018/06/june-in-garden.html
http://sirstampalotchallenge.blogspot.com/2018/06/june-anything-goes.html
http://allsortschallenge.blogspot.com/2018/06/week-471-ladies-night-out.html
http://www.kreativscrappingblogg.no/2018/06/utfordring-6-og-7-blomster.html
http://craft-alnica.blogspot.com/2018/05/izziv-212-roze.html
http://addicted-to-stamps-challenge.blogspot.com/2018/06/challenge-165.html
http://www.happylittlestampers.com/2018/06/hls-june-watercolour-challenge.html
http://www.happylittlestampers.com/2018/06/hls-june-cas-challenge.html