Showing posts with label stenciling. Show all posts

Friday, 3 January 2025

January 2025 Release - Introducing Day 4... Ink & Flip Layering Flower Stencil AND Simply Said Blocks Occasions Clear Stamp Set

 Hello everyone!

Happy Friday!


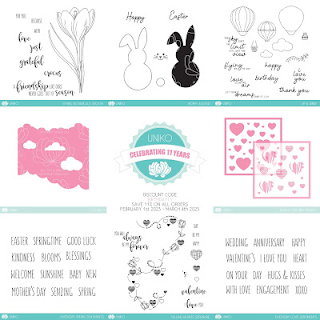
Welcome to Day 4! Today we are introducing the new Ink & Flip Layering Flower Stencil and Simply Said Blocks Occasions Clear Stamp Set which can be used for many occasions.

I love this stencil and how easy it is to make a card with a big impact! It is an innovative and creative stencil that can be used to build a flower using a rotating technique!


I chose three distress inks for the stencilling. You can vary the amount of ink and the pressure you put on the brush to achieve the various inking effects you want from lighter to dark.
First, I started using shaded lilac DI through the stencil and rotating the stencil to create various color effects using the same ink.


I overlapped my second flower stencilling using picked raspberry ink.


 Again I overlapped my second flower by using the villainous potion DI to create the third flower.

I liked the variation of colors and interest this stencil brought! Sometimes, you have to experiment and try things.
It was fun to play!
I hope you definitely love this stencil and create something soon! You can find more inspirations here.
Thank you for visiting and come back for the fourth reveal tomorrow!

Happy crafting!


Wednesday, 1 January 2025

January 2025 Release - Introducing Day 2... Ink & Flip Layering Geometric Gem Stencil AND Sparkle Sentiments Clear Stamp Set

Hello to all!

Happy Wednesday!

Goodbye 2024, Welcome 2025!!

Cheers to a fresh start, new adventures and a year of boundless happiness. May 2025 be your best year yet, filled with sunshine and smiles!

Today, we are introducing the Ink & Flip Layerining Geometric Gem Stencil with a matching Sparkle Sentiments stamp set. With so many elements in this set, this stencil can be used in many ways!


The background is created using Wilted violet, abandoned coral, and salvaged patina DO. 


The gem is created using salvaged patina, mermaid lagoon, picked raspberry and kitsch flamingo DO.


 Then, I outlined the gem using gold and black acrylic pen and highlighted the boundaries around using gold acrylic pen again.

 The sentiment and tiny elements are from the Sparkle sentiments set. Bev is offering one set of the stencils away to one lucky comment left on any of the blog posts or across Uniko's social media posts to win the stencil set. 

For more inspiration visit here.

I hope your day will sparkle and shine with this release!

Happy crafting!

Wednesday, 23 August 2023

Pure Florals Gerbera with a Butterfly in Fall colors!

Hello friends!

Happy Wednesday!

Who is ready for fall!!! I love the fall colors as the leaves begin to change and the weather turns cooler!

Here is my interpretation of the fall colors........Uniko BA inspiration post!


Here I paired up the Pure Florals Gerbera stencil with English Country Garden Butterflies stamp set.


I started with using Distress inks and white pigment ink using the Gerbera floral stencil in fall colors. After blending the inks I fussy cut the floral image.


On a white piece of CS, I used MOD background Builder stencil and stamped the sentiment from the Yes, You Are stamp set. I love the soft look background with stripes!

Then stamped the largest butterfly, watercolored it with my ZIG watercolor brushes, die-cut it.


In the end, I assembled all the elements with some die-cut leaves. 

Hope you are inspired by these fall colors!

Happy crafting!

Would love to join these fun challenges:


Uniko Brand Inspiration: Pure Floral gerbera

 Hello to all!

Happy Wednesday!

Once again I used the Pure Florals Gerbera Stencil to showcase its beauty!


I started with white pigment ink on a wine-red CS. For a detailed and deep look at the centre, I overlapped the centre with aged mahogany DI.


I stencilled the flower 2 times with the same method.


Now on a white CS base at the top, I stencilled some wonky stripes look using Wonky stripe stencil with the same colors.


Now added a sentiment white strip with my inked flowers and some cute stamped flutters-by. I accented it with some white pearls and some Posco white paint dots in the centre of the flowers.


Hope you enjoyed it!
Happy crafting!

Would love to join these fun challenges:
I used Stamps, flowers, stripes+ Butterflies

Friday, 31 March 2023

Uniko 11th Birthday Release In Review Brand Ambassador Blog Hop & Giveaway!

 Hello friends!

Happy Friday!

I am back with the review release hop as last time due to some International Post office issues the package didn't arrive on the time. 

Here are the latest releases pic and Bev, the owner of the Uniko studio decided for another chance to win with a blog hop and giveaway!!!


I fell in love when I got the Uniko UP & Away stamp set and Cloud 9 stencil in my hands, so many ideas came to my mind and finally I come up with my watercoloring technique background using Cloud 9 stencil only.


Here are the pics of how I started with my background using this versatile stencil, so many options.....


I used Liquid watercolors to create my background full of cloudy sky and the edge of the sea.


I stamped the images and watercolored them using my ZIG brushes.


Here is the final outcome!


Can you see the silver shining clouds???


Hope you enjoyed it!

Don't forget to purchase any stuff from the Uniko Brand!

 The blog Hop link is here

Bev will choose one lucky winner to receive a Uniko Clear Stamp & Stencil Bundle worth a minimum of £ 30

Simply leave a comment along all stops of the hop before midnight BST Saturday 8th April.

Happy crafting!
Will come back with more inspirations soon using Uniko Brand!!!

Supply list

Stamps: Uniko Up &Away clear stamp set

Stencil: Uniko Cloud 9

Liquid watercolors: poolside, turquoise, shooting star, moss green, evergreen, pretty peony from CrafTangles

ZIG Real Watercolor brushes

Archival Ink: Jet Black

Thursday, 23 February 2023

BA inspiration: Birthday Balloon Bash card

  Hello friends!

Happy Thursday!

Today with my first inspiration post at Uniko Studio Blog. As you all know it's Uniko's 11th Birthday this month, let's celebrate with me!

A Birthday card with a Birthday Balloon Bash stamp set from Uniko. So here is my card:


This stamp set makes it so easy to create! What do you think? Kindly visit the blog for the step-by-step details!

Keep crafting!
Have a wonderful Day!

Would love to join these fun challenges:


Friday, 26 August 2022

Celebrate this day!

 Hello friends!

Happy Saturday!

Today, I wanted to showcase a slimline card to celebrate any occasion!


Hope you enjoyed the steps!
Happy crafting!

Supply List
Cardstocks: Dual texture white CS, coral CS, Victorian pink CS from CrafTangles
Mirror sheet: rose gold from DCAM store
Stencil: blooming buds from Little Birdie
Distress Oxides: picked raspberry and crushed olive
Dies: Slimline Celebrate this day and 3-way modern lace die with shadow from DCAM store; Floretta set dies from Little Birdie
Golden and silver tiny rhinestones from my stash

would love to join these fun challenges:


Sunday, 17 July 2022

Jellyfish fun in summer!

 Hello friends!

Happy Monday!

A new theme at Cut It Up Challenges: Summer fun!

Yayy! First place winner:

https://colorfuloptions.blogspot.com/2022/08/july-winnners-cards.html


I created this underwater scene with summer fun and cute jellyfish in rainbow colors!

Started with the slimline panel. Added sunburst stencilling at the bottom of the panel.


Die cut some a bunch of Jellyfish.


Inking all in rainbow colors.


Die cut some abstract circles and inked them too. Added them all to create my underwater fun scene.


Added some sentiment stickers.


Finished it off with some water droplets.
Hope you all liked it!
Happy crafting!

Supply List

Cardstock: whisper white CS

Notelets: Plain white Slimline Notelets from CrafTangles

Stencil: Sunburst from CrafTangles

Dies: abstract circles and creatures from craftadda

Distress inks: faded jeans, dried marigold

Distress Oxides: Wilted violet, mermaid lagoon, twisted citron, squeezed lemonade, abandoned coral, kitsch flamingo

Sentiment stickers: Handmade LF-CF from hndmd store

Clear Water droplets and glossy accents

Would love to join these fun challenges:

Scrappelyst: Summer Challenge - Everything is allowed

Colorful Options: July 2022

InspirationStation: Inspiration Station Challenge #34 - Picnic- I am inspired by summer season and colors!


Tuesday, 7 June 2022

Best Dad!

 Hello everyone!

Happy Tuesday!

The project I am sharing today is perfect for celebrating the men in our lives!

I used argyle stencil and paired it with the sentiment Best Dad In The World featuring a ties and a cute tiny moustache.


I started by applying DO using a stencil and blender brushes.


Die cut a sentiment Best Dad In The World from the snippets of a navy blue CS with a moustache and tie from a little piece of striped PP.


Die cut a biggest Rhombus frame.

Added those frame, sentiment and popped up the tie with a  moustache.

Happy crafting!

Supply List

Cardstocks: Snippets of Navy Blue CS, Whisper White CS

Pattern Paper: Pretty Basics from Papericious

Dies: Stitched rhombus from Craftadda; Best Dad from DMC- Crafters Corner Brand

Stencil: Argyle from CrafTangles

Distress Oxides: salvaged patina, mermaid lagoon, kitsch flamingo

Would love to join these fun challenges:

https://www.hndmd.com/articles/craftangles-monthly-challenge-june-2022/


Thursday, 14 April 2022

You will reap what you saw!

Hello everyone!

Happy Thursday!

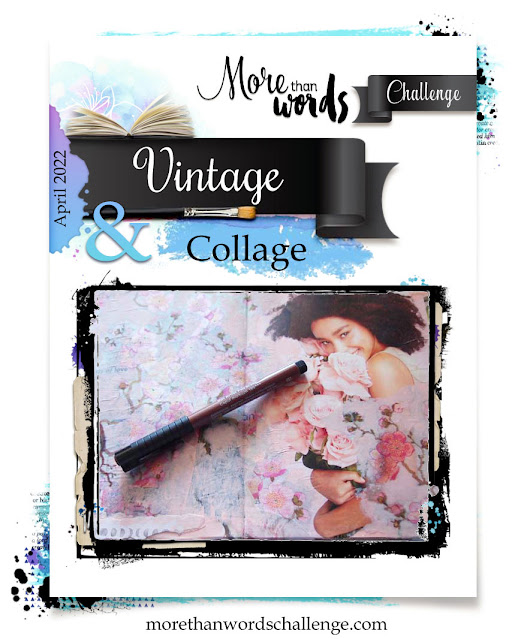
This time I explored Art Journaling with Mixed Media.

Here I created a vintage + Nature themed spread in blue hues for this page.

This Journal page has so many things that are my favourite and it also took me out of my comfort level. I wanted to give this page such wonderful textures.

I struggle a bit with a few things. This piece also has a rich meaning and I spent a lot of time searching for the papers, elements, and stickers that I used in this because they tell the story and the meaning.

The saying "you will reap what you saw" just hung in my heart this week so I knew I needed to create with it. The saying means "if you plant seeds or do something good, you should expect to reap rewards later."


I started playing with my liquid watercolours using a vintage damask stencil.


I wanted an aged and smudged look, I didn't want it to be perfect.
I added lots of textures, and interests to reveal underlayer papers where I wanted to show my stencilling parts. I added liquid watercolours poolside and evergreen with lots of water. Then outlined the areas with a black pen using the same stencil and some old script newspaper stamping using DO.


Well I found some Khaki paper bags and grey jute bags and decided to would give it a makeover.
 I recycled them to make my own little envelope by adding an old script sticker roll inside the envelope and cutting a jute bag piece for backing the envelope. Die-cut some wildflowers, sprigs.


Whilst I left my page to dry I started to gather some ephemera and a photo for my focal element and I layered it and glued them together ready to put on the pages.
Added some dried bunch of flowers to the hand with a piece os little vintage script sticker.


Before applying all the ephemera labels I applied golden texture paste for a mysterious look.
 I added different ephemera stickers with lots of paper layers, journaling labels, washi tapes.
Gave it some distressed, faded and scratched look by adding some pearl white acrylic colour.
I just love how it turned out.


I really wanted to tell the story through papers and journaling stickers. 


I added that envelope at my focal point to pop up.  to create with my wildflower garden. I wanted some dark flowers with soft look wild flowers as well.


I really discover and practise new ideas and put down some labels with my thoughts.
I added some white splatters to bring this piece together.


Adding quotes or texts is a good way to enhance the aesthetics. So I finished it up by writing this message!
Added those journaling labels.


I wanted the unfinished look of wax seal stamping saying You make me Happy.


Then distressed all along the page using Hickory smoke ink for the faded look as well and have some contrast.

This is a really cool feeling with cool colours for me with a vintage feel what this piece is all about. So every single piece related has meaning to my saying. 

The flowers are the growth, new buds, new beginnings, new life and those ephemeras tickets are the part of travel, the hand is representing my dream, creativity, pour some tender love and watch it grow. All those washi touches and splatters are the art of this nature's creative journey. Be patient and dreaming a good life!

It's not too late........You're not too young or too old...... It's just the right time to do what you've always wanted to do.........CREATE!

I hope this project inspired you!

Happy crafting!

Supply List

Art Journal Diary

Paper pack: Wild about blue 6"x 6" from CrafTangles, Beautiful flowers paper pack from Jags

Cardstocks: Rosewood CS from CrafTangles, Black CS

Liquid watercolours: Poolside and evergreen from CrafTangles

Stamp: Old newspaper from CrafTangles

Stencil: Vintage Damask from CrafTangles

Dies: Floral Springs (set of 5) and Line art flowers (set of 4) from CrafTangles

Texture paste: Golden Dragon from CrafTangles 

Sticker Rolls: Pretty plaid 1 and Old script from CrafTangles

Journal Stickers: Traveller from CrafTangles

Creativity Sentiments 2 from CrafTangles

Dry flowers: RAWDF-2 from CrafTangles

Wax seal beads: Metallic Blue from Craftangles

Wax spoon from CrafTangles

Sealing stamp: You make me happy

Acrylic Chalk Paint: Buttermilk from Little Birdie

Acrylic colour: pearl white Camlin brand

Distress Oxides: Mermaid lagoon and Hickory smoke

Add gel soft line black pen

Handmade paper Steel grey, washi tapes from my stash

Would love to join these fun challenges:

https://www.hndmd.com/articles/craftangles-monthly-challenge-2022-april/