Showing posts with label Wow Embossing powders. Show all posts

Thursday, 18 May 2023

Because I Love you!

 Hello everyone!

Happy Thursday!

My card is created by metallic rich gold pale heat embossing floral framed image twice on a black CS.


Here are the steps:


Then using my polychrome pencils I colored the image with the greeting in the middle. Adhered it to a white CS with a metallic gold mirror frame, simple and super easy!

Thanks for stopping by today!
Happy crafting!

Would love to join these fun challenges:


Wednesday, 16 November 2022

May your season sparkle!

 Hello everyone!

Happy Thursday!

Today I am going to share a Christmas card with winter trees, kraft animals, snowbanks, sparkles and a lot of textures!

Yipee!! Look at the cute badges I won:

https://letssquashit.blogspot.com/2022/12/lets-squash-it-lets-make-christmas-card.html


The basic white top layer is debossed using spots EF from Itsy Bitsy.

My card base is a textured coconut cream CS. I added an inverted scalloped rectangle in Kraft color with dimension and created this adorable winter scene.

Added a torn snowbank to give detail and a layer of sparkle is heat embossed for more interest.

I die-cut some Christmas trees from a dazzling cream embossed textured sheet and a glittery tangerine sheet.  The cute fawn is in the kraft sheet.

The neon sunset glitter dots are the perfect combo with Kraft paper. I stamped the sentiment using archival ink.


Hope you enjoyed the process!

Happy crafting!

Supply list

Cardstocks: Kraft and coconut cream CS

Textured sheets: Glittery Tangerine and embossed cream CS

Stamp: Snowflake kisses stamp set from Little Birdie

Dies: Winter Trees, Chrismas set of 5 from DMC brand; Inverted scallop rectangles from Die Cuts and more

Archival ink: fired brick

Glitter Glue: Neon sunset from Itsy Bitsy store

Embossing Powder: Hero from WOW

Would love to join these fun challenges: 

https://de-egel.blogspot.com/2022/11/november-challenge-151.html

https://abcchristmaschallenge.blogspot.com/2022/11/abc-christmas-challenge-w-andor-x.html


Monday, 7 November 2022

A Gift for You

 Hello to all!

Happy Tuesday!

     I love the idea behind this card, that of sparkly embossing flowers and watercoloring in fall colors with a warm feeling.


I started by stamping the flowers and leaves on a white textured CS. Heat embossed the outlined images with Hero EP. Watercolored them with ZIG brushes and fussy cut them all.


Die cut a flower basket out of a textured white speciality sheet.


My card base is old lace CS and I added a sparkly chocolate color embossed sheet on it. Arranged my flower basket. Before adhering to the sheet I tied a dual-shade sparkly thread along with a textured fabric lace piece.


Added a wax seal stamp in the dual shade and highlighted it with my gold pen.


In the end, added a die-cut word celebrate out of a gold glitter sheet and enhanced the beauty of this card with some wax seal drops in brown color. Love all the shine and sparkle on it with the autumn feeling!!!

Hope you like it!
Happy crafting!

Supply List

Cardstocks: Old lace and Dual textured white CS from CrafTangles

Embossed textured sheet: chocolate brown

Glitter CS: Gold from the DMC store

Textured sheet: white

Stamp: Magenta from Kaisercraft

Dies: flower basket from Itsy Bitsy store; celebrate from Peek-a-boo Designs

ZIG watercolor brushes

Embossing powder: Hero from Wow

Sealing stamp: Gift for you from Hndmd

Sealing round wax sticks: Copper and brown

Acrylic paint marker: Gold

Textured fabric paper in kraft color

Would love to join these fun challenges:

http://allsortschallenge.blogspot.com/2022/11/week-701-sparkle-and-shine.html

http://wordartwednesday.blogspot.com/2022/10/anything-goes-weeks-567-568.html

https://daranddiane.blogspot.com/2022/11/thankfulblessingsgrateful-challenge.html

https://inspirationstationchallenge.blogspot.com/2022/11/inspiration-station-photo-inspiration-41.html


Sunday, 27 February 2022

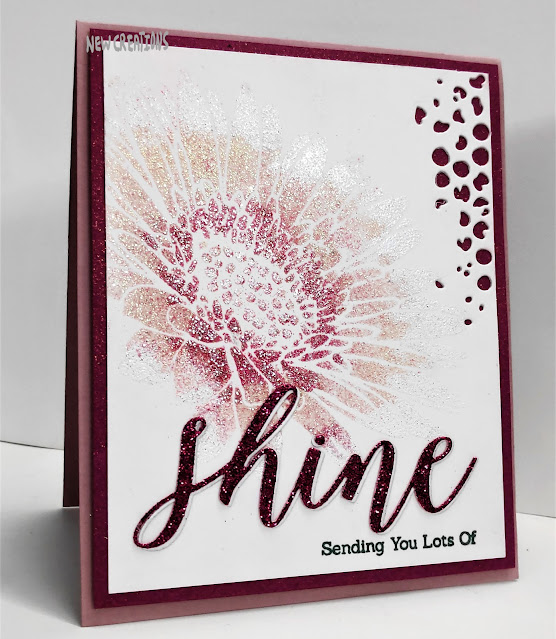
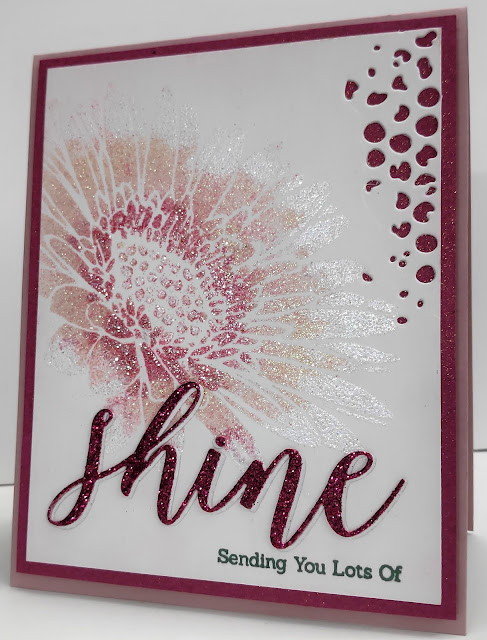
Ombre glittered Gerbera in shades of pink!

 Hello everyone!

Happy Sunday!

Have you got lots of embossing glitters in your stash but ensure how to use it I have a technique for using glitter in ombre style look to make your card shiny and sparkly, so let's get started!

I am showcasing Gerbera's stencilled flower. It features gorgeous details and fine lines. The generously-sized flower allows you for an abundance of techniques whether it is water coloring, ink blending, heat embossing to make different patterns always!

Happy to share:  In Top picks here:

https://pixiessnippetsplayground.blogspot.com/2022/03/results-of-challenge-422.html


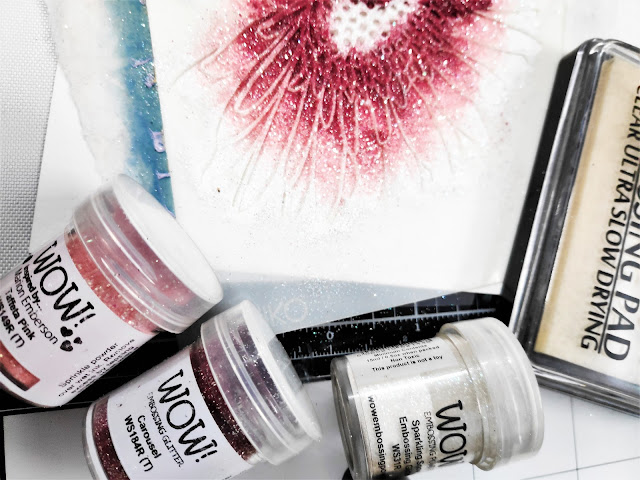
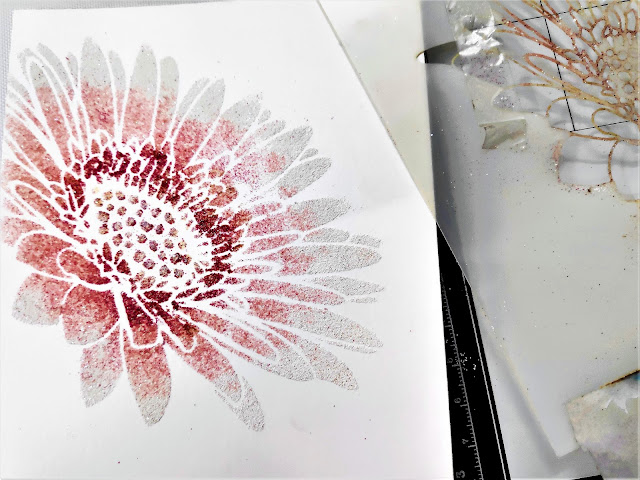
I started off with my Gerbera stencil on a white panel and applied clear embossing ink using my dauber. Covered the embossed ink design using 3 different embossing glitters as shown in the below pic:


Now heat embossed that panel, love the results.


The sentiment is from the Happy Succulents stamp set. Now added some Mixed Media die dots at the top right corner for some textures.
Die-cut a bold shine sentiment 2 times and adhered the glittery pink on the white one for the shadow look. Placed that die cut sentiment.


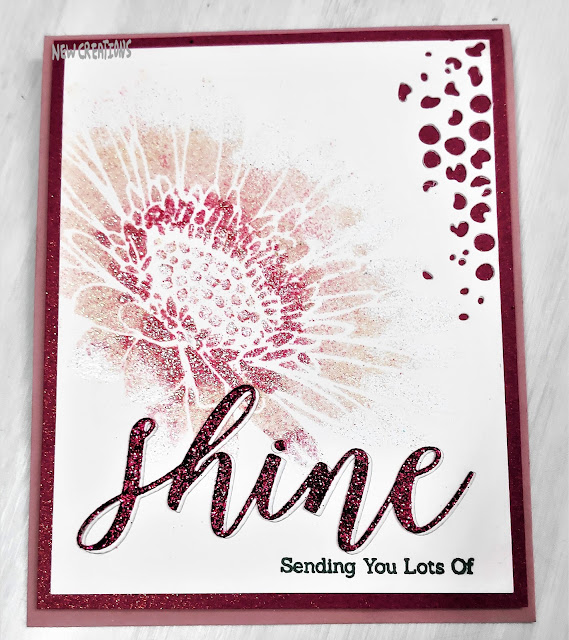
Tried to showcase from different angles!
Adhered that panel on a snippet of dark pink glittered sheet and then my card base.
I made this card for my daughter's friend to make her day more special with some shine as she loves sparkles!
Wishing you all a lovely day!
Happy crafting!

Supply list
Cardstocks: Snippets of Whisper White CS, sparkly pink CS, Victorian pink from Craftangles
Glitter sheet: Snippets of Dark pink glitter sheet from Itsy Bitsy
Stencil: Pure Florals Gerbera from Uniko
Stamp: Happy Succulents set from Uniko stamps
Dies: sentiment Shine from Winnie & Walter; Mixed Media 660220 from Sizzix
Embossing ink: Clear ultraslow drying from Wow
Embossing glitters: Sparkling snow, Taffeta pink, Carousel from Wow
Dye Ink: Black licorice from Lawn Fawn

Would love to join these fun challenges:


Monday, 10 January 2022

Birthday Party Balloons!

 Hello!

Happy Tuesday!

Oh my did I have fun making this card!! I did a Birthday card full of party balloons! 

I added lots of new stuff to my stash and these die balloons set is my new goodies addition with new embossing powders too! This card is a bit different too........ the balloons are embossed with different textures to make a bouquet!

I started with die-cut my ballons in two sizes. Covered them all in clear embossing ink and heat embossed in different colors and textures.


 After heat settings, I got these super gorgeous and sparkly balloons!

 Added some curly balloon strings. It looks like little raised using pop dots. I added a strip and embossed the sentiment to give it a contrast of some black with a pop of all different color balloons.

And of course, every card is in need of a little bling especially when it is for such a special person, I added enamel dots. 

All these balloons are making me feel like it's party time. They are such a happy subject to be playing with......... so there is a ton of Happiness!

Happy crafting!

Supply list

Cardstock: Ultra smooth white CS from Itsy bitsy

Stamp: Big Birthday Wishes stamp set from SSS

Dies: Nesting rectangles from Tattered lace; Balloon die set from peek-a-boo designs; Happy word from Wild rose studio

Embossing powders: Taffeta pink, lime tricky, Tangerine dream, midnight dream, Sara Naumann, sea mist, primary lemon, fizz, bang, black magic, Hero and Opaque bright white from Wow

Stickles: cotton candy, turquoise

Enamel Accents: Electric lime, blue ribbon

Pearl drop: snow white

Would love to join in these fun challenges:

https://daranddiane.blogspot.com/2022/01/party-balloons-challenge.html- who doesn't love Birthday Party Balloons. I am inspired by the bunch of colorful balloons, sparkles, fun! Happy 6th Birthday!

http://timeoutchallenges.blogspot.com/2021/12/challenge-204-new.html


Friday, 24 December 2021

Blingtastic snowflake on Christmas eve!

Hello friends!

Happy Friday and Merry Christmas eve!!!

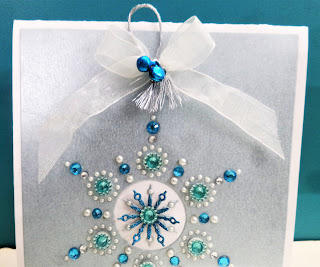
On this Christmas eve, I made a fun, elegant and easy jewelled snowflake card using a beautiful snowflake die, a perfect focal point!

 My card is inspired by a Create a Smile mood board!


I took a piece of metallic pearl shimmer CS in baby blue and die a snowflake, just so pretty.
Then I adhered that panel to the white card base.
Using my tweezer I placed each individual pearls and rhinestones....... the tiniest white pearl took a little extra time:). Just beautiful!

A closer view with tiny details:


Embellished it with a white shimmery ribbon bow along with a silver string and some turquoise anklet bells.


I heat embossed the sentiment in the same tone of baby blue pearl sheet with blue pearl EP for tone on tone effect.


Perfect little details on the snowflake! What do you all think? I love the way my Christmas snowflake look now!
Happy and merry day!

Supply list
Cardstock: Glossy white CS from Crafters Corner store
 Metallic Pearl Shimmer CS: Baby blue from DCAM store
Glitter sheet: turquoise blue
Die: Cool cuts Negative Snowflake die from Create a Smile 
Stamp: Snowy/ Holiday set from Winnie & Walter
Adhesive Rhinestones and half pearls: white pearls in different sizes and turquoise blings in different sizes from my stash
Anklet Bells: Turquoise color pack from  Itsy Bitsy store
White Shimmery ribbon from my stash
Silver string from Crafters Corner store

Would love to join these fun challenges:
https://createasmilestamps.blogspot.com/2021/12/we-dare-you-to-create-smile-december_01235051424.html- I am inspired by cool blue color, snowflakes, ribbon bow and some blings


Sunday, 31 October 2021

Sunshine Blast card and an announcement!

Hello everyone!

Happy Monday!

I am so excited with an announcement as I am one of the Trinity Brand Ambassadors, Happy dance!!!

I received a Stand Alone Centre Burst die along with a freebie Teacup die as an order.

The Center Burst die is just Fabulous and can be used with many variations! You can use any color cardstocks or designer paper or any technique to make a stunning card.

 I think the Center burst die is so easy to get those perfect rays! 

I am showcasing this fab die in a unique way to use!


I cut out the Center Burst die out of Pearlescent Cream and black color CS. Then I take out the sunrays part and heat embossed them with Blue Pearl EP. 


Look at the difference on both white and black CS  using an awesome embossed pearly look on the pieces of these sun rays.


I used the sunburst outlined part and popped it up on my card base. Adhered all the heat embossed sunrays pieces in the negative space as shown in the pic.

I heat embossed the sentiment too and fussy cut it. I really like the way this sentiment looks on the base of the Burst die.


I embellished it with some bubble blow Out mixatives and it looks like snowfall in the sky.

Well, that is all for me today!

Happy crafting!

Trinity Stamps Products

Stand Alone Die: Slimline Center Burst Die set 

Embellishment: Bubble Blow Out Mixatives

Other Products List

Cardstock: Buttercream and black CS 

Pearlescent CS: cream golden color

Sentiment: Uniko stamps

Embossing Powder: Blue Pearl from Wow


Monday, 11 October 2021

Poppy flowers Pop-up card!

 Hello to everyone!

Happy Monday!

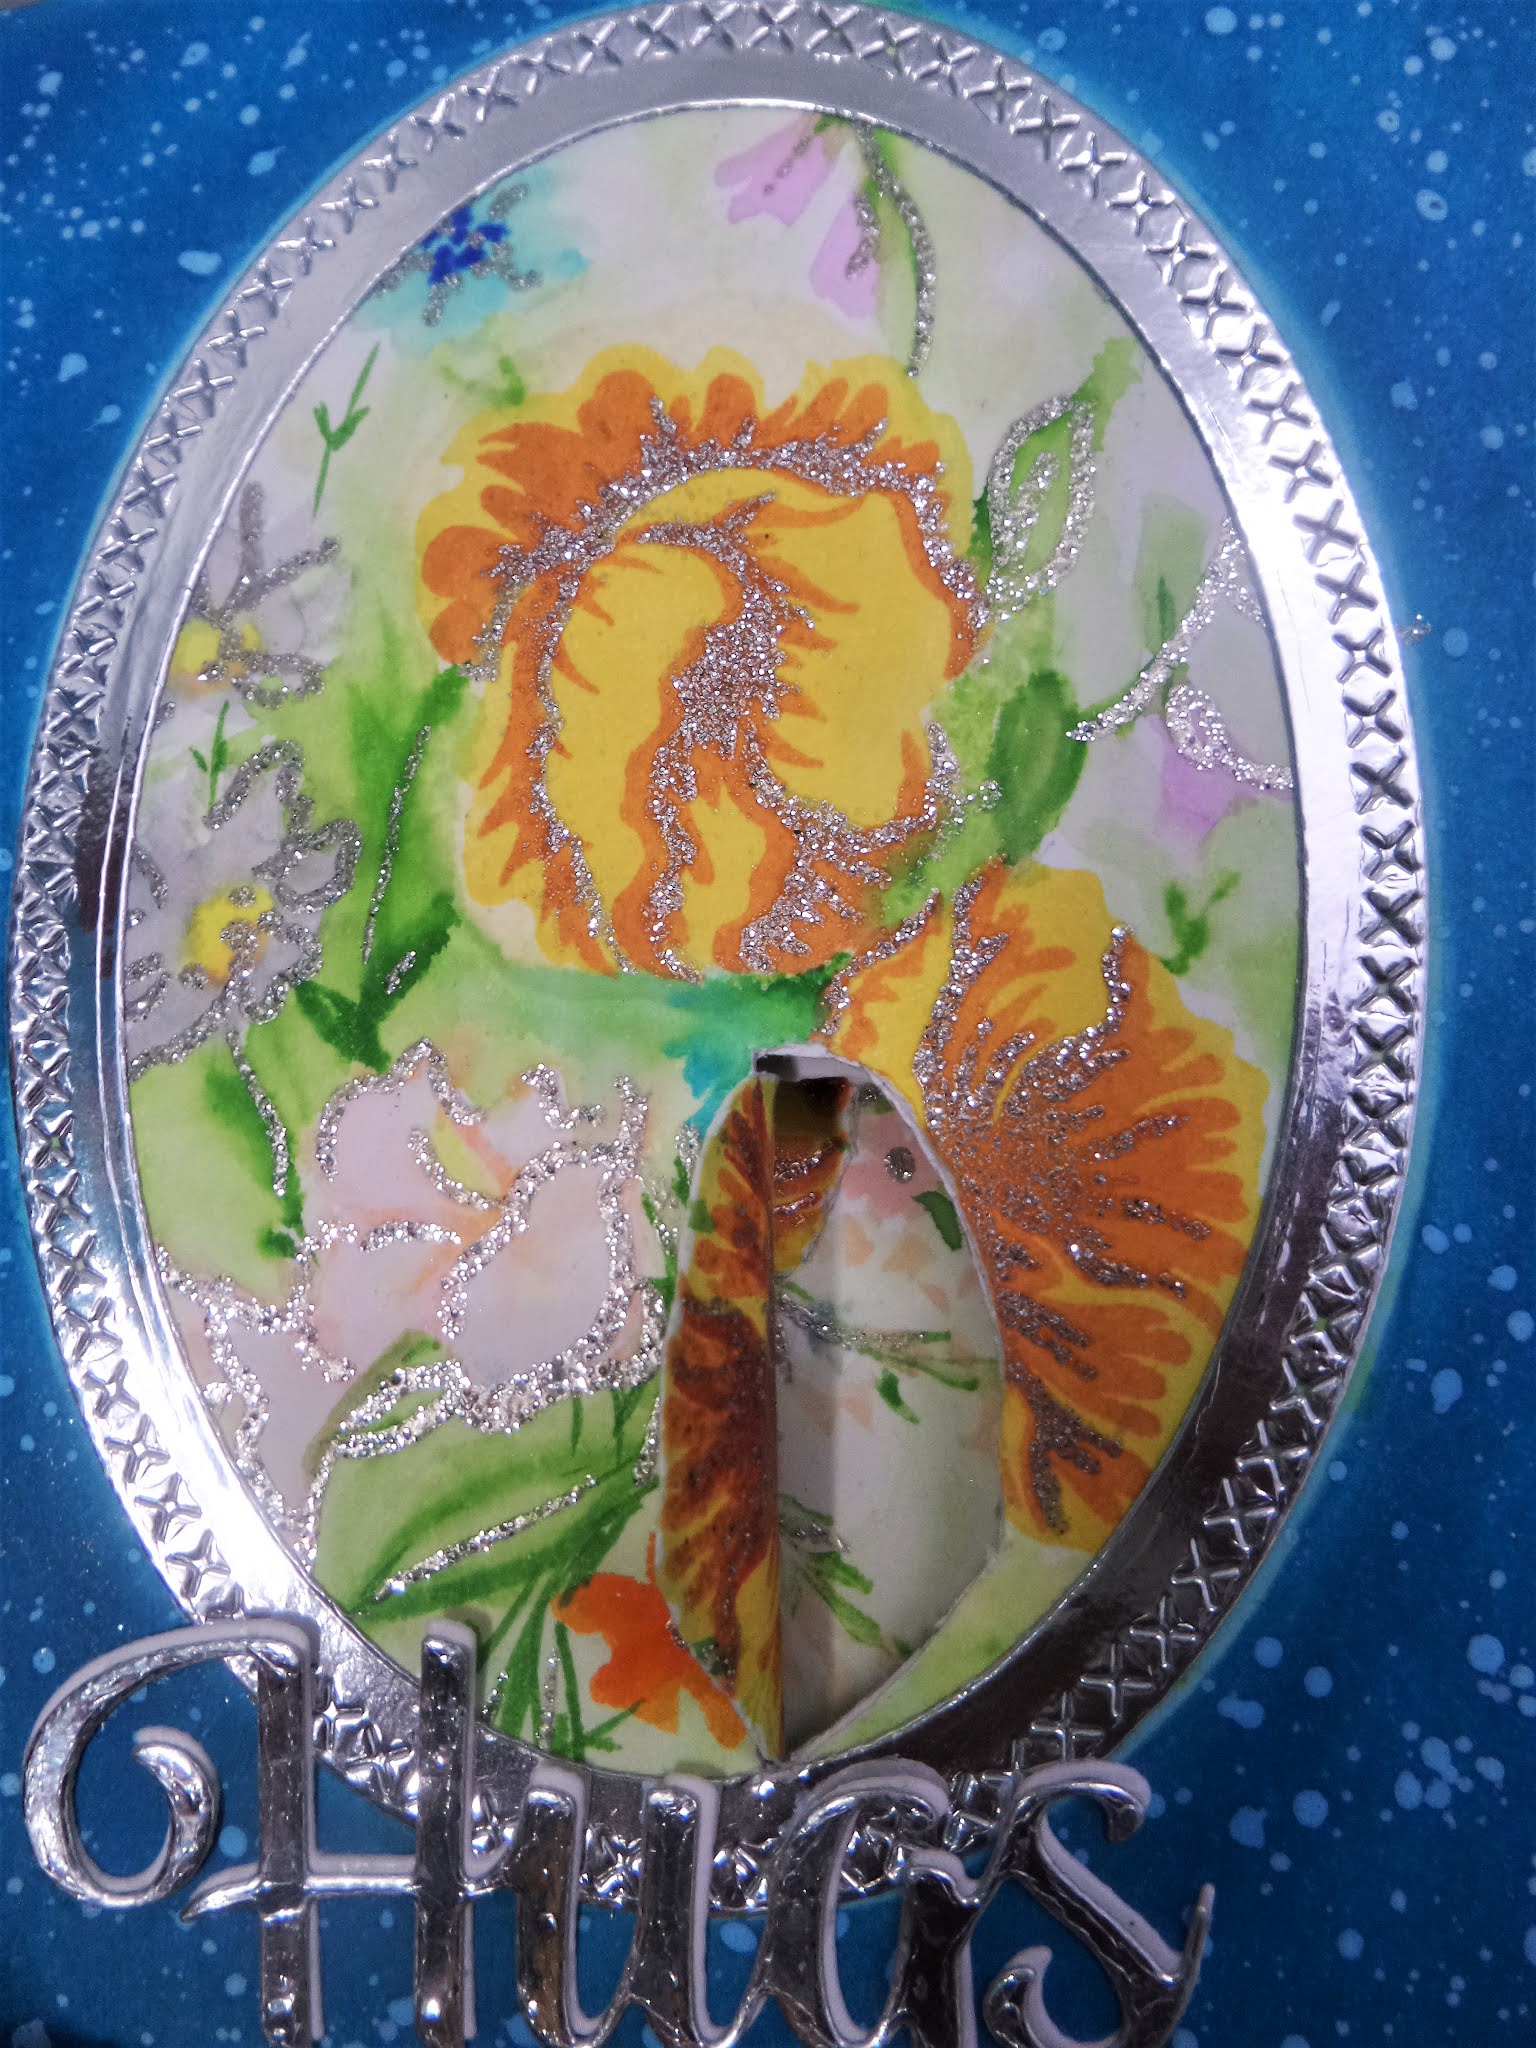
This is a pop-up card with an autumn colour feel on it. I love to experiment with my work and for the first time tried the pop-up elements inside with simple cutting and creases.


I started with an A4 white CS and created the creases in between as shown in the below pic. Now fold it on the creases.


Now stamp the layering poppies using Altenew inks and the last layer I heat embossed in silver sparkle EP.


Die-cut a cross-stitched oval frame shape out of a snippet of silver Mirror CS. And blended the outer space using DI, I used my oval die for blending the colour and added some white splatters.


Now hand-drawn some flowers and watercolored them. Using an embossing pen I created some silver sparkle outlines and details to the bunch to match with my poppy flowers. And placed that die cut oval on it. 


Die-cut a hug sentiment our of a snippet of silver mirror CS and placed it.


Now here comes the inside part.
I started by stamping Poppy flowers with a heat embossing layer. And created a watercolored background using my ZIG brushes with a hand-drawn butterfly.


Now my inside part is completed with a bunch of flowers in autumn colors.


I applied DI all over the edges and heat embossed the sentiment in silver sparkle EP. Created a silver sparkle outline using an embossing pen and some splatters.


Now how I popped up and gave cuts to my design shown in the below pic with some creases and added a silver mirror sheet to the other side. 


Here are some close-ups.


I enjoyed making this pop-up card. Hope you all like it!

Happy crafting!

Supply List
Cardstock: Smooth white CS from Itsy Bitsy
Mirror CS: silver from Itsy Bitsy
Stamps: Poppy perfect and Be happy stamp sets from Itsy Bitsy
Dies: Stitched ovals and hug sentiment from Itsy Bitsy
 Dye inks: Buttercream from Altenew; Dandelion, Tangelo from Memento
Distress inks: mermaid lagoon
ZIG watercolor brushes
Misti
Heat embossing pen: Wow brand from Itsy Bitsy
embossing ink pad from Itsy Bitsy
Embossing Powder: Silver sparkle Wow brand from Itsy Bitsy
Trimmer from Crafters corner
Acrylic paint: snow white from Itsy Bitsy

Would love to join these fun challenges: