Showing posts with label Winter. Show all posts

Monday, 28 October 2024

It's Beginning To Look Like... Uniko October/November Release Sneak Peeks!

 Hello everyone!

Happy Monday!


Are you ready for some Festive and Seasonal Holiday sets for this Christmas Celebrations? 

This time Bev is again relaunching 2 retired much love stamp sets on demand which launched in 2012 and 2016. Now with some freshness, we are going to introduce them again, here they are........ 


Now these 3 are brand-new stamp sets, have a sneak peek!


I am so excited to see all these and can't wait to showcase what I am working on!!!


Happy crafting!
Lots of love


Tuesday, 20 December 2022

Celebrate every moment!

 Hello to all!

Happy Tuesday!

I am in love to make 3D Christmas tags, so made another one for this festive season and to decorate my Christmas tree with a winter feel & blue frosty theme!

I tried to create a scene on both sides of the tag, as a girl watching from her window, a snowman playing in the winter with the snowball and on the other side a car borrowing a Christmas tree as a gift while going to the house through the Winter Wonderland!!


There are a lot of tiny details. I started by die-cutting the outlined Christmas tree with a star border tree out of a holographic sheet and added the acetate die-cut sheet behind them. And started decorating my tree from one side as shown in the below pic with a closure look:


Now decorated the other side!


a closer look:


I added snow paste for winter textures and cotton for the snow textures.
Here is a YouTube link to visit:https://www.youtube.com/shorts/eYBSXOxj2sw

Hope you all like it!

Happy crafting!
Supply list
Cardstocks: Plain Holographic CS, Garnet Matte CS and Turquoise Matte Foil CS from Die cuts and more brands, dual-textured white CS from CrafTangles, light cream textured CS
Acetate Sheet: Crafters Corner store
Glitter sheets: Silver and brown from DMC Brand
Dies: Christmas tree set, cute houses, snowflakes from Christmas set die DMC Brand; window set, mini doilies set of 4, a car with Christmas tree set from craftadda
Snow Paste: Cadance brand
Clear Pet Stickers: Girly from thelittle_wings shop
Special textured fabric net sheet: from thelittle_wings shop
Motif sheets: Christmas & Jinnie from DCAM brand
Rub-on: Brown flower flourish from Itsy Bitsy store (retired)
Washi tapes: Penguins, months, foiled sentiment from Nirmal Stationer store
Slices: Snowflakes and stars- glow in the dark from DMC Brand
Pompom, cotton, white thread, and silver gems are from my stash

Would love to join these fun challenges:


Monday, 5 December 2022

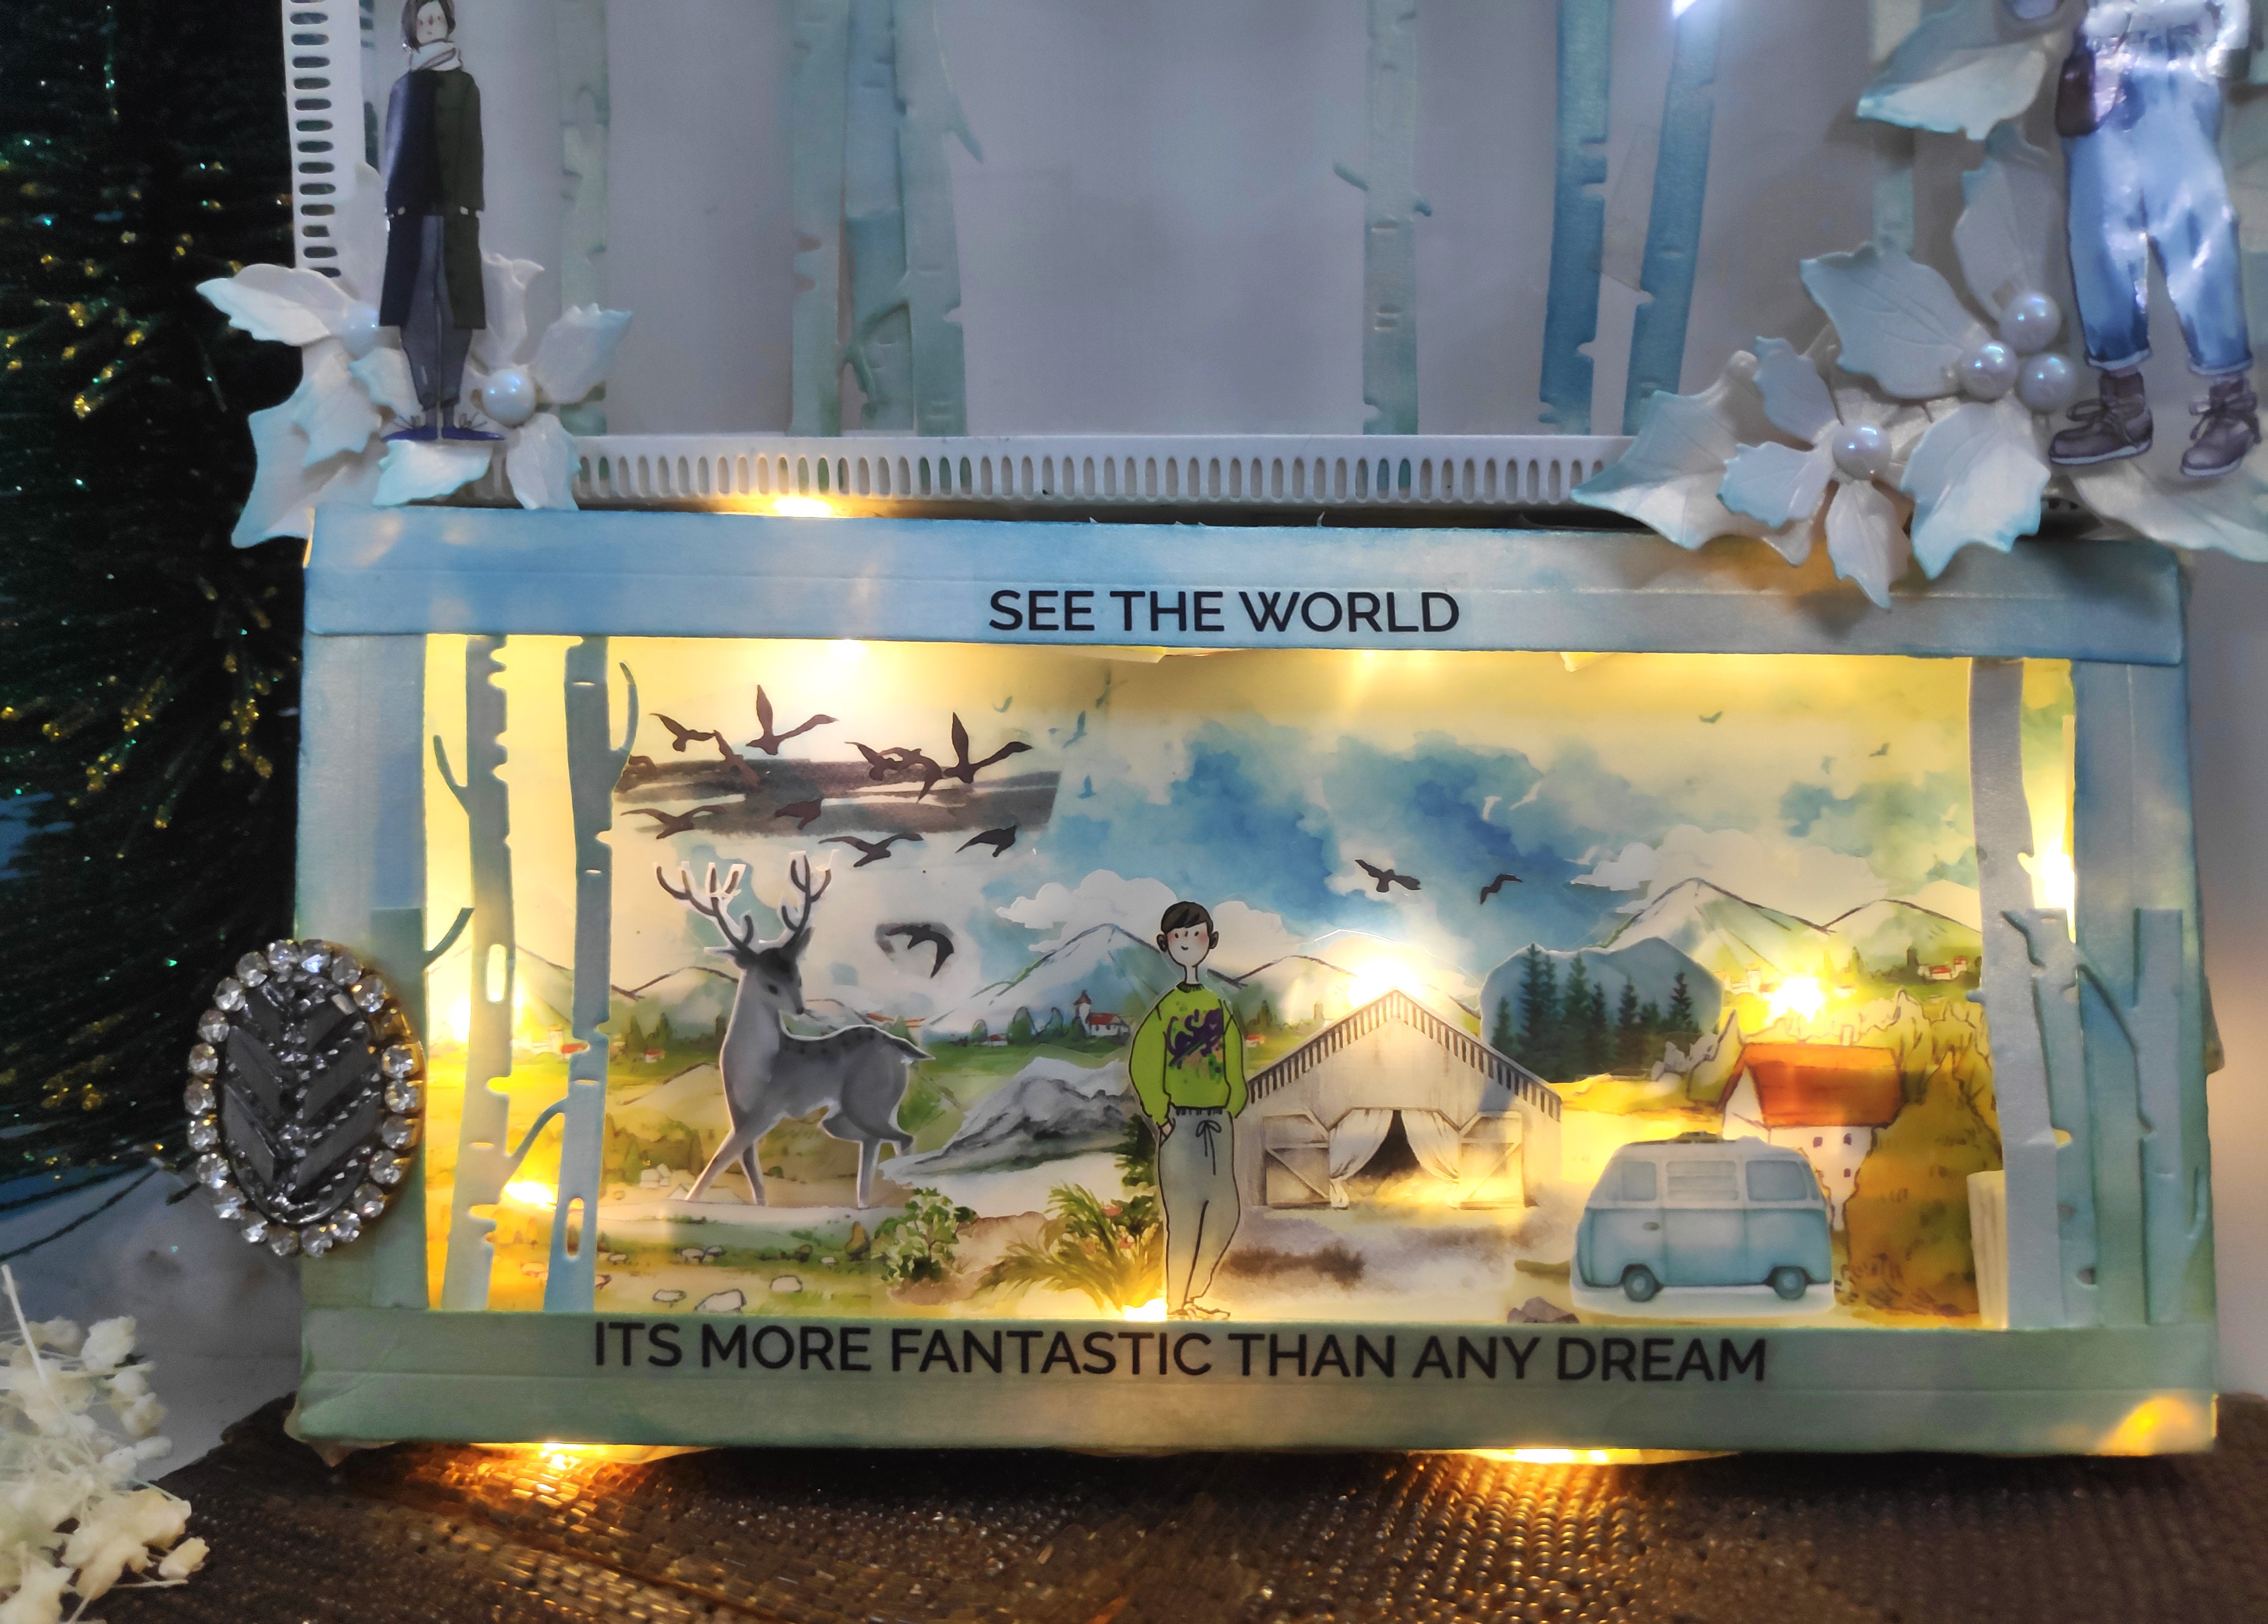
Winter Wonder Landscape Shadow Dream Box!

Hello friends!

Happy Tuesday! 

Hope you all enjoyed your weekend!

I love creating scenes and made my first own shadow box. I just love the depth of this winter theme landscape scene, I enjoyed it so much!

Yipee- I won the challenge here!!!

https://letscreatechallenges.blogspot.com/2023/01/challenge-191-ag-black-and-white.html

And I couldn't resist adding LED light to make it even more magical!


Hereafter opening the lid.


I just started by making the box using slimline dies and added a panel of an acetate sheet in the top centre of the box and lots of washi tapes and stickers.


Added the washi tape layers using foam tape for a 3D look with textures.


After creating all the layers I added LED lights to my box.


Added a few distressed ink birch trees at the top lid of the box.


Now added some people travelling through this landscape, watching deer, camping, clicking pics, and enjoying winter!


Some poinsettia flowers were added to the lid corners with a girl sticker.


In the end, I added a little decor charm to open my box easily with a cute sentiment perfect for this theme!
Hope you all like it!

Supply List

Cardstocks: Coconut cream CS; Cream Pearl metallic CS

Dies: Trees with deers  and Poinsettia flowers set from DMC; Slimline large shadow box die and slimline celebrate this die from DCAM brand

Distress oxides: salvaged patina, rustic wilderness, mermaid lagoon

Clear Pet Stickers: couples tape, planner figures, Blue Scenery from the little wings shop

Clear Pet Stickers Roll: Landscapes from craftadda

Paper for journalling with elements: colourful elements (50 sheets)

Washi Tape: Vintage Script from craftadda

Transparent Sentiment Sticker sheet: Travel sentiments 2 from CrafTangles

Half shine adhesive pearls: white

An oval-shaped decor charm and LED light  from my stash

Would love to join these fun challenges:

https://christmas-craft-creations.blogspot.com/2022/11/november-challenge-washi-tape-dt-call.html

https://abcchristmaschallenge.blogspot.com/2022/11/abc-christmas-challenge-w-andor-x.html- adding LED lights made it more magical with 3 D look and x-tra special!


Wednesday, 16 November 2022

May your season sparkle!

 Hello everyone!

Happy Thursday!

Today I am going to share a Christmas card with winter trees, kraft animals, snowbanks, sparkles and a lot of textures!

Yipee!! Look at the cute badges I won:

https://letssquashit.blogspot.com/2022/12/lets-squash-it-lets-make-christmas-card.html


The basic white top layer is debossed using spots EF from Itsy Bitsy.

My card base is a textured coconut cream CS. I added an inverted scalloped rectangle in Kraft color with dimension and created this adorable winter scene.

Added a torn snowbank to give detail and a layer of sparkle is heat embossed for more interest.

I die-cut some Christmas trees from a dazzling cream embossed textured sheet and a glittery tangerine sheet.  The cute fawn is in the kraft sheet.

The neon sunset glitter dots are the perfect combo with Kraft paper. I stamped the sentiment using archival ink.


Hope you enjoyed the process!

Happy crafting!

Supply list

Cardstocks: Kraft and coconut cream CS

Textured sheets: Glittery Tangerine and embossed cream CS

Stamp: Snowflake kisses stamp set from Little Birdie

Dies: Winter Trees, Chrismas set of 5 from DMC brand; Inverted scallop rectangles from Die Cuts and more

Archival ink: fired brick

Glitter Glue: Neon sunset from Itsy Bitsy store

Embossing Powder: Hero from WOW

Would love to join these fun challenges: 

https://de-egel.blogspot.com/2022/11/november-challenge-151.html

https://abcchristmaschallenge.blogspot.com/2022/11/abc-christmas-challenge-w-andor-x.html


Saturday, 18 December 2021

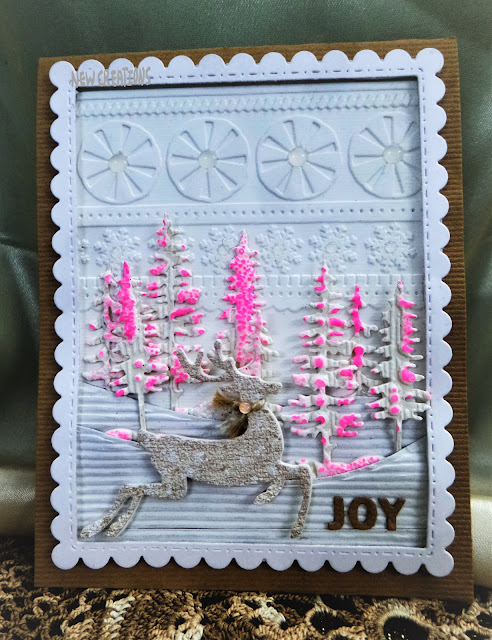
Winter scene on Kraft!

Hello to all!

Happy Sunday!

Imagine, just a week left to celebrate Christmas!

Yayyy! In Top 3!

https://allsortschallenge.blogspot.com/2021/12/good-afternoon-to-you-all-we-hope-you.html

Here I made another card with lots of white and vintage feel on it with some pink Christmas trees and a cute reindeer!


For the winter scene background, I started with a Kraft card base. Embossed a white panel. Die-cut some rectangle scalloped frame, some corrugated winter hills. 


Die-cut a reindeer from a snippet of the textured light brown sheet.


Now created the whole background of the winter scene. Die-cut some Christmas trees from the snippets of an embossed white sheet. and inked some raised parts with neon pink ink.


Added the letters JOY.


Tied a jute twine as a muffler to the reindeer neck.


Embellished it with some semi-transparent iridescent baubles.


Some more pics:


Something different from my style. Hope you all like it!

Enjoy your day and keep crafting!

Supply List

Cardstocks: Kraft textured CS, Smooth white CS, Coconut white CS

Textured sheets: White corrugated sheet, light brown textured sheet, an embossed sheet in white from my stash

Embossing Folder: Swirls and ribbon set from Sizzix

Dies: Winter trees and Reindeer from Dress my craft store; Nested rectangles from Tattered lace; scalloped stitched rectangles from Gina Marie designs; Borders 1 from paper smooches; JOY word- Holiday Tiles cutaways from Winnie & Walter

Neon Ink: Pink

Embellishment: Fortune teller from Trinity Stamps

Glossy accents

Jute twine

Would love to join these fun challenges:

https://letssquashit.blogspot.com/2021/12/challenge-15-any-embossing-folder-any.html