Showing posts with label washi tapes. Show all posts

Thursday, 12 January 2023

Collect beautiful moments- Double page art journal spread!

Hello everyone!

Happy Friday!

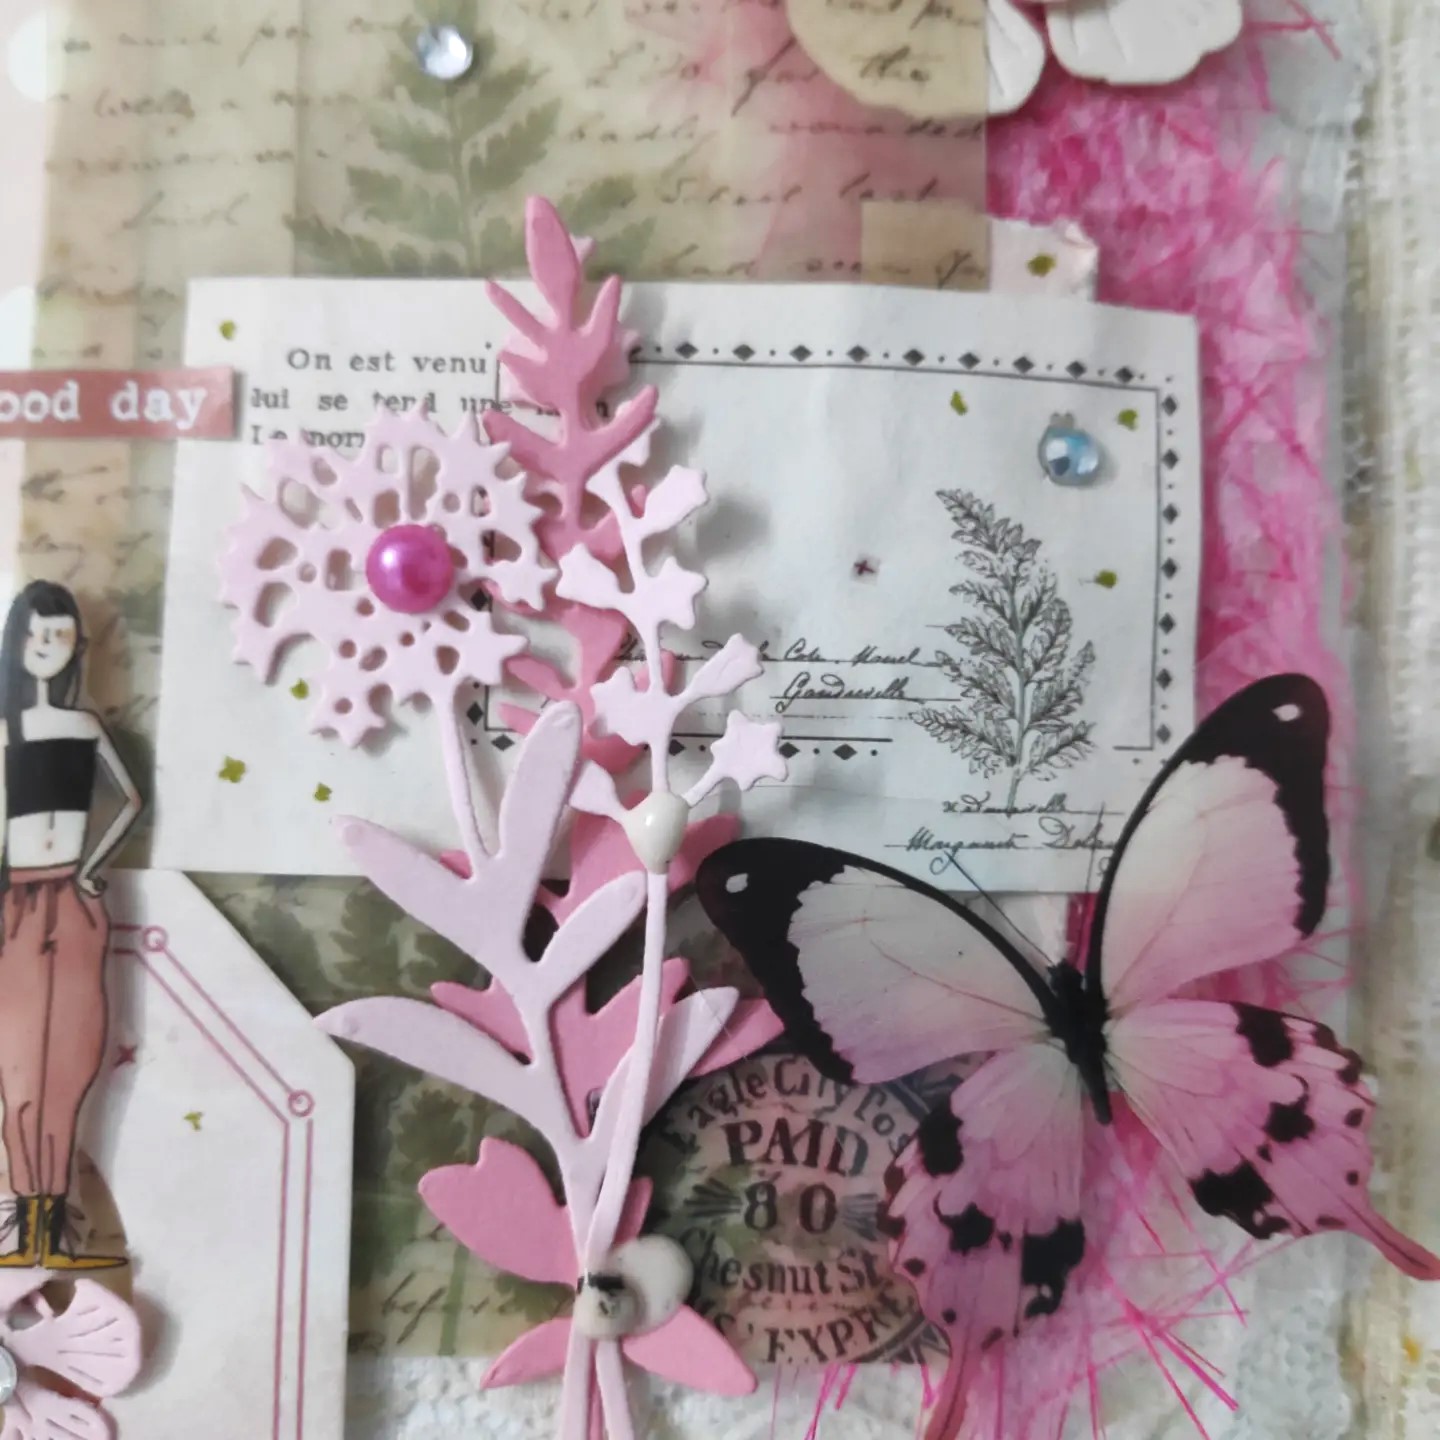
An art journal spread in pink with a shabby chic style, is not my cup of tea but I tried!! 

Hope you all like this!

Happy dance here:

https://butterflyspotchallenge.blogspot.com/2023/01/winners-176.html

I paired the abstract beauty girl with the pink theme.


Hope you enjoyed this new addiction of work with a lot of layers, stamping, and a girly theme with a nature walk page!

Happy crafting!

Supply list
Journal diary: Craftangles
Cardstocks: Rose, baby pink, flax CS
Speciality paper: Leather paper in pink is used for the tag, fabric jute paper in rose pink
Designer papers: polka dot print, script print, flower print from my stash
Dies: ornate frame die set of 3, Floral set of 5, flower branches from craftadda and Tag die from Nellie's nest
Stamps: ledger and bird print set from Hndmd store
Archival Ink: black, brick colors 
clear PET girly tape, sentiment sticker, memo pad, labels from thelittlewings shop
Abstract girl washi sticker roll from Craftangles Brand
clear PET rose flower tape, butterfly stickers in pink, vellum note pack,  seal wax stamp, white and pink wax beads, and dried flowers in pink from craftadda Brand
White Floral laces and white net
Gold metallic pen and blings

Would love to join these fun challenges:
https://butterflyspotchallenge.blogspot.com/2023/01/176-spin-butterfly-wheel-with-f-for.html: I used butterfly stickers, colors: french rose, flax and forest green in vellum printed leaf


Tuesday, 20 December 2022

Celebrate every moment!

 Hello to all!

Happy Tuesday!

I am in love to make 3D Christmas tags, so made another one for this festive season and to decorate my Christmas tree with a winter feel & blue frosty theme!

I tried to create a scene on both sides of the tag, as a girl watching from her window, a snowman playing in the winter with the snowball and on the other side a car borrowing a Christmas tree as a gift while going to the house through the Winter Wonderland!!


There are a lot of tiny details. I started by die-cutting the outlined Christmas tree with a star border tree out of a holographic sheet and added the acetate die-cut sheet behind them. And started decorating my tree from one side as shown in the below pic with a closure look:


Now decorated the other side!


a closer look:


I added snow paste for winter textures and cotton for the snow textures.
Here is a YouTube link to visit:https://www.youtube.com/shorts/eYBSXOxj2sw

Hope you all like it!

Happy crafting!
Supply list
Cardstocks: Plain Holographic CS, Garnet Matte CS and Turquoise Matte Foil CS from Die cuts and more brands, dual-textured white CS from CrafTangles, light cream textured CS
Acetate Sheet: Crafters Corner store
Glitter sheets: Silver and brown from DMC Brand
Dies: Christmas tree set, cute houses, snowflakes from Christmas set die DMC Brand; window set, mini doilies set of 4, a car with Christmas tree set from craftadda
Snow Paste: Cadance brand
Clear Pet Stickers: Girly from thelittle_wings shop
Special textured fabric net sheet: from thelittle_wings shop
Motif sheets: Christmas & Jinnie from DCAM brand
Rub-on: Brown flower flourish from Itsy Bitsy store (retired)
Washi tapes: Penguins, months, foiled sentiment from Nirmal Stationer store
Slices: Snowflakes and stars- glow in the dark from DMC Brand
Pompom, cotton, white thread, and silver gems are from my stash

Would love to join these fun challenges:


Monday, 5 December 2022

Winter Wonder Landscape Shadow Dream Box!

Hello friends!

Happy Tuesday! 

Hope you all enjoyed your weekend!

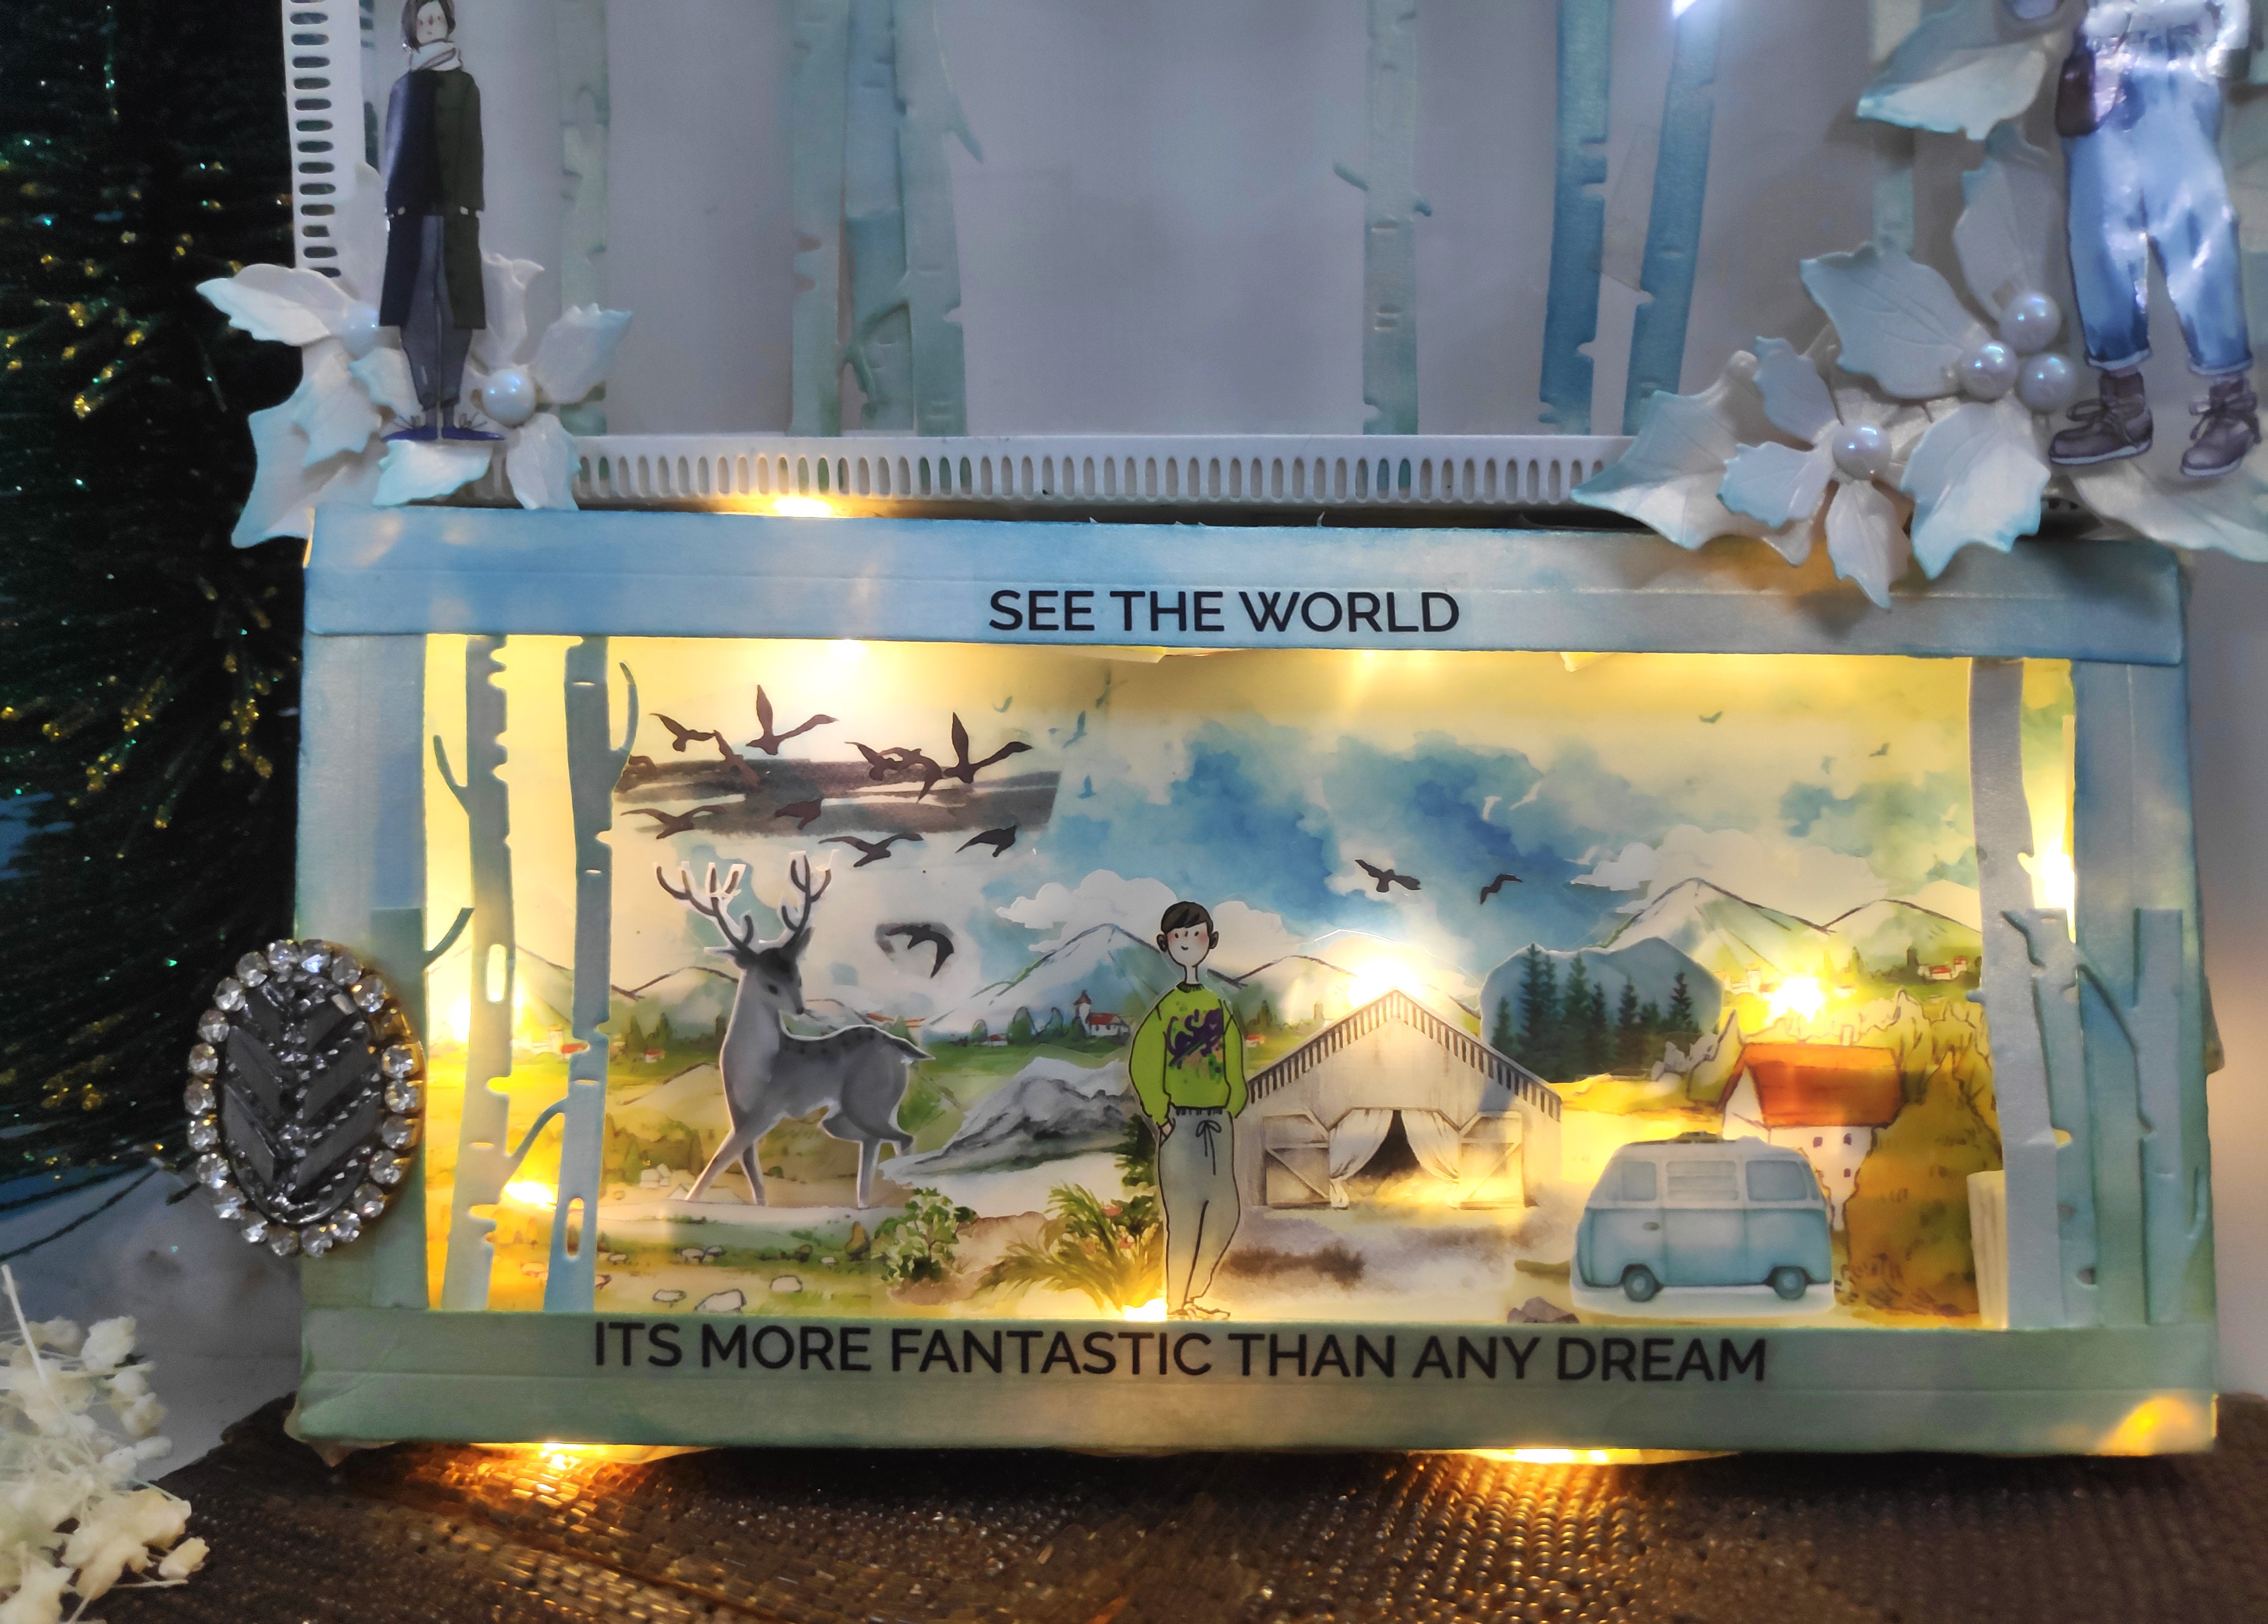
I love creating scenes and made my first own shadow box. I just love the depth of this winter theme landscape scene, I enjoyed it so much!

Yipee- I won the challenge here!!!

https://letscreatechallenges.blogspot.com/2023/01/challenge-191-ag-black-and-white.html

And I couldn't resist adding LED light to make it even more magical!


Hereafter opening the lid.


I just started by making the box using slimline dies and added a panel of an acetate sheet in the top centre of the box and lots of washi tapes and stickers.


Added the washi tape layers using foam tape for a 3D look with textures.


After creating all the layers I added LED lights to my box.


Added a few distressed ink birch trees at the top lid of the box.


Now added some people travelling through this landscape, watching deer, camping, clicking pics, and enjoying winter!


Some poinsettia flowers were added to the lid corners with a girl sticker.


In the end, I added a little decor charm to open my box easily with a cute sentiment perfect for this theme!
Hope you all like it!

Supply List

Cardstocks: Coconut cream CS; Cream Pearl metallic CS

Dies: Trees with deers  and Poinsettia flowers set from DMC; Slimline large shadow box die and slimline celebrate this die from DCAM brand

Distress oxides: salvaged patina, rustic wilderness, mermaid lagoon

Clear Pet Stickers: couples tape, planner figures, Blue Scenery from the little wings shop

Clear Pet Stickers Roll: Landscapes from craftadda

Paper for journalling with elements: colourful elements (50 sheets)

Washi Tape: Vintage Script from craftadda

Transparent Sentiment Sticker sheet: Travel sentiments 2 from CrafTangles

Half shine adhesive pearls: white

An oval-shaped decor charm and LED light  from my stash

Would love to join these fun challenges:

https://christmas-craft-creations.blogspot.com/2022/11/november-challenge-washi-tape-dt-call.html

https://abcchristmaschallenge.blogspot.com/2022/11/abc-christmas-challenge-w-andor-x.html- adding LED lights made it more magical with 3 D look and x-tra special!


Thursday, 14 April 2022

You will reap what you saw!

Hello everyone!

Happy Thursday!

This time I explored Art Journaling with Mixed Media.

Here I created a vintage + Nature themed spread in blue hues for this page.

This Journal page has so many things that are my favourite and it also took me out of my comfort level. I wanted to give this page such wonderful textures.

I struggle a bit with a few things. This piece also has a rich meaning and I spent a lot of time searching for the papers, elements, and stickers that I used in this because they tell the story and the meaning.

The saying "you will reap what you saw" just hung in my heart this week so I knew I needed to create with it. The saying means "if you plant seeds or do something good, you should expect to reap rewards later."


I started playing with my liquid watercolours using a vintage damask stencil.


I wanted an aged and smudged look, I didn't want it to be perfect.
I added lots of textures, and interests to reveal underlayer papers where I wanted to show my stencilling parts. I added liquid watercolours poolside and evergreen with lots of water. Then outlined the areas with a black pen using the same stencil and some old script newspaper stamping using DO.


Well I found some Khaki paper bags and grey jute bags and decided to would give it a makeover.
 I recycled them to make my own little envelope by adding an old script sticker roll inside the envelope and cutting a jute bag piece for backing the envelope. Die-cut some wildflowers, sprigs.


Whilst I left my page to dry I started to gather some ephemera and a photo for my focal element and I layered it and glued them together ready to put on the pages.
Added some dried bunch of flowers to the hand with a piece os little vintage script sticker.


Before applying all the ephemera labels I applied golden texture paste for a mysterious look.
 I added different ephemera stickers with lots of paper layers, journaling labels, washi tapes.
Gave it some distressed, faded and scratched look by adding some pearl white acrylic colour.
I just love how it turned out.


I really wanted to tell the story through papers and journaling stickers. 


I added that envelope at my focal point to pop up.  to create with my wildflower garden. I wanted some dark flowers with soft look wild flowers as well.


I really discover and practise new ideas and put down some labels with my thoughts.
I added some white splatters to bring this piece together.


Adding quotes or texts is a good way to enhance the aesthetics. So I finished it up by writing this message!
Added those journaling labels.


I wanted the unfinished look of wax seal stamping saying You make me Happy.


Then distressed all along the page using Hickory smoke ink for the faded look as well and have some contrast.

This is a really cool feeling with cool colours for me with a vintage feel what this piece is all about. So every single piece related has meaning to my saying. 

The flowers are the growth, new buds, new beginnings, new life and those ephemeras tickets are the part of travel, the hand is representing my dream, creativity, pour some tender love and watch it grow. All those washi touches and splatters are the art of this nature's creative journey. Be patient and dreaming a good life!

It's not too late........You're not too young or too old...... It's just the right time to do what you've always wanted to do.........CREATE!

I hope this project inspired you!

Happy crafting!

Supply List

Art Journal Diary

Paper pack: Wild about blue 6"x 6" from CrafTangles, Beautiful flowers paper pack from Jags

Cardstocks: Rosewood CS from CrafTangles, Black CS

Liquid watercolours: Poolside and evergreen from CrafTangles

Stamp: Old newspaper from CrafTangles

Stencil: Vintage Damask from CrafTangles

Dies: Floral Springs (set of 5) and Line art flowers (set of 4) from CrafTangles

Texture paste: Golden Dragon from CrafTangles 

Sticker Rolls: Pretty plaid 1 and Old script from CrafTangles

Journal Stickers: Traveller from CrafTangles

Creativity Sentiments 2 from CrafTangles

Dry flowers: RAWDF-2 from CrafTangles

Wax seal beads: Metallic Blue from Craftangles

Wax spoon from CrafTangles

Sealing stamp: You make me happy

Acrylic Chalk Paint: Buttermilk from Little Birdie

Acrylic colour: pearl white Camlin brand

Distress Oxides: Mermaid lagoon and Hickory smoke

Add gel soft line black pen

Handmade paper Steel grey, washi tapes from my stash

Would love to join these fun challenges:

https://www.hndmd.com/articles/craftangles-monthly-challenge-2022-april/