Showing posts with label circles. Show all posts

Friday, 6 May 2022

Fluttering by in Flora and Fauna Garden

 Hello to all!

Happy Friday!

Delicate butterflies in circles on an embossed background with a flora and fauna garden scene made me smile!


I decided on blues and green hues with a touch of yellow color! Watercolored directly on the stamp designed butterfly and then stamped on my scraps of a white panel as shown in the below pic. Die cit them in a circle shape.


Then on a white panel, I partially stamped the background stamp and gave it a washed look.


Embossed that panel using dots EF.


Stamped the sentiment and tied a twine.


Finished it off with some sequins.
Happy crafting!

Supply List

Cardstocks: Whisper White and turquoise CS

Stamps: BE set from Cas-ual Friday and Mystique Garden from Little Birdie

Embossing Folder: Spots from Itsy Bitsy(now retired)

Dies: Stitched circle Layers set from Memory Box; Double stitched rectangles from Peekaboo designs

Liquid Watercolors: Ocean Breeze, poolside, lemon tart, green from CrafTangles

Archival ink: Jet black

Twine: grey tone from Little Birdie

Sequins are from my stash

Would love to join these fun challenges:

http://allsortschallenge.blogspot.com/2022/04/week-674-anything-goes-option-of-scenic.html

http://sirstampalotchallenge.blogspot.com/2022/05/may-challenge.html


Tuesday, 15 February 2022

Birthday Card in mixed media style!

 Hello friends!

Happy Wednesday!

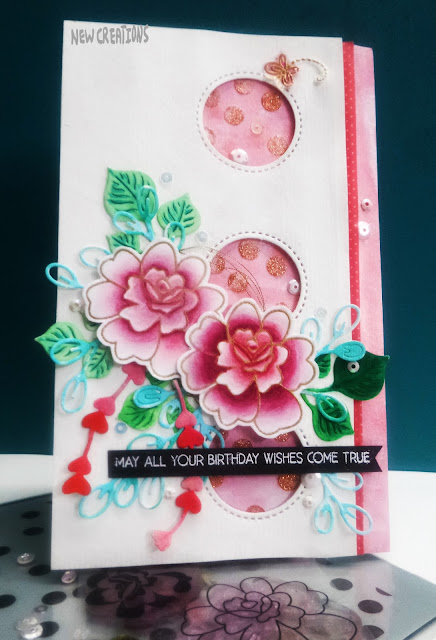
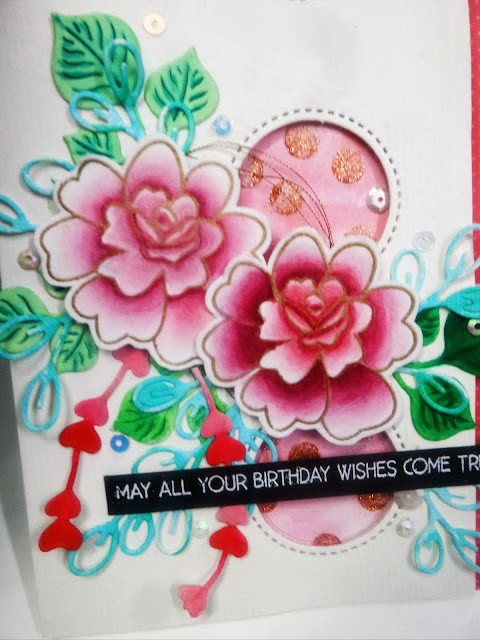
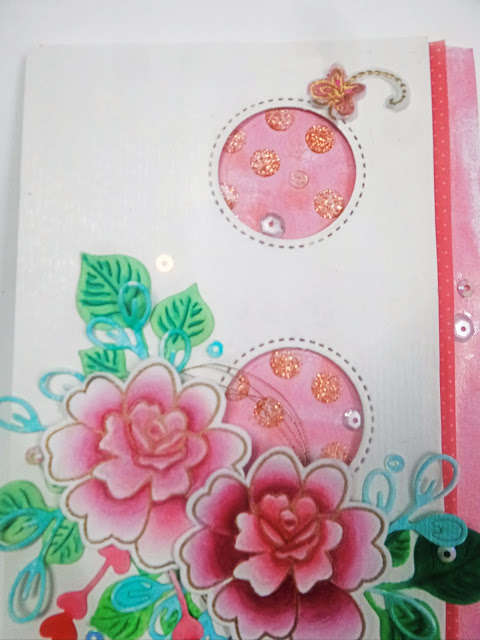
I am popping in today to share with you this bright and cheerful Birthday card celebrating Uniko !0th Birthday, Many Congratulations Bev!

 I just love all the elements and details of this card!

https://daranddiane.blogspot.com/2022/03/shades-of-pink-winners.html

(IMP: I posted it today only and I can't able to revert the date, hope u all understand)


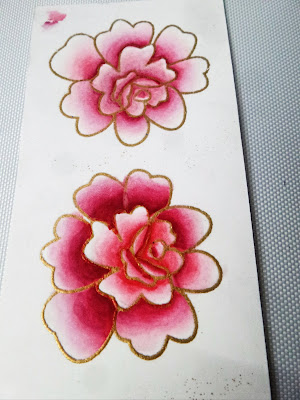
I  started with stamping the beautiful blooms and heat embossed in rich Gold pale EP. I colored them with my Chameleon Markers, fussy cut both.


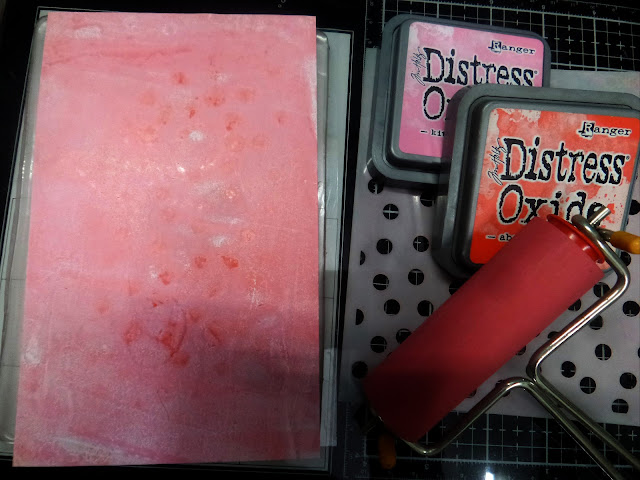
Now created my own background panel to match the colors with my flowers using Gelli plate, brayer, DO and a scattered polka dot stencil.


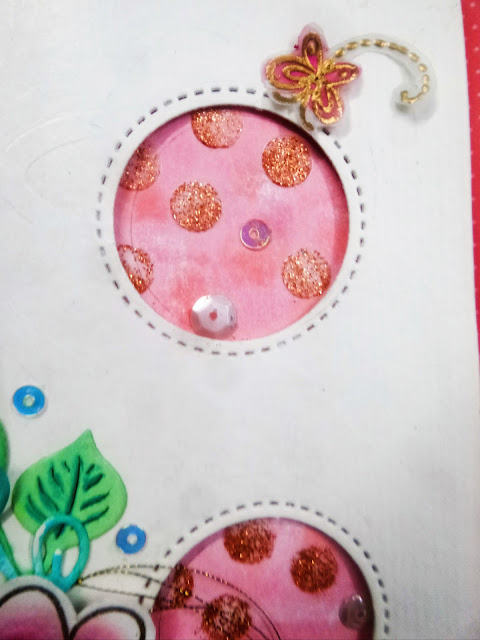
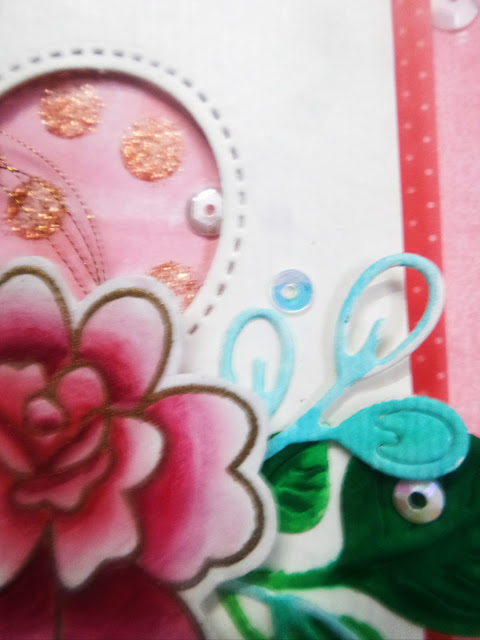
Now die cuts some foliage, leaves and watercolored them too using my ZIG brushes. Die-cut a focal panel in white using some double stitched circles. I applied copper glitter paste using the same polka dot stencil which is peeking behind from the 3 circles. And arranged them all along with a copper thread underneath the flowers..


Stamped the sentiment on a black strip and heat embossed it in white. Added a tiny vellum butterfly. Embellished it with some sequins and added a strip of printed polka dot vellum sheet too.


I hope you have a wonderful day!
Happy crafting!

Supply List

Cardstocks: Glossy CS from Die cuts and more store, whisper white CS, textured CS and black CS

Vellum sheets: white and printed vellum from Heidi Swapp

Stamps: Beautiful Blooms II and Cosmos stamp sets from Uniko stamps; Butterfly from Scrapberry's My little bear set

Stencil: Scattered polka dots from Uniko

Dies: Meadow foliage set and Leaves set from Itsy Bitsy; flourish #13 from Cheery Lynn

Glitter Paste: copper from Crafters Corner store

Distress Oxides: Abandoned coral and kitsch Flamingo

Embossing powders; Opaque Bright white and Gold rich pale metallic from Wow

Gelli plate and brayer from Itsy Bitsy store

Sequins: Pink story sequins from Crafters Corner store

Copper thread

Would love to join these fun challenges:

http://sirstampalotchallenge.blogspot.com/2022/02/february-challenge.html

https://www.welovestamping.co.uk/2022/02/february-challenge.html

https://daranddiane.blogspot.com/2022/02/shades-of-pink.html


Friday, 24 December 2021

Blingtastic snowflake on Christmas eve!

Hello friends!

Happy Friday and Merry Christmas eve!!!

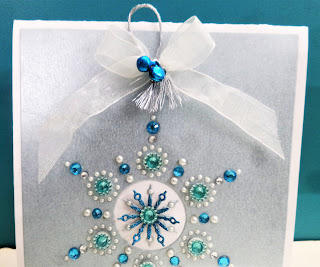
On this Christmas eve, I made a fun, elegant and easy jewelled snowflake card using a beautiful snowflake die, a perfect focal point!

 My card is inspired by a Create a Smile mood board!


I took a piece of metallic pearl shimmer CS in baby blue and die a snowflake, just so pretty.
Then I adhered that panel to the white card base.
Using my tweezer I placed each individual pearls and rhinestones....... the tiniest white pearl took a little extra time:). Just beautiful!

A closer view with tiny details:


Embellished it with a white shimmery ribbon bow along with a silver string and some turquoise anklet bells.


I heat embossed the sentiment in the same tone of baby blue pearl sheet with blue pearl EP for tone on tone effect.


Perfect little details on the snowflake! What do you all think? I love the way my Christmas snowflake look now!
Happy and merry day!

Supply list
Cardstock: Glossy white CS from Crafters Corner store
 Metallic Pearl Shimmer CS: Baby blue from DCAM store
Glitter sheet: turquoise blue
Die: Cool cuts Negative Snowflake die from Create a Smile 
Stamp: Snowy/ Holiday set from Winnie & Walter
Adhesive Rhinestones and half pearls: white pearls in different sizes and turquoise blings in different sizes from my stash
Anklet Bells: Turquoise color pack from  Itsy Bitsy store
White Shimmery ribbon from my stash
Silver string from Crafters Corner store

Would love to join these fun challenges:
https://createasmilestamps.blogspot.com/2021/12/we-dare-you-to-create-smile-december_01235051424.html- I am inspired by cool blue color, snowflakes, ribbon bow and some blings


Wednesday, 15 December 2021

Joyful Christmas!

 Hello everyone!

Happy Wednesday!

Today I am showcasing a classic combo of white and gold Christmas vibes cards!


I cut the ornaments using leftovers of gold mirror CS. On my white card base, I added beautiful scalloped curved borders attaching with circled gold foiled PP at the top of the card. Die-cut some pine boughs in the snippets of gold mirror CS. Added them before adhering to the border. Added a gold string to the topper of the ornaments. Placed under the scalloped border before adhering using foam adhesive.


Added the sentiment in gold platinum EP. I leave my baubles free for swinging fun. Isn't the ornaments looking so cute!

Supply List
Cardstock: Whisper White CS
Mirror CS: Snippets of Gold CS from DMC store
Pattern Paper: Snippets of Forever Always pack from Itsy Bitsy store
Stamp: Most wonderful set from Uniko
Dies: Snowman Ornaments set from Crafters Corner; Pine boughs from Poppy Stamps; A2 Curved Borders from spellbinders
Embossing Powder: from Wow
Crystal rhinestones from my stash
Twine: snippets of gold thread

Would love to join these fun challenges:


Thursday, 25 November 2021

Thankful for you!

Hello friends!

Happy Thanksgiving Day all around the World!

I have a Thanksgiving card to share with you today!! Let's get to it!

There is no coloring involved on the die cut flowers, just cut and paste is so much fun. I chose 3 colors deep red, bright pink and pale lavender.


Die cut a double stitched rectangle panel. Added some memento ink colors using retro circles stencil.


Added a Thankful sentiment on the blended circles. Then arranged the cluster of blooms with different leaves at the top corner.


Finished it off with some half pearls.
Love how beautiful these blooms matched with pretty colorful circles.
Didn't you just love it?
I am sure, you do!

Happy crafting!

Supply List
Cardstocks: Whisper white CS, textured white CS, Snippets of deep red, bright pink and pale lavender, dark green, leafy green colored CS
Dies: Crazy double running stitched rectangles and trendy spring blooms from Stamplorations; Floral wreath set from sizzix; Foliage and Leaves#6 from crafters corner
Stencil: Retro circles from Stamplorations
 Stamp: Blossom Overture from Stamplorations
Inks: peanut butter, tangled, summer sky and Rosie bud from Memento
Blended brush
Dye Ink: Black Licorice from Lawn Fawn
Some half pearls from my stash

Would love to join these fun challenges:


Monday, 25 October 2021

Playful kittens!

Hello everyone!

Happy Monday!

Today my card featured some tiny fun playful kittens with a dotted cover plate die. 

Janis is hosting the 7th Annual Cat Lovers Hop 2021. 

I am glad to participate this year! But I am going out for the next 2 days, so will come back after 2 days with more of my cat projects.


I started with a dotted cover plate die out of white CS, holographic sheet and white foam sheet.
On my card base, I placed one of the white dotted dies and marked some circles using a pencil.


Now I blended some DI using a blender on these circles and rub circle marks. Added some water droplets on the blended circles.


Now filled some of the dotted shakers in two colors, placed my cats and placed a transparent sheet on it and adhered my holographic panel on it.


In the end, I placed a die-cut sentiment out of a glitter sheet.

Look at these playful kittens, sp magical! Aren't they so cute!

Happy crafting!

Supply list

Cardstock: Whisper White CS

Holographic Sheet: Dotted from DCAM store

Glitter Cardstock: Brights from Little Birdie

Transparent sheet: OHP pack of 10 sheets from Itsy Bitsy store

Dies: Dotty from Itsy Bitsy store; Baby kittens from Poppy stamps; Celebrate from Peek-a-boo stamps

Distress Inks: fossilized amber, twisted citron, fired brick, mermaid lagoon 

Dotted shakers: Light blue and yellow from my stash

Would love to join these fun challenges:

https://herpeacefulgarden.blogspot.com/2021/10/main-hop-page-2021-cat-lovers-hop.html

https://mijnhobbyhonkchallenges.blogspot.com/2021/10/mhh-challenge-36-2-4-6.html- 2 shaker dotted elements blue and yellow color, 4 distress inks, 6 cats

http://alessandrasangels.blogspot.com/2021/10/challenge-51-and-winner-of-challenge-50.html

http://wordartwednesday.blogspot.com/2021/10/weeks-513-514-anything-goes.html

https://poppystamps.typepad.com/poppystamps/2021/10/psc85-make-it-magical.html


Saturday, 14 August 2021

Little space traveller!

 Hello to all!

Happy Saturday!

I am back with this fortnight challenge and the theme chosen by me "Space" at Cut It Up Challenges!

Are you ready for inspiration!


I started by stamping some space images from the Cosmic Newton set and coloured them. 


I die cut some circles from a metallic designer sheet in dual colors and some from a white sheet.


To create my night sky I used a designer mirror paper which has stars and so much shines. I added it to my white card base.


Die-cut a space rocket, space elements along with puffy clouds. Arranged them on my night sky panel.


Added those circles with dimension as steam.


Added the sentiment on a banner.


Embellished my rocket with Nuvo clear crystal drops for some shine and some tiny star sequins.


Happy crafting!

Supply List
Cardstocks: whisper white, red CS
designer sheet: Metallic in a combo of gold and red
Mirror sheet: designer stars on blue
Stamp: Cosmic Newton from Newton's Nook design
Dies: Cosmic newton die set from Newton's Nook design; Puffy cloud borders from Lawn Fawn, Circles from WRMK
Punch: tiniest circle from Jags
Sequins: tiny stars
Nuvo Crystal Drops
Enamel drop:  Blue from Itsy Bitsy

Would love to join these fun challenges: