Hello to all!
Happy Tuesday!
Today I am feeling so happy and thrilled to use a new die launch sent by sweet Anitha Mallesh from Itsy Bitsy, Little Birdie brand to create some projects and showcased it! Feeling honoured! Thank u so much Rashmi Harish!!!!


I just love trees. I like watching the leaves turn and like the look of the snow and ice on the branches. They last for generations and almost seem wise with all of the changes they have seen over the years. There is so much to love. They also have growth and changes we can see in the leaves and branches as well as what we can't see underground. Let me show you some of the cool cards I have created with one of nature's awesome wonders! And I love the huge size of the tree die with so many possibilities!!!
So here are these cards using one die only!!!

So here are these cards using one die only!!!

It's called 3D "Flowering Tree". Let me say how pretty this set is- it's one of the best set that I've seen for a while coordinating with some flowers and leaves die attached. It would work for so many occasions, perfect for all four seasons, plus feminine and masculine cards and even it has so many possibilities to create your own cover die background for cards:), so many ideas floating in my mind right now!!!!
Card 1 Details
I started with a sheltering tree card to celebrate the summer season. It is definitely summer here with a pair of lovebird, the tree full of leaves, green grass.
I started with a sheltering tree card to celebrate the summer season. It is definitely summer here with a pair of lovebird, the tree full of leaves, green grass.

Die cut a tree out of watercolored white CS. I didn't take out the die out of the sheet. I spritzed with water on this die sheet to let the colors blend and move.

Using my color bursts the trunk was watercolored in the shades of brown and orange crystals, branches and leaves with yellow and green crystals, now carefully took out my watercolored tree out of the sheet.

Using My Marta Stewart scoring board I added some stripes with a bone folder on a white panel and adhered the tree on it. I created a ground for my tree. There is a bit of layer of dirt with faded impression using Mowed lawn at the top of grass..... dirt, you know. The sentiment is from Here & now stamp set, fussy cut it and adhered with a black strip on an angel.

The pair of lovebirds is from Melodic Chirp stamp set, fussy cut it and adhered it to the tree branch enjoying the season. Now added my focal panel to a green panel and then a turquoise blue card base. Added a black jute bow as an embellishment. ended it up with some green splatters.
I really like the way this card turned out! Don't you!
Card 2 Details
When I saw the leaf panel die an idea blink in my mind to create a textured background panel using this.

On a piece of square white sheet, I draw a grid and roughly drew some lines using the leaf die for symmetry.

Now die cut that panel where I drew the lines using the leaf die. Don't forget to rub those lines.
Voila, what a great result I achieved totally with a unique look!
I stamped an adorable Llama on the textured white sheet, I never used this image before. So it was a happy discovery to use with it!

Watercolored it using Distress ink, added textures to the fur and fussy cut it. Paired it up with a succulent pot and a banner with a birthday sentiment on it.
I think it's a perfect match with textured BG and reminding me of those old windows( Jharoka) An Arabic architect with full of holes while walking in sand ground houses and enjoying walking with Llama.
I adhered this Panel on a textured Kraft CS peeking from the leaves holes and adhered it to the base panel.
Card 3 Details
The last one is with night sky background. I love how different the looks is with the same die!

I started working on this card by creating a nighttime sky background. I used Memento dye and Distress Inks. I added a bit of Blueprint sketch to darken the purple look at the top part of my sky. I also splattered some white chalk paint to mimic stars and I can say I am so happy with the result:)

I cut the tree and flowers out of a white sheet. Used those scrap of leaves which I used to create a BG in card 2.

I colored my tree with ZIG markers and detailing with Polychromos pencils.


I colored my tree with ZIG markers and detailing with Polychromos pencils.

I added some distress inks on my mat and applied ink on all those die cut leaves and flowers as shown in the pic.

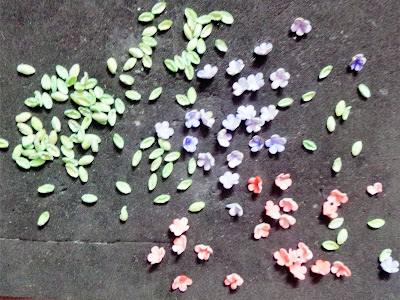


On all individual leaves and flowers, I shaped them to fit on the tree die and embossed with my tiniest golf tool using embossing pad.
Now placed my tree on my blended panel. Attached those flowers and leaves to cover the tree.


While adding a sentiment, unfortunately, it slipped off from my stamping block as it didn't stick well to the block, so I darken the sentiment little bit with my black pen and added some detailing dots in black and white both! I think its totally matched now!!!


I love how the 3D look on the tree with blended night sky added depth and interest to the scene!
Thanks so much for checking out my cards today! I hope you are having a great week!
Supply list for Card 1
Cardstocks: White, Turquoise blue, leaf green and black color CS
Stamps: Melodic Chirp and Here & Now stamp set from Itsy Bitsy
Die: 3D Flower Tree Die from Little Birdie (Itsy Bitsy)
Score Board: Martha Stewart
Color Burst: Sepia, orange, Lemon yellow, green from Ken Olivers Crafts
Archival ink: Jet Black
Distress inks: Mawed Lawn, twisted citron
Jute twine: Black from Tim Holtz IdeaologyCraft glue
White Gel pen: Sakura
Big Shot: from Itsy Bitsy
Double-sided Adhesive Foam sheet
Supply List for Card 2
Cardstocks: White heavy CS 300gsm, Kraft textured sheet
Textured sheet: White Fleece from Itsy Bitsy
Designer Paper: Succulent Garden from Little Birdie
Stamp: Llama Birthday stamp set from Itsy Bitsy
Die: 3D flower tree die from Little Birdie
Distress Inks: Vintage photo
Archival Ink: Jet Black
Craft glue: from Itsy Bitsy
Supply List for Card 3
Cardstocks: White heavy CS 300 gsm, watercolored sheet
Stamp: Dream Catcher stamp set from Itsy Bitsy
Die: 3D flower tree die from Little Birdie
Distress Inks: Blueprint Sketch, Candied apple, twisted citron, mowed lawn
Memento inks: Sweet plum, Grape jelly, Lilac roses
Archival ink: Jet black
Chalk Paint: Natural white from Papericious
Zig Clean clear real brushes: Brown, green
Polychromos pencils: Faber Castell
Craft Glue: from Itsy Bitsy
White Gel pen: Sakura
Calligraphy pen: 3.0 mm from Stylo
Golf tool: a small one from Crafters Corner
Embossing Pad
2 comments:
Gorgeous designs love the Llama Love and hugs Carole x
WOW! Stunning Projects! So much detail! LOVE!
Theresa
Post a Comment