Sunday, 29 October 2017

You're purr-fect!

Hello everyone!

It is truly said, "Cats rule the World".  Today is National Cat day too!!! Here is the reference: https://en.wikipedia.org/wiki/National_Cat_Day
 Today I want to share a Purr-fect sweet cat card. I am glad to join at Cat Lovers blog hop and inspired by YNS sketch challenge too!
Janis is hosting this hop with an awesome array of prizes and today is the last day to participate! So hurry up guys still some time left:) 
And I am also joining this card to the concept of number 7 for I love Math Challenge!


I rotated the sketch and opted the color scheme too.

                                                                                                                                                                       
I love this cute stamp-" Jessica with her Kitty". She is so sweet with her cute kitty and fun to color.  I stamped the image in Jet Black archival ink on Bielo sheet and colored it with my Zig watercolor brush pens. Highlighted it with my Staedtler watercolor pencils too.  Applied pearl white dots on her hair and her frock for more fun. At all around the image gave a little shadow of grey color to highlight the image more. You can see below clearly in the image!


Using Double running stitch die, I die cut some rectangle sheets in blue and white color CS. On one of the sheet, I stamped 7 paw prints to match the concept of seven and you can see the watercolor effect on Kitty's paws :)D, I tried to give the reflection of her paw-print.
Now arrange them according to the sketch. The sentiment is also from the same set. And finished it with a cute heart!

Hope you all enjoyed this fun creation!
Thanks for stopping by!

Supply used:
Cardstocks: White and blue color CS, Bielo sheet
Pattern Paper: Plaids from Lawn Fawn
Stamp: Jessica with her Kitty and Phoebe with her wagon for the paw print from YNS
Die: Crazy Double Running Stitch Rectangle from Stamplorations
ZIG clean color real water brushes
Staedtler watercolor pencils
Pearl white: from Fevicryl
Misti

P.S:  Yayyyy' Happy dance! Won this cute card at YNS challenge
http://yournextstamp.com/blog/sketch-and-color-challenge-76-winners/
And here in the Top 3- http://dragonflydreamschallenges.blogspot.in/2017/11/winter.html
Winners Badge

Would love to join these challenges:
https://herpeacefulgarden.blogspot.com/2017/10/the-2017-cat-lovers-hop-and-link-up-is.html
http://yournextstamp.com/blog/sketch-and-color-challenge-76/
http://craftymilka.blogspot.in/2017/10/ilovemathchallenge7.html

https://stamplorations.blogspot.in/2017/10/cutplorations-october.html#more_ I am inspired by the word Happy, stitching texture and the colors!.

https://stamplorations.blogspot.in/p/stamplorations-anything-goes-challenge.html
http://kraftinkimmiestamps.blogspot.in/2017/10/wonderful-wednesday_25.html#
http://www.simonsaysstampblog.com/wednesdaychallenge/simon-says-anything-goes-43/
http://dragonflydreamschallenges.blogspot.in/2017/10/fully-loaded.html#
http://craftyhazelnutspatternedpaper.blogspot.in/2017/10/craftyhazelnuts-patterned-paper-october.html
http://fairytale-challengeblog.blogspot.in/2017/10/challenge-179-not-more-than-4-nicht.html
designer paper, enamel heart, white pearl dots, zig real brush pens
http://stampedblessings.com/heartfulstamping-challenge/


Saturday, 28 October 2017

Magic of Seven colors!

Hello everyone!
Happy weekend!

Crafty Milka is hosting I Love Math Challenge #7 and I am glad finally got time to join:) D

The theme for this challenge is number seven or something 7 on your project!

So I went for the Rainbow scheme which has seven colors in it and created the Rainbow BG!


P.S : http://craftymilka.blogspot.in/2017/11/top4-and-winner-ilovemathchallenge7.html -Topper:)


Today's card started with Rainbow color inkiness blended background on a watercolor sheet.


Firstly I die cut the watercolor sheet using stitched border and directly applied my small Distress inks cube in VIBGYOR(violet, indigo, blue, green, yellow, orange and red)  sequence and sprinkled the water using a sprinkle bottle with a height to lighten the edges. Woha, gr8 result achieved! 


I stamped the images in Jet black ink and watercolored them with my ZIG brush pens, fussy cut them. And once again stamped the hippo image and cut the only face part and added it to hippo image for a 3D look.


Using the same border die I cut a strip out of silver glitter foam sheet.
Using a color splash stencil I applied some silver glitter paste to this fun-filled background. 


On a textured CS, I stamped the sentiment for the best result using my Misti. Now popped up the whole scene using pop dots and added some stickles to flower centre.

Hope you all enjoyed this fun-filled creation!

Supplies used:
Cardstocks: Off-white textured CS, Watercolor textured sheet
Glitter Foam sheet: Silver
Stamp: Hippo wishes to you from Craftyscrappers
Stencil: Color splash from Craftyscrappers
Die: Stitched Basic Edgers from MFT Die-namics
Distress inks: Wilted violet, Blueprint sketch, mermaid lagoon, lucky clover, fossilized amber, carved pumpkins, candied apple
ZIG clean clear brush pens
Jet black Archival ink
Misti
Glitter paste: Silver from Bo Bunny
Stickles: Cotton candy and yellow iridescent glitter glue from Ranger
Pop up dots

Would love to participate in the following challenges:


Thursday, 26 October 2017

Sparkly fun!

Hello friends!
Hope you all are enjoying your day!

This time I come up with a very sparkly creation!


My card base is in Jet black color. I started with stamping the images on textured watercolor paper in Jet black Archival ink. Using my favorite Zig brush pens I colored the images. Fussy cut them. Die cut a scalloped frame 2 times and popped it up with foam dots.


 On an adhesive Stick it sheet, I added some dark pink glitter at the bottom and burnished it properly with my finger and then added purple color glitter.


For the balloon, I added pearl shimmer while coloring to match up the shimmery background. Arranged all the images to create a scene with fun. The word phrase is a pre-die cut in black. Finished it up with some sequin flowers.


Hope you all enjoyed this sparkly creation with the fun technique!

Supply used:
Cardstock: Black CS, White CS, watercolored sheet
Stamp: Hippo wishes to u from Craftyscrappers
Dies: Frames SSSD111373from Simon Says Stamp
Zig watercolor Clean Clear Real brush Pens
Perfect Pearls: Silver
Glitters: Purple and dark pink from Oak arts
Stick It adhesive sheet from Ken Olivers
Sequins: Flowers in purple shade From Craftyscrappers

Wednesday, 25 October 2017

Stenciling with Fashion Divas!

Hello to all!
I am back again with one more
I could make many cards from weaved stencil with so many possibilities!
So I decided to make one more card using this beautiful stencil and this is also part of my DT post for Expressions Stamps!

For this card, I combined my stencil with pretty Fashion Divas stamp set. They are so stylish, sassy, confident and carefree teenagers!

On this card, I placed my stencil diagonally and coloured the weaved pattern with my watercolour brush pens shown in the above pic.

I choose Fashion Divas stamp set and stamped two of the images on my watercolour sheet. I love how quick and easy the Staedtler watercolour pencils are to use and they give the beautiful watercolour results. Fussy cut them and don't forget to apply black ink pen at all along the edges of the image for the best result:)


Die cut a black banner. Stamped the sentiment from the same set and heat embossed it.
Now popped up my fashion girls and banner with dimension to create more interest.

Isn't it so much fun, love the bold, bright look of stencil pattern with these Fashion Divas- so happy!

Thanks so much for stopping by. 
Have a wonderful Day!


Supply list:
Cardstocks: Black and white colour heavy CS, watercolour sheet
Stamp: Fashion Divas from Expressions craft stamps
Stencil: Weaved from Expressions craft stamps
Die: Dotted rectangles from Sizzix
Japanese watercolour brush pens- Blue, orange, pink and black
Staedtler watercolour pencil set
Embossing powder: opaque bright white from Wow
Pop foam dots and Fevicol

Would love to participate in the following challenges:
http://bizzybecsstore.blogspot.in/2017/10/october-challenge.html
https://lovetocraftchallengeblog.blogspot.in/
http://cardztv.blogspot.in/2017/10/cardz-tv-anything-goes-challenge-18.html
http://www.simonsaysstampblog.com/wednesdaychallenge/simon-says-anything-goes-43/
http://justkeeponcreating.blogspot.in/


Fun with stencil!

Hello everyone!
Happy Wednesday!

This is my DT post for Expressions Craft Stamps, for more pics and details kindly visit the blog here.


I paired the beautiful stencilling with a flower die and some pearls to make an elegant card!

Firstly I applied embossing paste at the bottom of my card panel and quickly splattered some diamond dust on it before drying. So sparkly and glittery, made me smile!


I die cut a flower from watercolor paper and used my Zig markers to color them. To add a little sparkle I added some crystal clear dust to the flowers using clear tacky glue.

Die cut a phrase sentiment out of a silver sparkly sheet and adhered at the top.
I added the flowers to my card with pop dots. I bent the one flower a little bit so it was moreover to thinking of you phrase and added some pearls! And lastly added a gorgeous clear sparkly white ribbon with a cute flower bow! Now adhered the whole panel on my dotted holes card base using pop dots.
Love the elegant and clean look!

Supply list:
Cardstocks: White Heavy cardstock; silver sparkly sheet
Stencil: Weaved stencil from Expressions Stamps
Die: field of dreams from Penny black and dotted holes rectangle nesting die from Sizzix; Thinking of You from Spellbinders
Zig Clean Watercolor Real Brush set
Georgette clear sparkly white ribbon, pop foam dots and some half pearls

Thanks so much for stopping by. 

Monday, 23 October 2017

Rococo Mixed Media Wall Decor

Hello, dear crafty friends!

This was another DT post for PeekaBoo Designs! This time I created a Mixed Media wall decor art piece.

Love this sweet Rococo stamp set with so many possibilities there! 


-I colored the images with Staedtler watercolor pencils. Fussy cut them. 

-Now started with a paper plate, I coated it with gesso 2 times.  Added a paper napkin to create the water pond as shown in the pic: 

-Created a sunrise scene in the BG using pearl acrylic paints and also applied a thin coat of crackle medium too.


-Took a 10"x10" cardboard, colored it with same color palette and using my own designed stencil :),  I applied gesso to it. Tied the upper part with a jute cord and applied a weaved jute lace at the bottom as shown in the pic. Cut the Inspire word 3 times to make a thick pile and adhered it.


-Now created the whole scene with the images with lots of depth and dimension. And finished it with some MDF embellishments and beaded lace and some Tim Holtz idea-ology chitchat words! 


-Now ready to enhance the beauty of your wall!!!!

supply list:

Stamps: Rococo Stamp set from Peek-a-boo Designs
Die: Inspire word from Peek-a-boo Designs
Stencil: Beaded from Peek-a-boo Designs
Other supplies: Staedtler watercolor pencils, Tim Holtz Idea-ology chitchat, Gesso- Camel Mod Podge- Matte, Mod Podge- fine crackle effect, cardboard, Fevicryl Pearl acrylic paints, MDF embellishment, beaded lace, jute lace and cord

See you later peeps with more fun posts!

Saturday, 21 October 2017

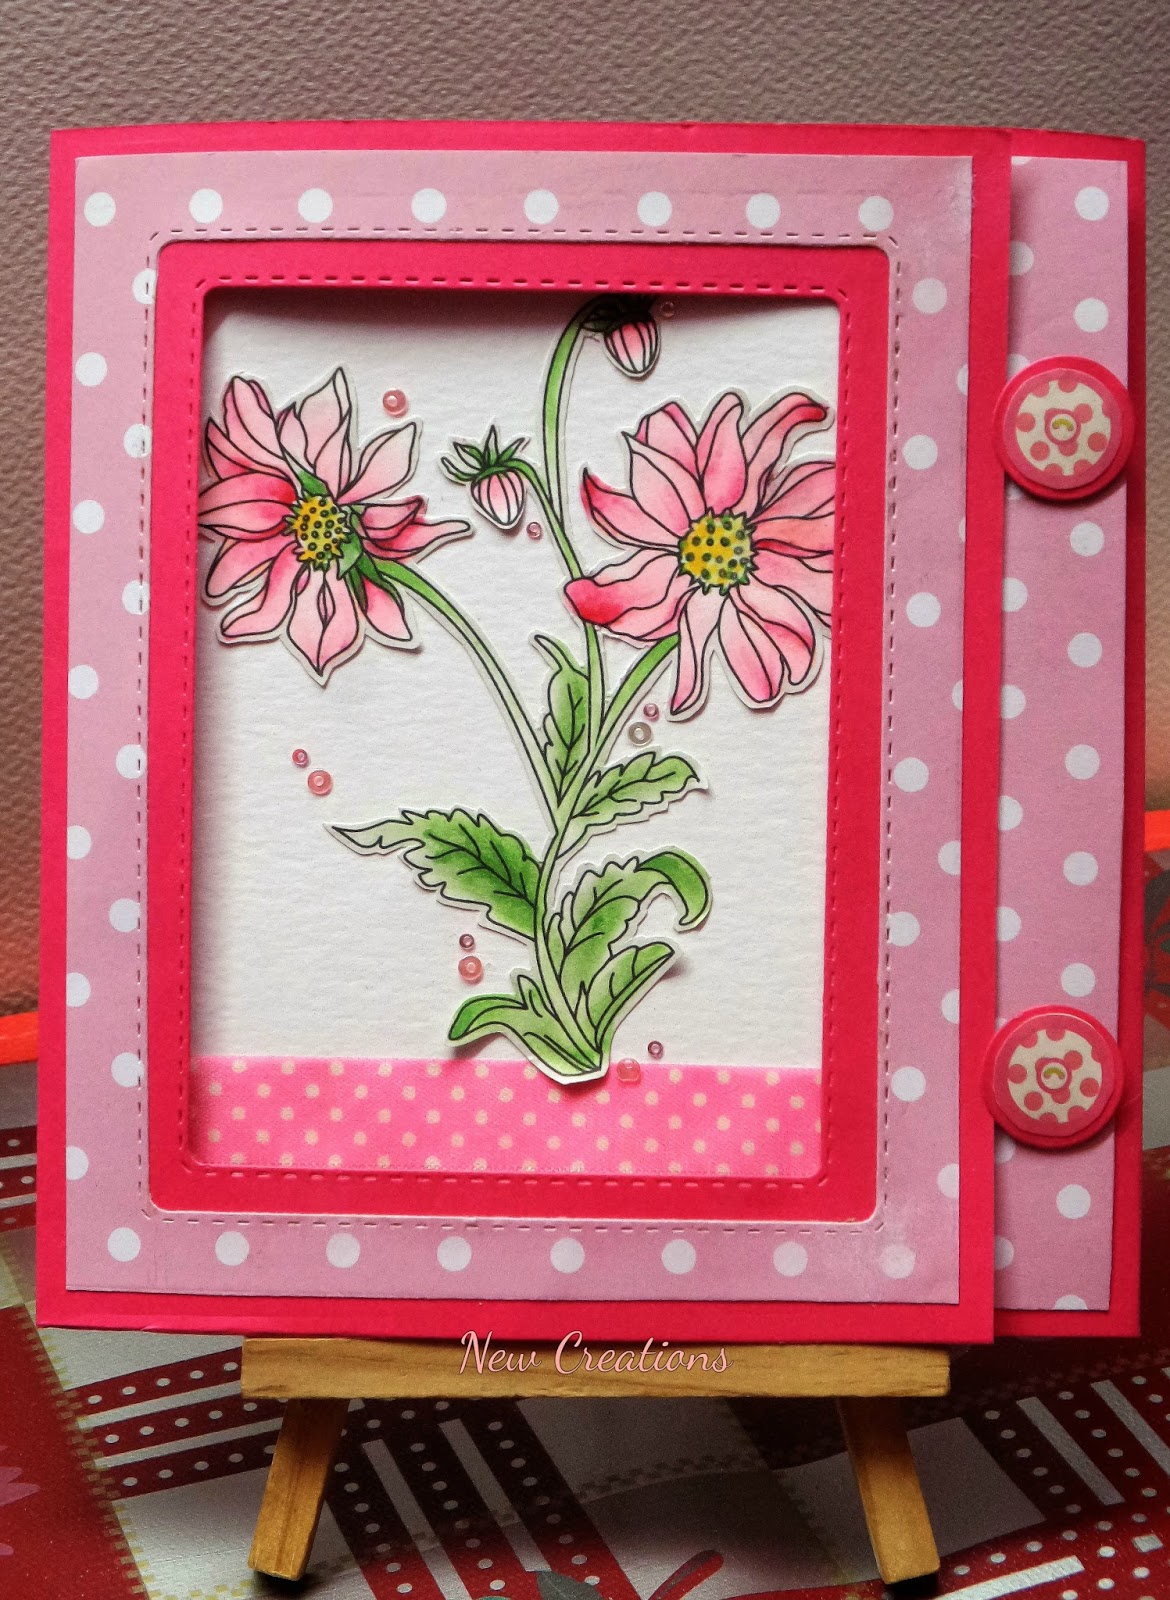
Trio Fold Window card

Hello friends!

Hoping you all enjoyed with full fun this great Diwali Festival!!!!

Today I wanted to share a card which is my DT post for Peekaboo Designs!


I just love these daisies, such a happy flower!

-I started with a 15"x18" CS that I cut to measure 6"X 17" and scored twice - once at 5" and other at 11". Once I folded all three sections. I created a window in the very first section, great idea to highlight the image out of the window! So I took my dual stitched rectangle die and set it where I wanted it on the front panel of my card.

-I wanted to cover my card front panel, so I took some polka dot PP from Summer Bloom PP stack and created a mat using the same die. Showing in the pic.....


- Now I created the same mat for the second panel.Then matted up my main image and set it in the inner portion of my inside fold so that it would peek out through the window I created. I coloured these daisies with Copic Markers, fussy cut them. Here is a close up: 


-I placed some cute buttons to secure the front window panel underneath them, they are from some wrapping papers, fussy cut and matted them! Wonders!!!

-And here is the entire centre panel looks like: 
-The sweet friendship sentiment is just so perfect that comes with this daisy stamp set! And placed some sequins to create more interest.


- I matted a piece of Daisy print PP from Recollections stack- Pretty as a Peacock. Created another mat with placing a polka dotted panel as a pocket attachment and provide an extra mat to write the message or add a self-pic!


This creation can be used for any right occasion by using other sentiments providing in this stamp set! 

Supply list:

Heavy textured white CS, heavy white CS, Pretty pink CS
Distress inks: fossilized amber, tumbled glass, twisted citron
Recollections PP stack- Pretty as a peacock and Summer Bloom PP stack
Dotted pink ribbon, round sequins in different sizes and colors, Beads, Pink silk thread

I love to join some challenges:
http://theflowerchallenge.blogspot.in/2017/10/the-flower-challenge-13-use-your.html

http://addicted-to-stamps-challenge.blogspot.in/2017/10/challenge-155.html
http://bizzybecsstore.blogspot.in/2017/10/october-challenge.html
http://dragonflydreamschallenges.blogspot.in/