Wednesday, 21 November 2018

Pretty succulents on wedding day

Hello friends!
Happy Wednesday!

This is a peek of wedding season here and I have to attend some wedding parties next week. I recently added some new goodie stamps in my stash & excited to play with them. I created an elegant card and I am so happy how beautiful this turned out and perfect for a lucky newlywed couple! Love the color scheme on this with all glamour and shine to it. And the couple could display it in their home with some wedding pics! What a beautiful way to send and share some smiles!


I started by stamping some succulent floral pattern at the bottom of my panel and heat embossed in nice ice blue glitter and added some botanical elements in metallic gold-rich pale by embossing them too. Now watercolored them using Zig markers.


Next,  Die cut another panel in white with a scalloped designer border and highlighted with copper border. Added the wedding couple to that scalloped border panel.  On a hand cut banner added the Happy sentiment, heat embossed it and added the tiny phrase using heat embossed technique again.
Adhered this panel to my main stamped panel.
Next, Die cut the couple two times, groom, in cobalt blue and bride in white with a copper border at the edge of her wedding gown. I adhered the figures to the card front with a mix of flat and foam adhesive.


And here is the matching inside too.


Hoping you all enjoyed this beautiful project!

Supply list

Cardstock: Whisper white in 300gsm, Cobalt blue CS, copper sparkly sheet
Stamps: Happy Succulent stamp set from Uniko; Love this sentiment stamp set from Kaisercraft 
Dies: A2 Scalloped Borders 2 from Spellbinders; Wedding couple from Peekaboo designs
Embossing Powders: Metallic gold-rich pale and Nice Ice Blue Glitter from Wow
Clear embossing Pad: Versamark
Zig Clean clear real brushes: Blue
Archival ink: Jet Black

Friday, 16 November 2018

Thanksgiving card in rainbow colors!

Hello to all!

I created a beautiful Thanksgiving card for my DT post at Cut It Up Challenges!


For the leaf print, I went with a rainbow color scheme. I pulled out my Distress Inks and stamped randomly on a double running stitched white panel.
The sentiment with border is also from the same stamp set. I gave it a metallic look by heat embossing at all the edges for shine and more textures.


Die cut two different size leaves and distressed them, added the metallic shine using heat embossing, tied them with a two shades thin string.


Finished it off with some sequins and rhinestones.

Supply list

Cardstock: White CS
Stamp: Art of life stamp set from Technique Tuesday
Dies: Double Running Stitched rectangles from Cutplorations; Dual leaf from Peekaboo designs
Distress Inks: mermaid lagoon, carved pumpkin, fossilized amber, lucky clover
Memento: lilac poises
Archival ink: Jet black
Embossing powder: Metallic gold rich pale from Wow
Sequins: Golden
rhinestones and a string

Would love to enter my card in the following challenges:


Wednesday, 14 November 2018

STAMPlorations Guest Designer Inspirations post #3

Hello everyone!
Happy Wednesday!

Once again, time for Wonderful Wednesday Coloring inspirations for Stamplorations blog to share our coloring techniques!

Card #1 Giving Thanks to Teacher 


This is perfect for a special teacher Thank you card!
Firstly I stamped the Kathryn image on a watercolored sheet and colored it with Zig brushes and highlighted with Dark pink Glitter pen.  Don't bother if the color is out of the image, I fussy cut it. Removed the flower part and added a pencil to hold her in hand. Sorry forgot to take the picture in between coloring work.


At the bottom of my one layer card, I created a stencil pattern using DI.  Above the stencilled pattern, added a double-sided scoring tape and burnished a fine glitter in brown color very well with my finger.
I created a super fun background pattern with all the little images from the Kathryn Thanks Teacher stamp set at the white remaining space. Colored the images using Zigs again. Added Wink of Stella glitter pens to the books in dark brown and dark pink to apples.


Now on a shining vellum strip stamped one of the sentiment and heat embossed it with Black ebony EP.
Added a set of books with double-sided adhesive foam for more dimension and pencil to the image.


Supply list

Cardstock: Glossy White CS
Shining Vellum sheet
Stamp: Kathryn Thanks Teacher Stamp set from Stamlorations
Stencil: Broken Glass from Artplorations
Distress Ink:
Zig Clean Clear Real Brushes- Set of 12
Archival ink: Jet Black
Embossing Powder: Black ebony from Wow
Fine Glitter: Brown
Double-sided adhesive scoring tape
Fine outliner black pen
Foam dots


Card#2 Flowers in Rainbow colors

This card started out as an experiment. A very fun and colorful too. I might add, I wasn't sure it was going to work but I kinda dig the bold look that came out in rainbow colors!


There is no actual coloring done for them, I have used Ken Oliver Color Burst Powders with water, glossy white CS and a spritzer. The colors tend to go all over the place but it sure is fun!


Let's start with the beginning, I cut out some florals and leaves out of black CS. I created a pattern using these die cuts and using an adhesive quick stick I adhered them all on a white CS. I just sprinkled the powders on the piece directly and then sprayed water on it to activate the colors. Let it dry on their own or you can use a heat gun too.


Then I added some black and golden polka dots to create the background for more drama and textures.


Finished it off with a die cut sentiment in gold foil sheet with a black shadow- "Life is good".


Supply list

Cardstock: Glossy white and black CS
Metallic Sheet: Gold
Dies: from Cutplorations
Color Bursts: Pithalo green, violet, orange, lemon yellow, crimson pigment powders from Ken Oliver
Brusho: Cobalt blue
Enamel Accents: Black from Ranger
Stickles: Gold
Wink of Stella: Glitter pen- Dark pink

A trio of Butterfly Tags

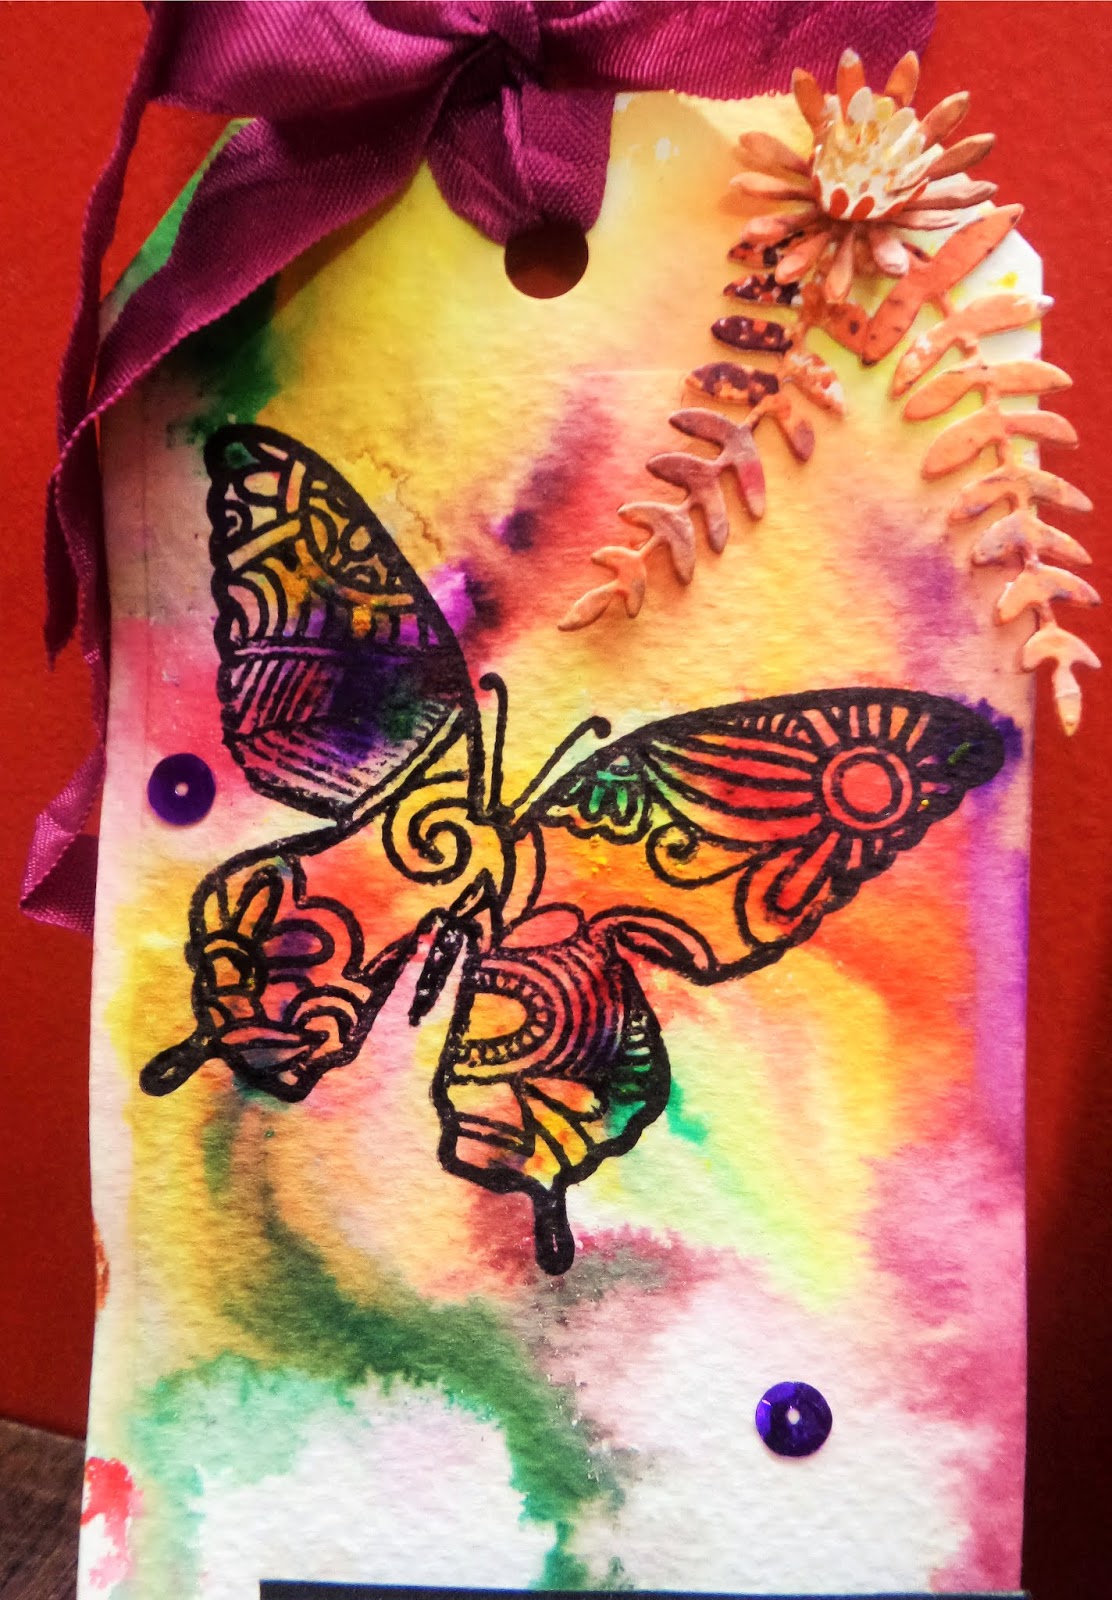
I created three different color techniques on these pretty butterflies. I love the detailing on the butterfly images. For all my 3 tags, I used color bursts to create the background.


I die cut 3 tags out of a watercolor sheet.

On one of the tag, I spritz water on the surface and added the pigments of different shades of color bursts and blow on with a drinking straw to spread the colors. 


Then on the first tag, I directly stamped the biggest butterfly image and added a strip of the sentiment which is heat embossed with wow embossing powder in opaque bright white and I added different shades to the sentiment too using my gel pens. I love the tye and Dye effect on this one!


One of the second tag I didn't remove that tag die and used it as a stencil. I stamped the butterfly images and colored the detailing parts using glitter gel pen for some shine and added a strip of sentiment which is heat embossed in white.

And on the last remaining tag, I directly added the pigments of color bursts and then spritz with water. Both techniques are having different results.


I added some bokeh technique circles using my finger daubers and white pigment ink. And stamped some text sentiments in the background here and there. Added some blue tiny sparkly dots at some circles and at one of the edges. Using my gel pens I added more details to my circles by outlining them. And added the sentiment. Stamped two different butterfly images and colored them with my gel pens, fussy cut them.


Tied all the tags with crinkle ribbons and one with sequins ribbon. Die cut some leaves and flowers from a scrap left. And finished them off with these die cuts and some sequins.

Kindly visit and leave the comments on all other Guest Designers blog and Stamplorations blog to win $15 G.C.

Supply list

Cardstock: Textured watercolor sheet
Stamps: Trendy Butterfly#2 stamp set from Stamplorations
Dies: Trendy Spring blooms from Cutplorations; Tags from Tim Holtz
Ken Oliver Color Bursts: Pithalo green, orange, brown, violet, lemon yellow
Archival ink: Jet Black
Pigment ink: Bright white
Embossing powder: Opaque Bright white from Wow
Gel pens: Glitter pens and neon moonlight pens
Tiny dots: turquoise blue
sequins, sequin trim, crinkle ribbon

Would love to participate in the following challenges:

Teacher Thanks card:
http://pennyblackatallsorts.blogspot.com/2018/11/november-make-someone-smile.html
https://happylittlestampers.blogspot.com/2018/11/hls-november-watercolour-challenge.html

https://lovetoscrapchallengeblog.blogspot.com/2018/11/ltscb-115-anything-goes.html
http://craftstamper.blogspot.com/2018/11/take-it-make-it-challenge-november.html
https://www.thedailymarker.com/2018/11/day-1-the-30-day-coloring-challenge-coloring-link-up/


Colorful floral card:
https://happylittlestampers.blogspot.com/2018/11/hls-november-anything-goes-with-dies.html


Butterfly Tags:
https://butterflyspotchallenge.blogspot.com/2018/11/111-spin-butterfly-wheel-with-thel.html- colors(Pink and blue in the butterfly) + repeat +butterflies

http://craftstamper.blogspot.com/2018/11/take-it-make-it-challenge-november.html


Tuesday, 13 November 2018

Celebrate

Hello friends!
Happy Wednesday!

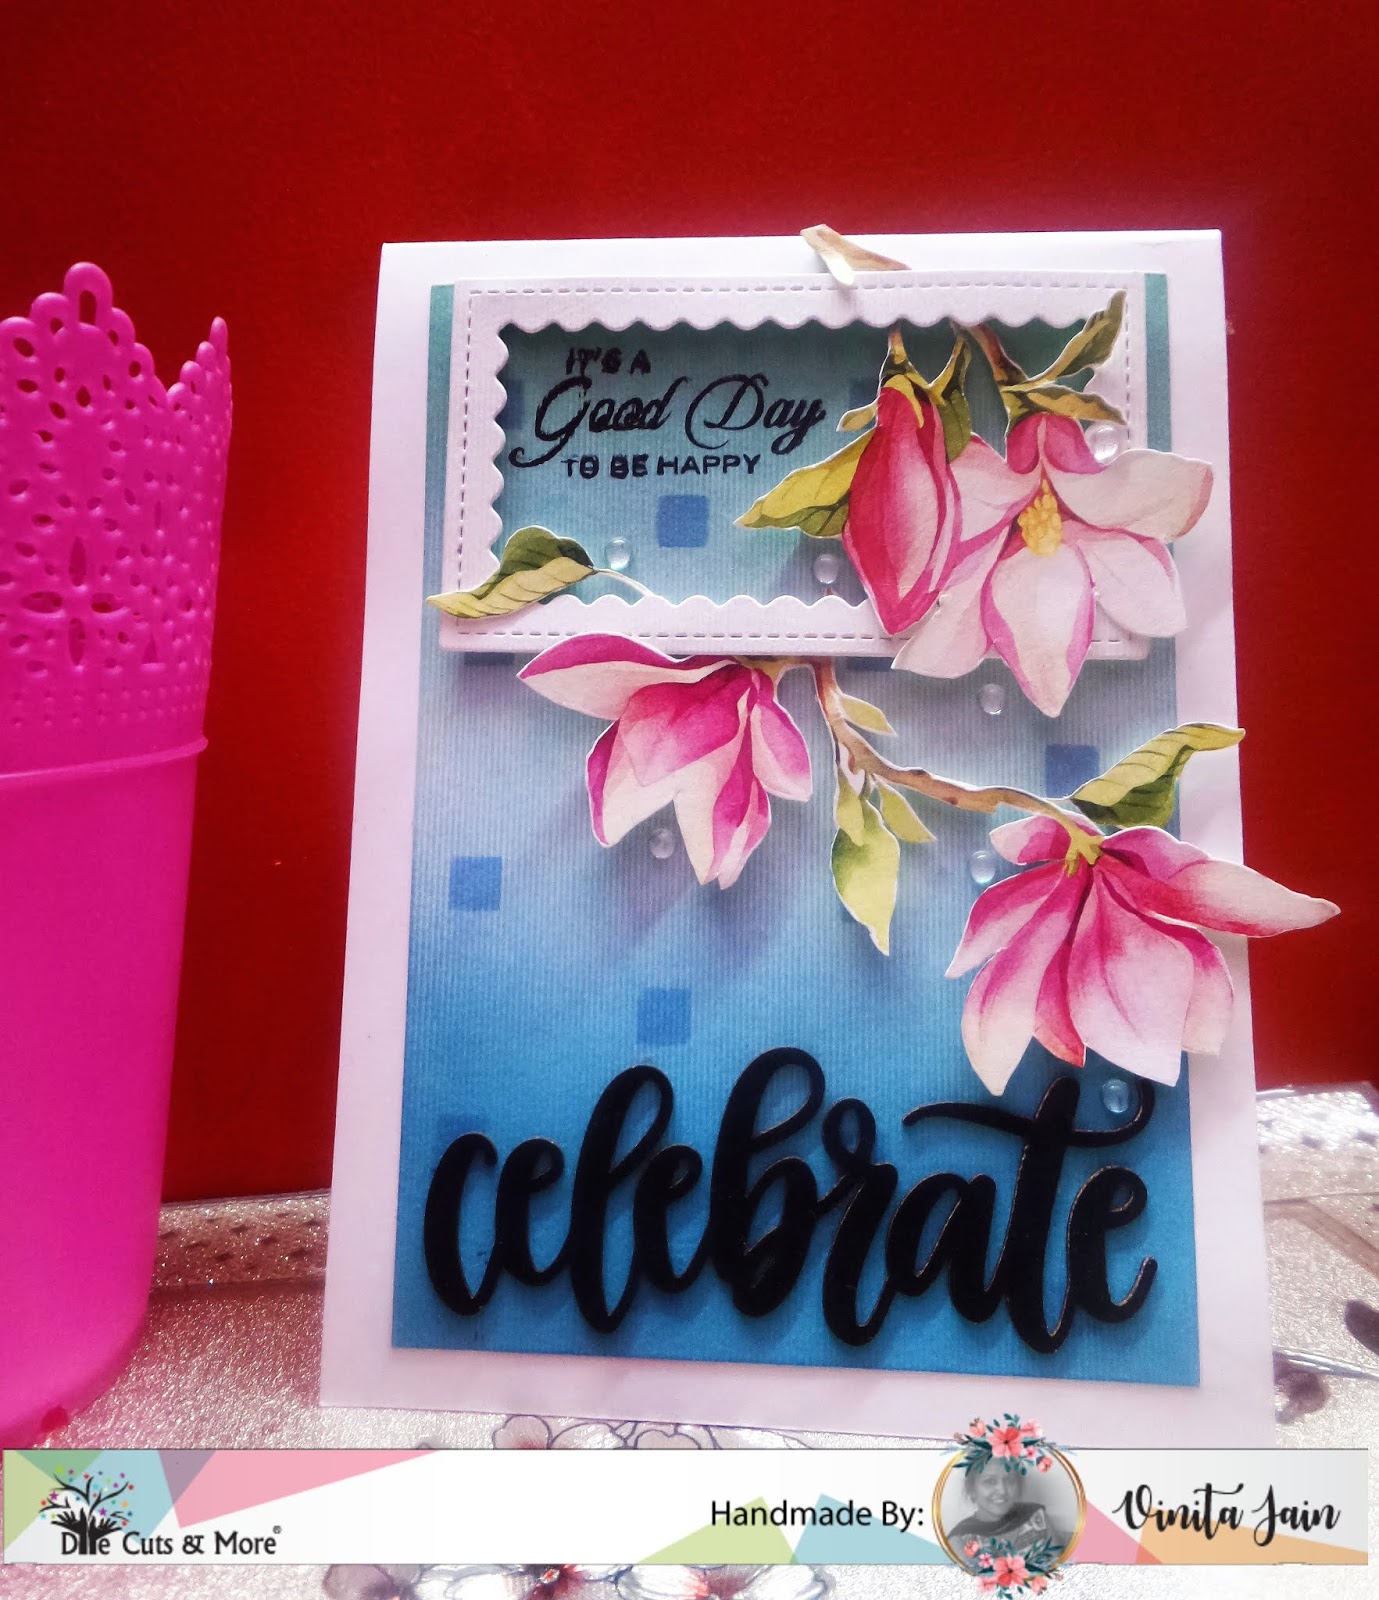
Today I am representing a very simple but an attractive card with dimensions which can be used for any special occasion.


I started with blending some DI Mermaid lagoon and Cracked Pistachio on a textured white panel. Then using Box stencil created a pattern. Die cut an inverted scalloped rectangle frame in white. Fussy cut some Magnolia flowers from Magnolia Delight Critter Sheet.


Added a sentiment at the top corner on the blended panel. Adhered this panel on a white card base. Using adhesive foam dots, I adhered all the fussy cut flowers with a frame with a lot of dimensions.
Adhered that bold and beautiful Chiplet sentiment in black with some sparkling clear droplets.


Hoping you enjoyed this pretty creation!

Have a wonderful day!


Supply List

Cardstock: Textured white and fleece whit CS
Dies: Inverted Scallop Rectangle frames from DCAM
Stencil: Box Mae two-step stencil from DCAM
Chiplet: Celebrate word in black from DCAM
Droplets: Sparkling clear from DCAM
Stamp: sentiment is from Mudra's Fresh cut roses stamp set
Distress Inks: Cracked Pistachio and mermaid lagoon
Pop Dots

Would love to enter my card in the following challenges:

Friday, 2 November 2018

Clean and Simple

Hello to all!
Happy Friday!

Today's post is for Cut It Up Challenge inspiration DT post. The theme is clean and simple. And this time Cas-ual Fridays Stamps is an awesome sponsor!!
 I received such a beautiful stamp set in my DT kit from them.
I love the stamp set so much with such inspirational quotes!

Here is my take on the theme:


 My card goes with an inspirational photo and combined it with a sketch too!


I love the textures and woodgrain panel with autumn feel on it!

For the woodgrain effect, I pulled out of my woodgrain embossing folder and inked it. Then cut a strip of it highlighted it with some gold & copper perfect pearls. Filled the crystal clear glitter in the debossed area. Then for more textures cut another strip of a handmade textured paper.


Some solid butterflies were stamped and highlighted one of them using gold perfect pearl with subtle blending effect.
To highlight the sentiment die cut a tag out of a PP and foam mounted this tag on the panel.
In the end, dressed up it well with few gold gems.

Supply used

Cardstock: Heavy white CS
Pattern Paper: Woodgrain from Papericious
Handmade paper: Textured brown
Embossing folder: woodgrain from Daris
Stamp: Be from Cas-ual stamps
Die: Scallop Tags from Cas-ual Fri-dies
Memento: Rich Cocoa
Perfect pearls: Gold and copper
Jute string: Dark Brown and light brown from American crafts
Gems: gold color from my stash
Glitter: Nuvo crystal clear drops

Would love to enter this card in the following challenges:
https://butterflyspotchallenge.blogspot.com/2018/10/110-spin-butterfly-wheel-with-letter-g.html- I spin the butterfly with gold theme and gems with glitter effect


Thursday, 1 November 2018

Diwali card in Gatefold style!

Hello craft lovers!
Happy November!

Diwali is the most important festival celebrated by Hindus in India, the festival of lights will be celebrated on November 7th!

I made this beautiful Gatefold card in Indian Traditional style to celebrate this Diwali!


I started with stamping the Diya image, heat embossed in gold and colored with Zig brushes, fussy cut it!
My card base is white in color and I blended some different distress inks on all the panels.
Now stamped the borders and Paisley images, colored them.
Heat embossed the chip frame in gold. 


Inside Panel


I used the negative part too of the framed chippi and applied different acrylic colors with textures using a palette knife.
Now stamped the sentiments and Ganesha image and heat embossed in gold with borders too. Added  PP in both sides and at the back as well.
Embellished it with some gems, laces and tied it with a golden string with a flower.

Here are some close-up pics:


Supply list

Cardstock: White heavy CS
Pattern Paper: a Handmade sheet in orange
Stamps: Diya mini, Mehendika, Madhubani borders and Ganesha from Mudra stamps
Chipzeb: Elegant Frames from Mudra
Embossing Powder: Metallic gold-rich pale from Wow
Distress inks: Picked Raspberry, Abandoned coral, fossilized amber and carved pumpkin
Zig clean clear real brush markers
Acrylic colors: Yellow, orange, red, white and pink from Fevicryl
Pearl color: Gold color from Fevicryl
Crystal gems
Golden string, red flower and a colored golden lace as an embellishments

would love to enter my card into the following challenges: