Monday, 25 December 2023

Merry Christmas!

Hello Friends!

Merry Christmas to all of you! Hope you all enjoyed this festive and magical season! 🎄🎅


I die-cut the fireplace pieces and inked them all!


Distressed this PP and added some journaling stickers.


Added some frames using snow mesh and some cute sentiment stickers. And decorated the page with some poinsettia flowers, candles, lampshades!


Hope you all like this!
Happy crafting!

Supplies:
Holly Jolly Christmas paper pad, tippy tap 1 transfer sheet and fireplace die set from @dressmycraft @crafterscornerindia
Christmas wreath decor stickers, memories border memo pad from @journalsay
White special material paper from @_soto_studios
Distress inks
White snow mesh from my stash


Would love to join these challenges:

https://christmas-craft-creations.blogspot.com/2023/12/december-challenge-christmas-decorations.html


https://daranddiane.blogspot.com/2023/12/winter-snow-scene.html


Sunday, 17 December 2023

Season's greetings!

 Hello friends!

Happy Monday!

As you already know Itsy Bitsy is having a contest with a Christmas theme! And I made this festive card perfect for celebrating the wonderful time of this year!


I inked a white CS panel using DI. Added some white splatters for snowfall. Stamped the hanging lights and watercolored them. I roughly tore the white CS for the snowflake landscape and added two layers.


Now watercolored the snowman, Santa and a house using ZIG watercolor brushes, and fussy cut them all. Stamped the sentiment. Added all the images as shown in the below pic.


I hope you like and are inspired by all the sample cards, they all are so festive and perfect to celebrate Christmas.
Happy crafting!

Supplies

Cardstock: Smooth Ultra white cardstock, Glitter Cardstock bright PP

Stamps: Happy Holidays and Christmas Joy stamp sets

Embossing Folders: Stars, spots and Dot frame

Dies: Stitched ovals and scroll banners

Distress inks

ZIG watercolor brushes

Wow Opaque Bright White Embossing Powder


Would love to join these challenges:

https://christmaskickstartchallenge.blogspot.com/2023/12/christmas-kickstart-challenge-81-if-its.html

https://abcchristmaschallenge.blogspot.com/2023/12/abc-christmas-challenge-y-z-are-for.html


https://christmas-craft-creations.blogspot.com/2023/12/december-challenge-christmas-decorations.html

Warm winter wishes!

 Hello friends!

Here is my winter card with a cute snowman!

I embossed a one-third panel of a white sheet using dots EF. Hand cut an arch shape as shown in the below pic. Stamped the cute snowman image, watercoloured it, and fussy cut it.


As shown in the pic, I dragged the distress ink cube on a white panel to ink it properly.


Stamped some snowflakes and heat embossed them with Wow Opaque Bright White EP. Now place that embossed panel on that inked panel. Added the sentiment with a snowman image.


Hope you all like it!
Happy crafting!

Would love to join these fun challenges:

Happy Holidays!

Hi to all!

Happy Monday!

Back with another card!


I embossed a white sheet using Dot frame EF. Die cut a stitched oval shape and one of the scroll banners, Stapmed the cute penguin image, and x-mas tree with lights, watercolored them with my ZIG water brushes, and fussy cut them. Added the sentiment using red DI on the die cut banner.


Now matted it on a red CS as shown in the below pic.


Hope you all like it!
Happy crafting!

Would love to join these fun challenges:


Hello Santa!

Hello friends!

Happy Monday!

As you already know Itsy Bitsy is having a contest with a Christmas theme! So I am showcasing a card to inspire you all!

You all know Itsy Bitsy has a great collection of Christmas clear stamp sets and I picked some stamps from the Christmas collections.

I stamped the Santa Clause image and gift image on a white ultra smooth CS, watercolored it with ZIG brushes and fussy cut it. Embossed a paper using stars EF and stamped the sentiment on a white sheet as shown in the pic.


I inked some of the embossed background parts at the bottom using DI.


Here is the final layout of the card. Before adhering to all the images I added a strip of pink glittered sheet.


Hope you like this!

Happy crafting!

Would love to join these fun challenges:

https://christmaskickstartchallenge.blogspot.com/2023/12/christmas-kickstart-challenge-81-if-its.html

https://abcchristmaschallenge.blogspot.com/2023/12/abc-christmas-challenge-y-z-are-for.html- Y is for your choice

Friday, 8 December 2023

December 2023 New Release Day, Blog hop and giveaway!

Hello everyone!

Happy Friday!


Finally, today is a Release day with such fabulous and unique designs this time! Perfect for this wonderful time of the year!!


Here are these 3 mini-release new products............


Background Blocks Layered Stripes £6
Copyright Uniko Ltd 2012 - To Date


Background Blocks Perspective £6
Copyright Uniko Ltd 2012 - To Date


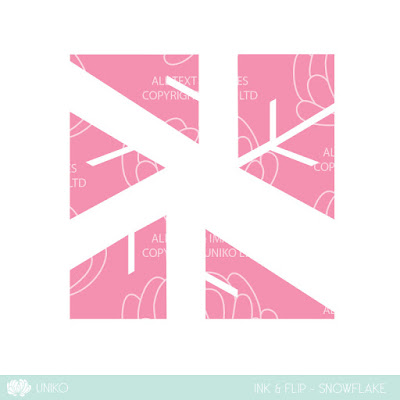
Stencil - In & Flip Snowflake  £4.25
Copyright Uniko Ltd 2012 - To Date


My first card showcasing Background Blocks Layered Stripes!


Firstly I stamped the Layered stripes in Altenew blush ink on a white CS and heat-embossed all the edges of the CS with Wow Rich Gold Pale Gold EP.
On a piece of vellum paper, I created a bauble in Rich Gold Pale EP using Mid Century Modern Baubles stamp set.


Now cover the striped block with that vellum piece and tie it with a copper string. I matted this onto a Pearl Peach CS.


Totally changed the whole look, so Christmas-sy!


Here is my second card showcasing the Background Blocks Perspective stamp!


I started by stamping the blocks on a piece of white CS and colored it with my Blue color ZIG watercolor brushes.


The next step is to color the faces of the blocks in smokey blue.


The rest of the blocks on the upper side I colored red and the bottom ones in pink color.


I paired it with the Mid Century Modern Christmas stamp set and the sentiment is from the Most Wonderful stamp set. And matted it on my card base along with red and pink frames. Does this block have so many possibilities to play with!


My final card uses ink and flip Snowflake stencil.


I started by inking a square white panel using seedless preserves DI. Then got this beautiful snowflake in the centre with a star design!


I masked some of the panels and applied blushing berry sparkle paste to the triangular parts only as shown in the below pic.


But after removing the masking tape some of the parts get smudged, so I cut this panel into pieces like this. 


Inked another panel once again and at the center I created a winter scene using Background Builders Winter Wonderland stamp set.


Adhered those sparkled pieces to the main panel and voila love the result!


Here are the blog hop links:


Kindly leave a comment on my fellow Teammate's Blog or social media to win a £20 eGift certificate by midnight Friday 15th December 2023!

Happy crafting!

Thursday, 7 December 2023

Introduction Day 3: Ink and Flip Snowflake

 Hi to everyone!

Happy Thursday!

Welcome to the Final Introduction Day 3! Today, we are showcasing the Ink and Flip Snowflake stencil, a new addition to the Ink and Flip stencil series!


I started with some hero art inks. After the first layer of inking, I flipped the stencil as shown in the below pic. And got a pretty snowflake image!


Kindly visit Uniko Blog Studio here to see what my fellow teammates created using this awesome stencil. Don't forget to visit again tomorrow for the full release, blog hop with a giveaway! 

All the products will be available tomorrow at 9a.m. GMT Friday 8th December '23

Happy crafting!


Wednesday, 6 December 2023

Introdition Day 2: Background Blocks Perspective

 Hi to all!

Happy Wednesday!

I am back here on the 2nd day of introductions to the new mini-release from Uniko! 

The stamp is another addition to the Background Blocks series: Background Blocks Perspective

It has such a modern trendy design element with a cool 3D style and can be perfect for Masculine and Birthday cards, banners, and posters too

So many possibilities with this background Block stamp!


I heat-embossed the blocks using Wow Pearl EP and love the outcome on the black. Added the chalky effect for the transparent look using chalk powders.


The sentiment is from the Most Wonderful stamp set.


Remember to visit the Uniko Studio Blog for more inspiration from my fellow Brand Ambassadors here!
All of the products being introduced this week will be available on the website at 9am GMT Friday 8th December 2023 
That's all for today, be sure to stop again tomorrow for more!

Happy crafting!


Tuesday, 5 December 2023

Day1: Background Blocks Layered Stripes

 Hello everyone!

Happy Tuesday!

Today is the introduction Day 1 of the December 2023 mini-release! 

Background Blocks Layered stripes are a great addition to the Background Blocks series.


I made a CAS card with multicoloured layered stripes using Altenew inks by masking technique. Then I had an idea that a layered stripes block would be perfect for a present for gifting purposes.


I paired it with Mid Century Modern Wreath Builder stamp set  for a bow and the sentiment is from the Most Wonderful stamp set

That's so simple and cute present, isn't it!

Kindly come back tomorrow for another stamp introduction. Just curious to see what my teammates created with this awesome stamp, here is the list:


And head over to the Uniko blog here.

Happy crafting!


Monday, 4 December 2023

Uniko sneak peeks with new release!!

 Hello and Happy Monday to all!


December has already started and Uniko bring a happy sneak peek for all in their usual style! This is a mini-release with some fabulous background stamps and a stencil.


First up two background Blocks stamps, perfect for this festive season and any celebrations with a Masculine theme as well!


Another addition to ink &flip stencil. Perfect for Christmas and winter season!


Get ready from tomorrow with a full product introduction and then finally a full release, a lot of inspiration with a giveaway! 

Don't forget to come tomorrow!

Happy crafting!

Wednesday, 15 November 2023

Poppy Love

 Hello friends!

Happy Wednesday!

Today showcasing the remembrance stamp set at Uniko blog! I just love this gorgeous stamp set!! Don't you!!


A simple design with the coloring taking centre stage and the sentiment coordinates just perfectly.
I am still in an autumn color mood!

I stamped one of the poppy images on a piece of white CS. I colored it with my clear ZIGwatercolor brushes. 
And just hand-cut it as I desired shown in the above pic. On my white card base, I added the sentiment and placed the stamped panel using adhesive foam. Added some black enamel dots.

Thanks for visiting!
Happy crafting!

Would love to join these challenges:
I am inspired by the shades of gorgeous yellow and orange


Saturday, 28 October 2023

October' 23 Release Review, BA Hop and Giveaway!

 Hello everyone!

Happy Saturday!

Time for the latest October Release Review Hop!!

Finally, I received my goodies!! So we came up with a release review blog hop with a lot of inspirations and why not celebrate this moment with a giveaway. Comment on all the blogs for your chance to win a £20 eGift Code to spend in the Uniko store.

This is my favorite Remembrance Stamp set from the release having Poppies and some beautiful sentiments. Autumn is my favorite season, so I am falling in love with these color vibes!


For this, I used ZIG real watercolor brushes to color my poppy flower and fussy cut the colored poppy. On my white card panel, I stamped the other poppy flower using versafine Black ink and popped up the colored one. Added the sentiment and on both corners, I added some splatters with some quilted stencilling using candied apple DI.


Next is with new Autumn Serenade stamp set, another addition to the Serenade style, love this! It has a lot of extra falling leaves too!


I added a lot of DO and DI for the impact of the fall colors as shown in the below pic.


On a white piece of a CS, using my Misti I pressed the Autumn Serenade image. added some extra elements from the same set. Now placed my stamped panel on a  brown CS panel and added the sentiment!


Another addition to the Big and Bold series thank/s/ful clear stamp set. We always need some Thanks sentiment in different styles and there are some accompanying sentiments to add.


For this card, I paired it with Background Builders: Round in clear stamp set. I think these two sets are a perfect match and I love the way it turned out!
I stamped both the outer line and solid leaves in fall colors and fussy cut them. Added the bold thanks with accompanying sentiment and some splatters using color burst orange. To finish it off added a tiny jute bow!

Finally, my last card showcasing Framed Snowflakes clear stamp set along with some accents and I love the Originally Organic feel to it, Perfect for this Christmas season!


I created this card with a monochromatic style and used only half of the part actually! I paired it with a Background Builders: Winter Wonderland clear stamp set.

I started by stamping the background in clear embossing ink sprinkled some Wow opaque seafoam white EP and heat embossed it. I used the tones of blue shades DI and blended them with each other. Added some water droplets to look like the snowfall view. On a strip stamped the Let It Snow sentiment.  Added the white panel along with sentiment using double adhesive tape to a navy blue CS.

Now join the hop here:


Vinita (it's me)

Hope you enjoyed this release, Happy Hopping!

Happy crafting!


Would love to enter this card here: