Monday, 26 March 2018

Underwater Ocean scene!

Hello Crafty peeps!
Happy Monday!

A fun underwater creatures card! This is my DT post for Craftyscrappers!


Here is my card where I created an underwater Ocean scene using You are so jaw-some stamp set.I have to say they are freakin adorable! I created this card as a Belated Birthday card for my friend. As she love sharks and movie Jaws, so I created a special card for her!


I stamped the shark images on the Premium white CS in jet black Archival ink and colored them with my copic markers and created a texture of tiny dots for more interest and dimension. At the outer edges I gave a thin coat of lighter grey copic marker and fussy cut them.


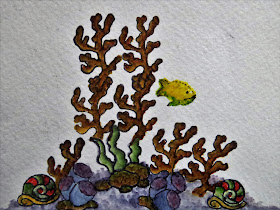
Then on white card base to create my underwater scene, I drew a big stone at the bottom with my pencil and stamped some ocean weeds, coral reef images and all tiny elements. Colored them with my copic markers again.


Using Fading Pattern stencil, I left the top space blank and applied different DI -Tattered rose, Salty ocean, mermaid lagoon, blueprint sketch using finger daubers to create an ocean scene. Then I blended some DI at the leftover blank space and flicked it with some water droplets. 
Wow, love the amazing outcome, its look like real ocean edge and at the topmost with different shades of blue hues!


Created a speech banner with a cute sentiment holding by a jaw-some shark and created the whole scene!
I carried away the sentiment inside with Birthday wishes. Stamped the Ocean waves using two shades of DI with a message bottle.


I had so much fun making this card---- I adore the ocean Pals. You can create so many fun cards for different occasions..... The possibilities are endless! 

Supply list
Cardstock: Premium white CS from Craftyscrappers; Heavyweight Whisper white CS
Stamp: You are so jaw-some from Craftyscrappers
Stencil: Faded Pattern from Craftyscrappers
Distress inks: Tattered rose, Salty ocean, mermaid lagoon, blueprint sketch
Archival ink: Jet Black
Copic Markers
Finger Daubers and Foam dots

Would love to enter my card in the following challenges:
http://pennyblackatallsorts.blogspot.in/2018/03/march-challenge-feature-creature.html
http://livelaughstamp.blogspot.in/search/label/Ellibelle%27s%20Crafty%20Wednesday
http://rubberneckerblog.com/silly-animals-rubbernecker-challenge-29/
http://timeoutchallenges.blogspot.in/2018/03/challenge-105-our-4th-birthday.html

http://kreativtanten-challenge.blogspot.in/2018/03/15-tiere.html
http://www.happylittlestampers.com/2018/03/hls-march-watercolour-challenge.html




Saturday, 24 March 2018

Foil Monogram card with spring flowers!

Hello everyone!

I love to create handmade gifts and making something that has a personalized touch to it! It can mean so much to the person who is receiving it! With that idea in my mind, I decided to create a personalized Monogram card by adding foil to it!

I made this special Monogram Card with Letter A ( Ayushi) for my daughter as her birthday is coming in April month and I want that she will receive this beautiful card on time!


Begun with a die cut panel and inked the fancy label with letter A using my Misti. I don't have electronic foil machine so I heat embossed it using bonding powder and covered it with the back side of sizzling silver transfer foil to the images.


Then peel off the foil carefully to reveal the beautiful foil design! And then I choose her favourite colour for stamping this pretty floral pattern all around the frame with monochromatic look. And adhered it on my double running stitch rectangle die card base.  Finished it off by adding some crystal Nuvo drops to highlight the floral pattern!


Here is the inside view with a sentiment and I added the same monogram style inside too with water smooshing BG and some splatters.


Hoping you enjoyed this quick and easy concept of foiling the initial name letter!

Supply list

Cardstock: Whisper white Heavyweight CS
Stamps: The Letter A set from WRMK; DC 130 Stamp and cut flowers from Hero Arts; Fancy Labels 3 from Inspired By Stamping; Sentiment _Beautiful day stamp set from Altenew
Die: Crazy Double running stitch Rectangle die from Cutplorations
Altenew Inks: Red Cosmos Mini ink cube set of 4
Foil: Sizzling silver from Craftyscrapers
Embossing Powder: Bonding Powder from Wow
Crystal Drops: White Bizzard from Nuvo
Misti

Would love to enter my card into the following challenges:
http://citycrafter.blogspot.in/2018/03/city-crafter-challenge-blog-week-404.html

Friday, 23 March 2018

Forest friends with Sparkly Birthday!

Hello everyone!
Happy Friday!

Today, I am showcasing a gorgeous sparkly fun friendly spring scene for a Birthday celebration inside! I made this for a very sweet friend!

Imortant:  Won the Butterfly challenge using all the 7 elements!!! Yayyyyy!
http://butterflyspotchallenge.blogspot.in/2018/03/winners-97.html


I started with a double running stitch Rectangle die cut panel.
Using a circle stencil, I applied distress inks which look like a sunset!
Spritz it with mist water bottle and remove the extra ink with a paper towel and added some white splatters using white chalk paint.

Now die cut some trees and foxes. Once out of the black CS and once out of watercolored CS. I dry embossed the tree border die and hand cut it, watercolored both the die cuts using distress inks. It is in the below pic how I created the trees.


I adhered my die cut trees in black on that white trees and for foxes, I created the shadow image!


At the bottom panel, I stamped some flower bed using Memento inks, colored all. In the centre of all flowers, I applied tacky clear glue gel and added crystal clear sparkle. Added the sentiment in jet black archival ink.


Adhered this panel to a light cream CS using double-sided foam tape. Added a glittered foam strip at the left side of the panel and another side added a strip of PP. 


Created a whole happy fun forest scene with spring flowers and trees with lots of dimension and interest! And the sunset is also some shine:)


Now time to create the continued design inside too!


I picked up some chippies for Happy birthday sentiment and applied black chalk paint to them. Applied clear gel with crystal clear powder for sparkling my sentiment. Again die cut a panel using the same die. Created a watercolored background using distress inks. 


Stamped some flowers and a butterfly using Memento inks directly. Now adhered those chippie sentiments.  Added a gorgeous heart shaped lace in black with some back glittered foam strip too.
It's looking so pretty with all the sparkle. 

Here is one more final pic!


Hope you like this creation!

Congrats on turning three Papericious!!!!!

Supply list

Cardstock: Light cream CS, black CS, watercolored sheet
Glittered Foam sheet: Black
Pattern Paper: Monochrome from Papericious
Stencil: Mixed Media Circle stencil from 13@arts
Stamps: Flowers and butterfly are from Fhiona riding a bike( YNS stamp set); Sentiment from Phoebe with her wagon (YNS stamp set)
Dies: Crazy Double running Stitch Rectangle dies from Stamploration( Cutploration); Young foxes from Poppy Stamps; Consenza Tree border from Memory Box
Distress inks: Vintage Photo, Picked Raspberry, mustard seed, squeezed lemon, twisted citron, Mawed lawn, hickory smoke, seedless preserve and salty ocean
Memento inks: Lilac posies, Dandelion, Tangelo
Crystal Clear Powder: Papericious
Chalk Paints: Natural white and Lamp Black from Papericious
Chippies Sentiments: Let's Party Theme set from Papericious
Black Paper lace from stash
Clear Gel Tacky glue
Double-sided foam tape
Tonic Trimmer
Rounded Blender

https://kraftgali.blogspot.in/2018/03/kraftgali-card-challenge-2.html-  I am inspired by spring flowers, colors, watercolred background look with faded effect

http://butterflyspotchallenge.blogspot.in/2018/03/97-spin-butterfly-wheel-with-letter-l_14.html- There are all the elements included in this creation with concluded inside design too!
http://www.happylittlestampers.com/2018/03/hls-march-anything-goes-with-dies.html
http://www.happylittlestampers.com/2018/03/hls-march-mixed-media-challenge.html

https://papercraft-challenges.blogspot.in/2018/03/challenge-7-sentiment-as-focus.html
https://cuttlebugmania.blogspot.in/2018/03/springtime.html
http://timeoutchallenges.blogspot.in/2018/03/challenge-105-our-4th-birthday.html

http://scrapki-wyzwaniowo.blogspot.in/2018/03/march-2018-lines-1st-reveal.html

http://deepoceanchallengeblog.blogspot.in/2018/03/challenge-177-easter-spring-last.html
http://kreativtanten-challenge.blogspot.in/2018/03/15-tiere.html
http://noordesign-uk.blogspot.in/2018/03/march-challenge-spring.html
http://thatscraftychallenges.blogspot.in/2018/03/spring-into-action-challenge.html
http://theartisticstampercreativeteam.blogspot.in/2018/03/march-creative-challenge-stencils-masks.html
https://scrappelyst.blogspot.in/2018/03/grublis-for-mars-farger.html
http://craftstamper.blogspot.in/2018/03/take-it-make-it-challenge-march.html
http://www.simonsaysstampblog.com/blog/happy-national-craft-month/
http://modsquadchallenge.com/ready-for-spring/
http://livelaughstamp.blogspot.in/search/label/Ellibelle%27s%20Crafty%20Wednesday


Wednesday, 21 March 2018

Birthday Floral Fusion

Hello friends!
Happy Wednesday!

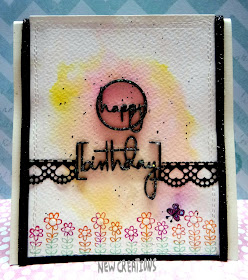
I am back with a Birthday floral fusion card. No die-cuts this time....... Just stamping, watercoloring and fussy cutting!
It's a Birthday Celebration at Mudra, they are 2 years old!!! I love to enter my creation here! Congrats Mudra!!!


Important: In Top 3
http://sovushkaslavia.blogspot.in/2018/04/caseing-19.html


I love the interesting Tic-Tac-Toe elements from Mudra! Here I went with two rows-- Laces, Birthday and sequins/ Sentiments, Birthday and banners!


The inspiration came from Amy Lee pretty card here! I am casing her card and inspired by pretty florals and how she used only the one-third part of the card with spring feel on it and sequins as an embellishment!
And I chose these colors from the below pic!

Firstly I created my watercolored background using Altenew inks with a spring scene. Then iIstamped the grunge effect dots to create my BG.


Firstly I created my watercolored background using Altenew inks with a spring scene. Then I stamped the grunge effect dots to create my BG. 


On a textured fleece white CS, I stamped my favorite silhouette flowers using Misti. I masked my floral images and inked it in different bright colors.


Fussy cut the image and one of the floral image I inked again and popped it up for more dimension and interest.


I added lots of foam tape to create my panel for dimension and depth. Adhered my floral image on this watercolored panel base. After adding the sentiment banner, I added a gorgeous lace and finished it off with gorgeous sequins and some splatters. Love this summery colors with spring feel on it!

Here is the beautiful inside too:


Supply list
Cardstock: Premium fleece white from Little Birdie ( Itsy Bitsy)
Stamp sets: Floral Silhouette, Grunge effects and Purely sentiments- labelled stamp sets from Mudra
Altenew inks: Coralberry, cotton candy, evergreen, warm sunshine and Caramel Toffee
Archival ink: Jet Black
Sequins: Yellow- Couture sequins from Mudra
Acrylic Block: Impresso from Mudra
Misti
Lace and foam tape from my stash